Create a new Zap
To get started, open the Zapier zap editor and create a new zap (instructions). Alternatively, you can clone our pre-made zap template.
Add the 'Webhooks' trigger
Add the initial trigger for your zap and search for the “Webhooks by Zapier” action.
The Webhooks by Zapier action requires
a Premium Zapier account.
Configure the Webhook
Click on the action to open the webhook settings.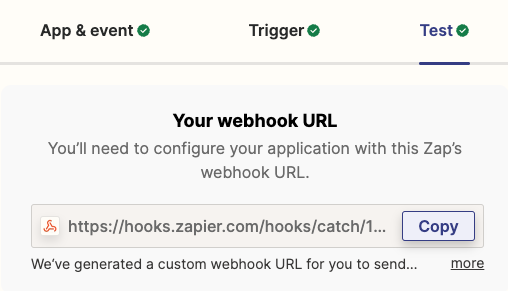
- Under the “App & Event” tab, keep the Event as Catch Hook. Click Continue.
- Under the “Trigger” tab, keep the settings. Click Continue.
- Under the “Test” tab, find your webhook URL and copy it.
Register the Webhook URL with Tightknit
In the Tighktnit webhooks admin portal, create a new endpoint using the webhook URL from the previous step.
Get Zoom Meeting ID
Log in to the Zoom online portal and navigate to your Meetings/Webinars. To work with Zoom’s registration APIs, we simply need the ID of the meeting/webinar, which you can find in the details of the event.Important: Copy the Meeting ID as a continuous number without spaces. For example, if Zoom displays 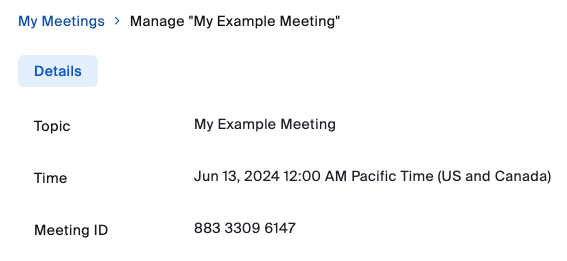
883 3309 6147, you should copy it as 88333096147.Register the Zoom ID with your Tightknit Event Webhook
We need to include the Zoom ID in the data sent to the Zap so that Zapier knows which specific Zoom event the user registered for.Open the Tightknit events list in Slack by clicking the 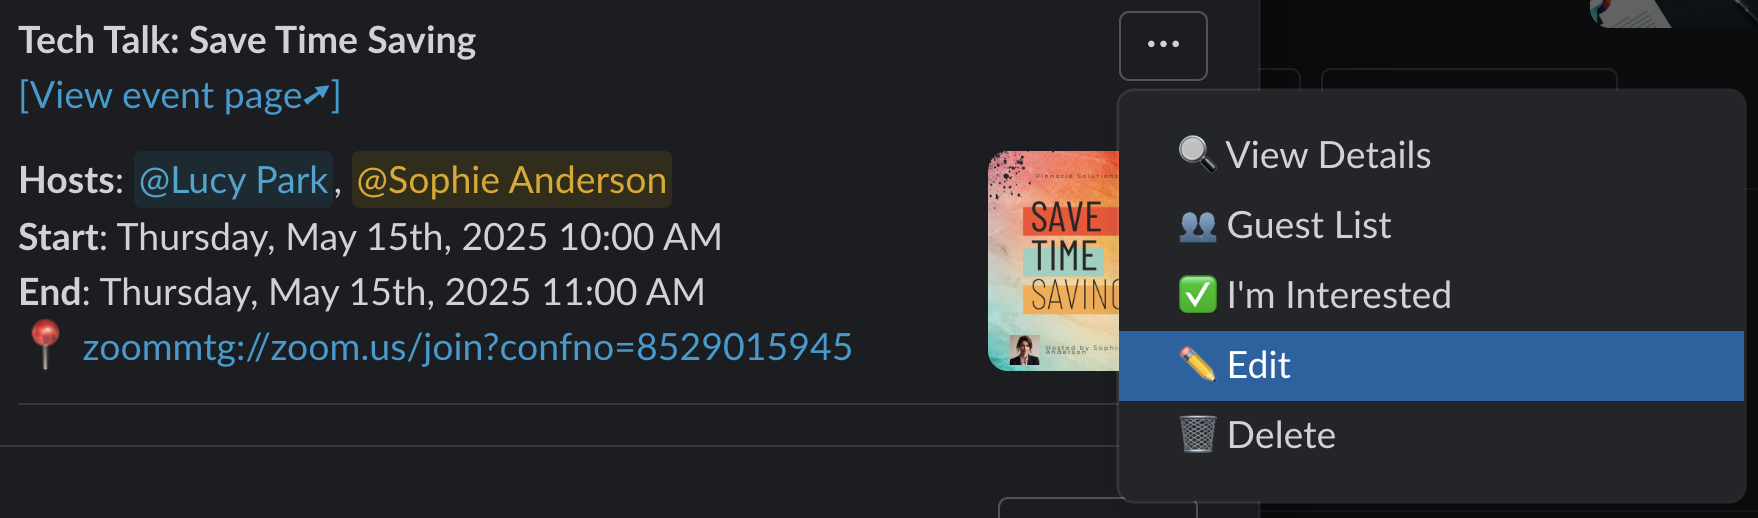
Events button in the app home or by typing the \events command. Click the ••• menu next to your event and select Edit.- Check the checkbox to Enable Webhooks
- Paste the Zoom meeting ID into the Webhook Custom Metadata field, without spaces.
Test the Tightknit Webhook
It’s easier to work with sample data, so let’s do a test run. Register for your own Tightknit event in Slack. You can do this by clicking the 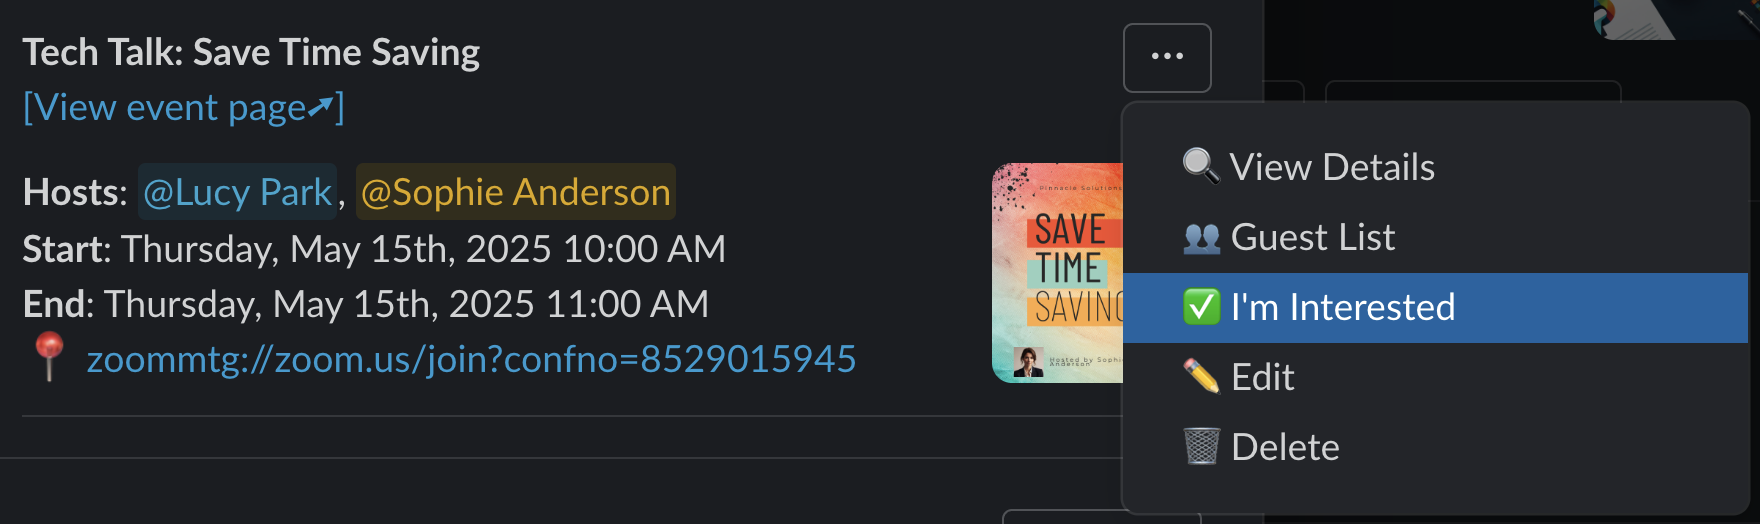
••• menu next to your event and selecting the registration option.The exact label of the registration option may differ depending on your
community’s configuration.
Verify Data Received by Zap
Jump back to the Zap editor from earlier. Under the “Test” tab, click the 
Find new records button. You should see at least one record of your registration test run in the previous step. Select the record and click Continue with selected record.The shape of Tightknit’s webhook data may change. Please check the API
docs for the latest.
Add Zoom Action to Zap
In the Zap editor, click the 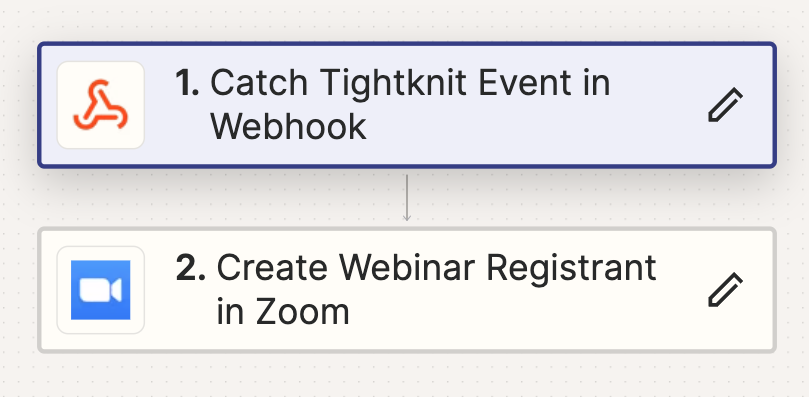
+ to add a new action. Search for the “Zoom” action.Configure Zoom Action
Click on the Zoom action to open the settings. We will instruct Zoom on how to register a new user based on the incoming data Tightknit sends to Zapier.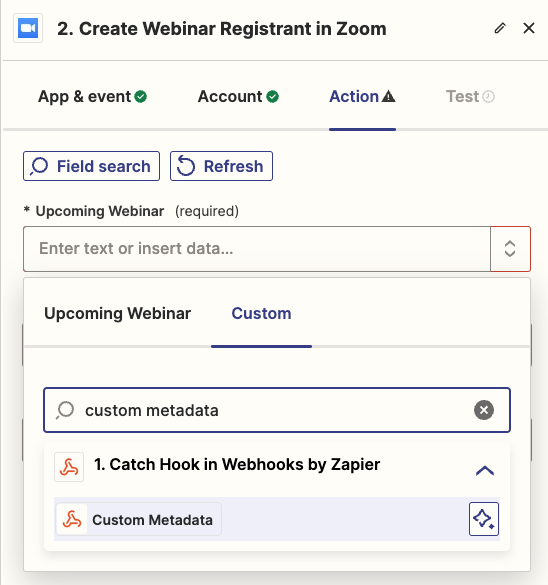
- Under the “App & Event” tab, select Create Webinar Registrant or Create Meeting Registrant, depending on your Zoom event type. Click Continue.
- Under the “Account” tab, login to to your Zoom account. Click Continue.
- Under the “Action” tab, configure the following fields:
- Upcoming Webinar - this will be the ID of the Zoom meeting/webinar, which we’ve configured Tightknit to send in the Custom Metadata field of the webhook data. Select the Custom tab, search for “Custom Metadata”, and select the “Custom Metadata” option associated with the webhook trigger.
- Email - select the “User Email” field from the webhook trigger.
- First Name - select the “User First Name” field from the webhook trigger.
You’re free to fill in any additional fields as you like. Keep in mind
Tightknit will also send along any custom profile
fields
configured for Slack profiles in the workspace
(example). Consider adding some
profile fields if they would serve as helpful user registration info.
Test Zoom Action
Let’s make sure Zapier can find the correct Zoom meeting/webinar with a test run.Under the “Test” tab, you can click the
Test step button. If you own the Zoom event, you will be met with an error. Don’t worry - that’s expected! Zoom does not allow the owner to register for their own event. This is proof you’ve successfully connected to your Zoom event!Click Continue or Skip.Publish and Enable the Zap
Click the 
Publish button in the top toolbar to save your changes.On.BONUS: Add Branching Logic for Register vs. Unregister
Right now, our zap assumes every time data is sent to the webhook it means a new user has registered for an event. Technically this is not true! Tightknit sends other kind of data too, such as a user unregistering for an event.Let’s assume you want to take some sort of action, or simply ignore, an unregister event. We’ll need to add branching logic in the zap in order to differentiate based on the incoming data. In this case, we’ll create a branch based on the 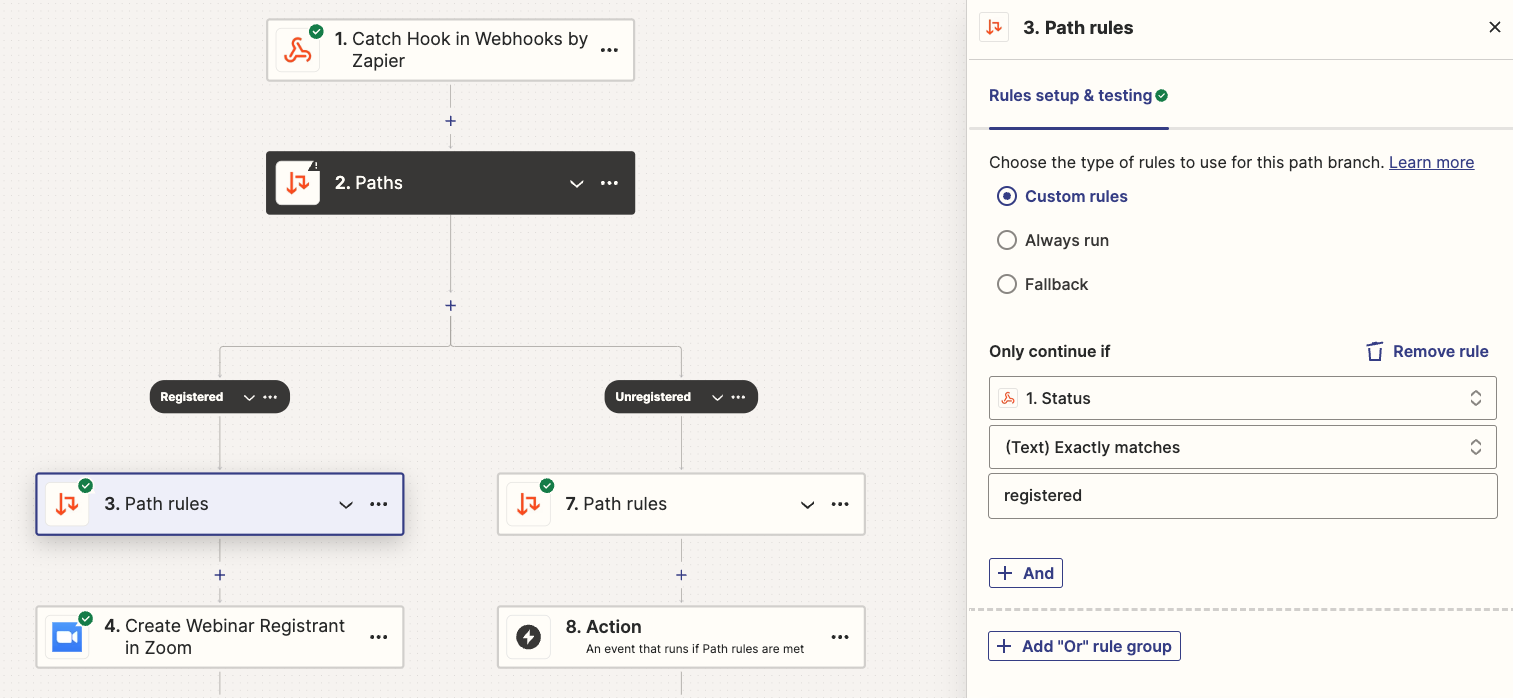
status field of the Tightknit webhook data.Add a zap action in between the Webhook and the Zoom actions. Select the Paths by Zapier action, and configure each branch as follows:- Name the left-side branch “Registered”. Choose a custom rule that will continue if
Statusexactly matches “registered”. - Name the right-side branch “Unregistered”. Choose a custom rule that will continue if
Statusexactly matches “unregistered”.
Status exactly matches “registered”.Troubleshooting
Meeting ID Error
If you encounter an error message like[3001] Meeting does not exist: 875 6077 1520. with spaces in the Meeting ID, this indicates that the Meeting ID was copied with spaces instead of as a continuous number.
Solution: Ensure you copy the Meeting ID without spaces. For example, 875 6077 1520 should be entered as 87560771520.