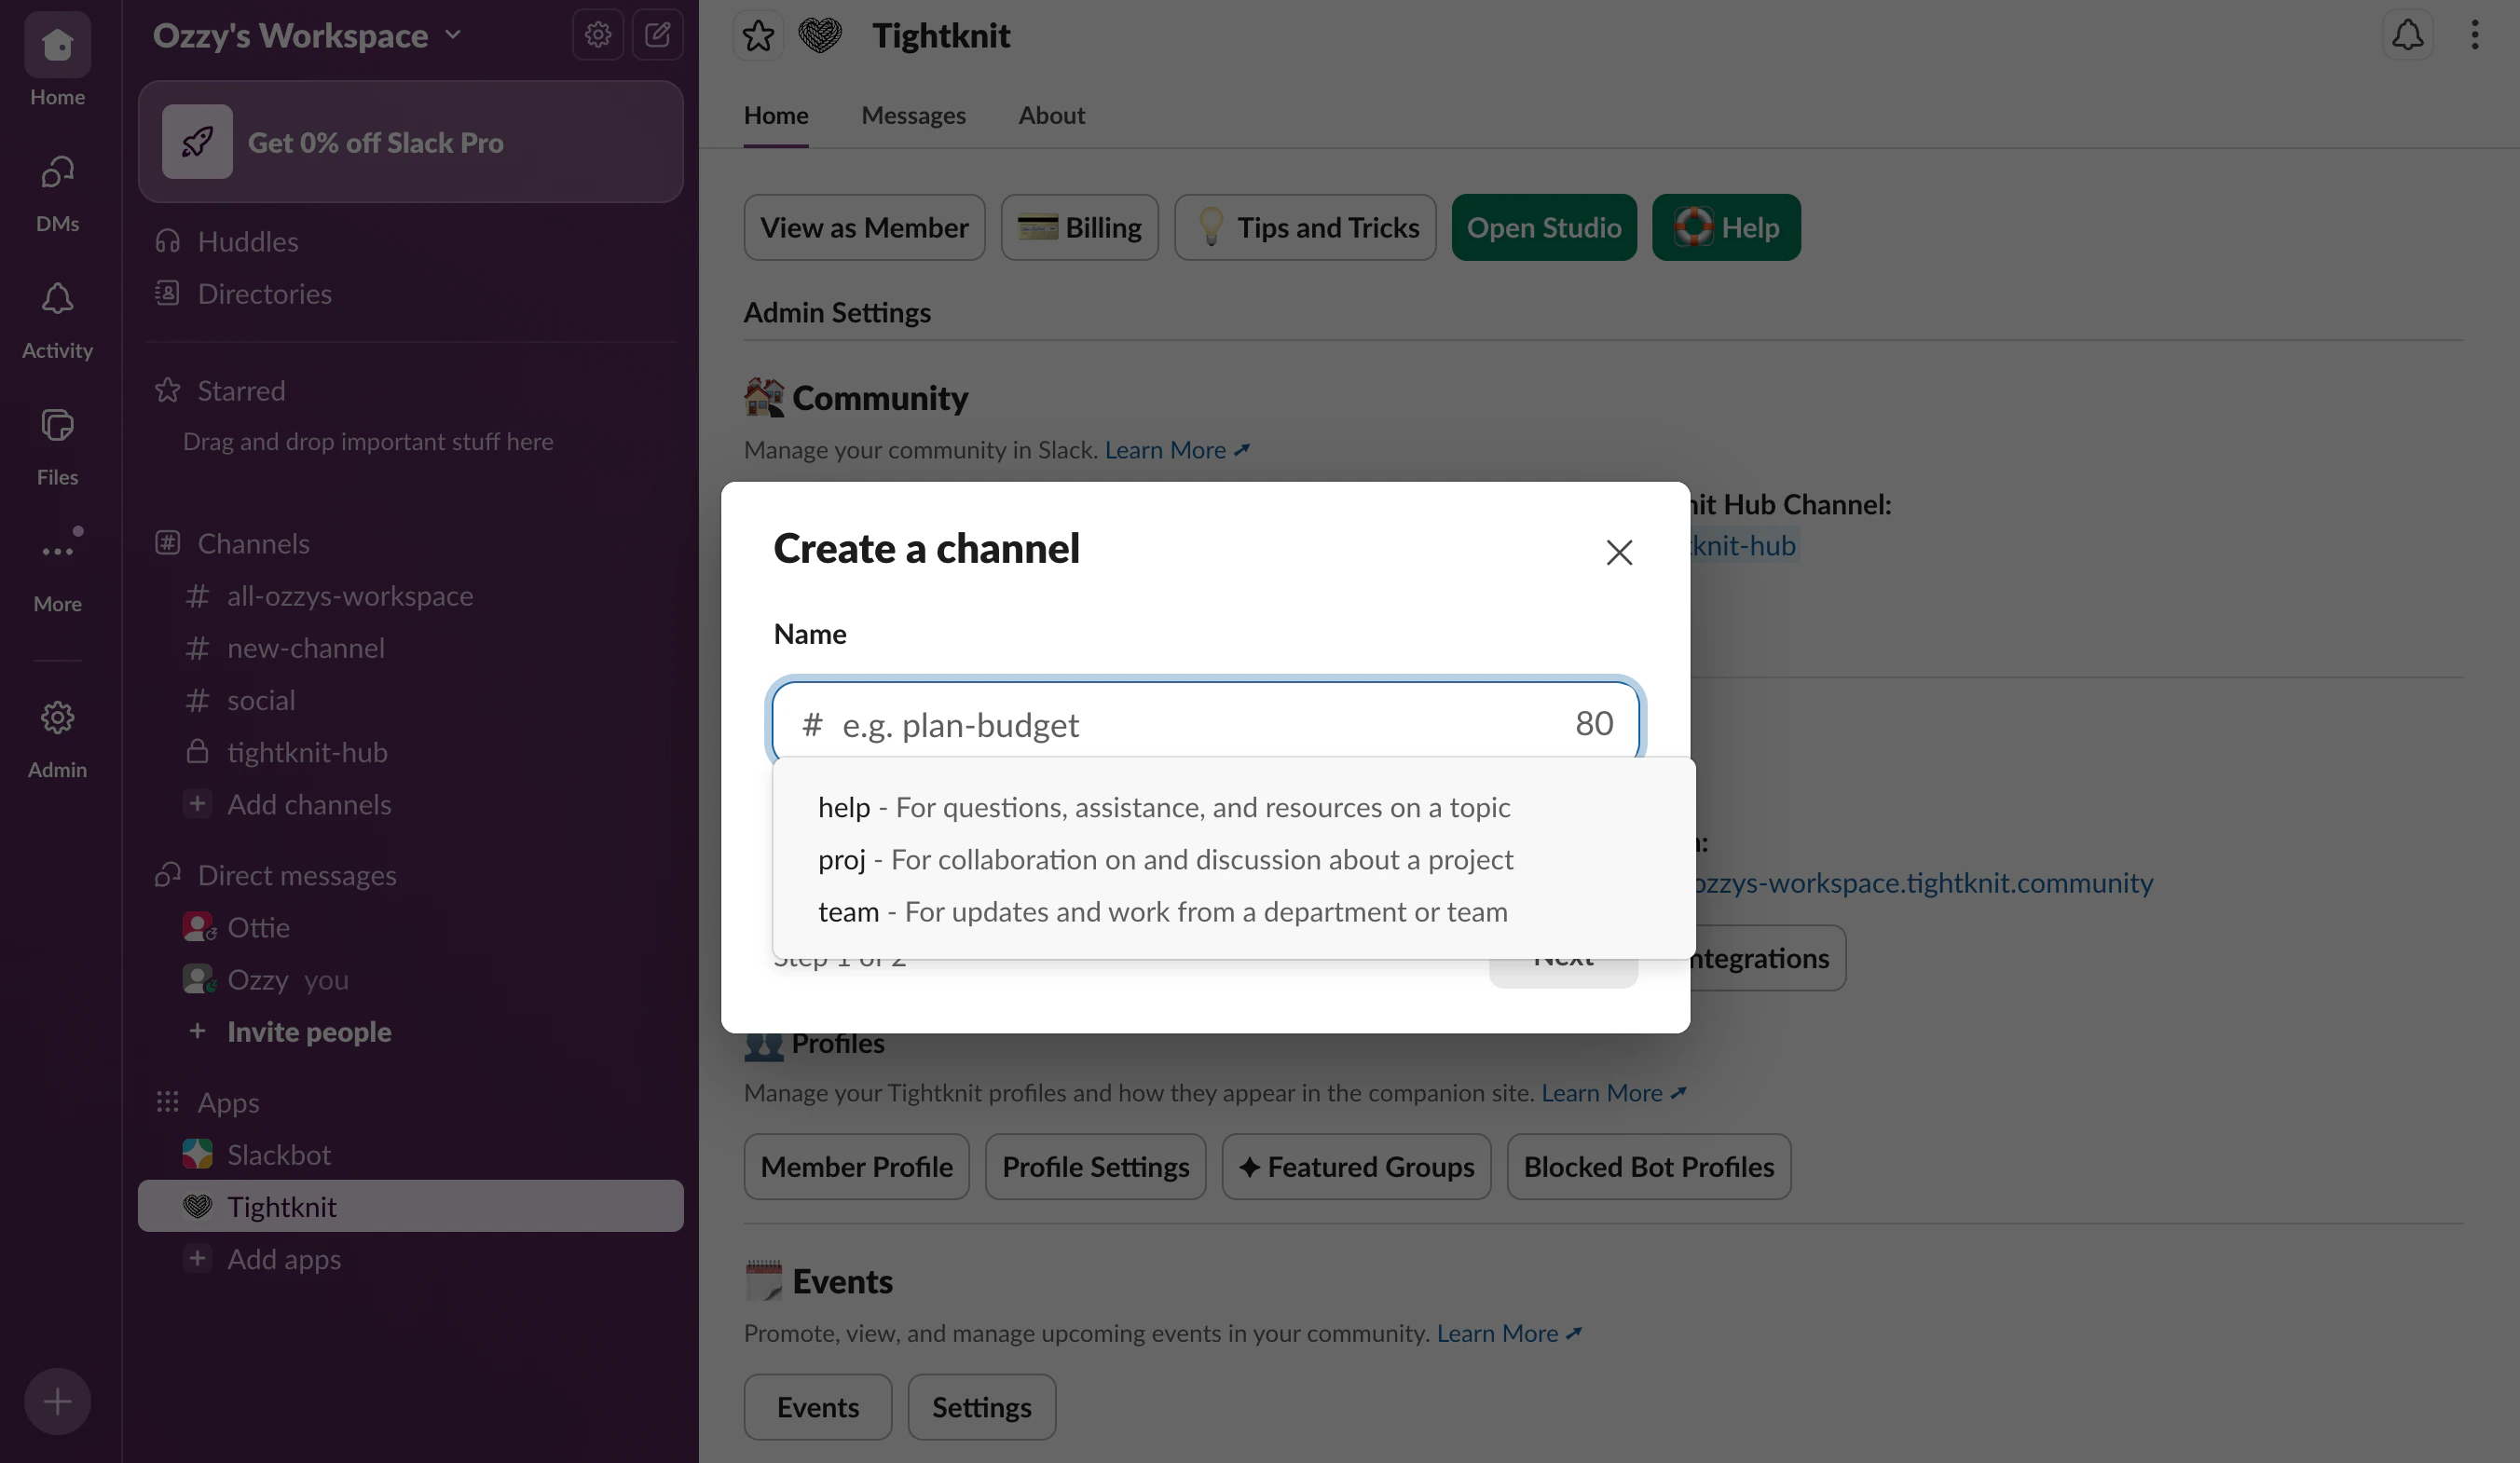
In your Slack sidebar, click the + icon next to Channels
Name your channel using lowercase letters, numbers, and hyphens (e.g. welcome-start-here, general, help)
Choose privacy:
Public: Anyone in the workspace can find and join
Private: Only invited members can access. Private channels can have a Tightknit feed, but its posts stay restricted to the feed’s members. See Private channels and feeds
Click Create, then Done
Creating a new Slack channel
2
Set posting permissions
Open the channel and click the channel name at the top
Go to the Settings tab
Under Posting permissions, choose:
Everyone: All members can post (default)
Admins only: Restrict posting to admins and owners
3
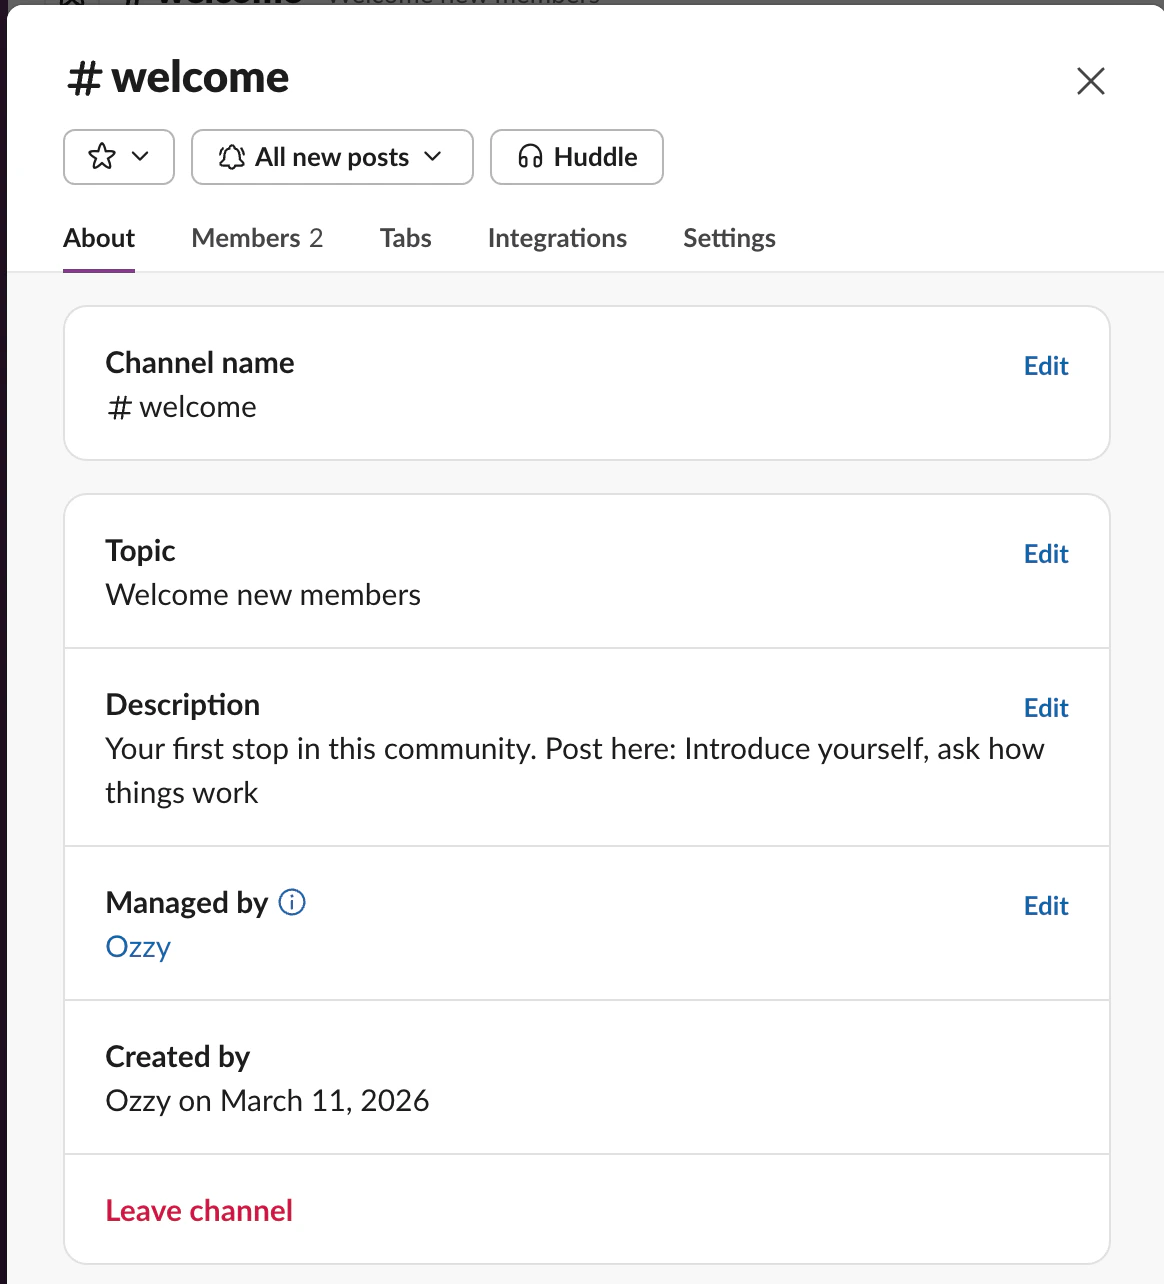
Add a description and topic
Open the channel and click the channel name at the top
Click Edit next to the description field
Add:
Description: Permanent explanation (appears in channel browser)
Topic: Dynamic updates or current focus (appears below channel name)
Channel description and topic fields
4
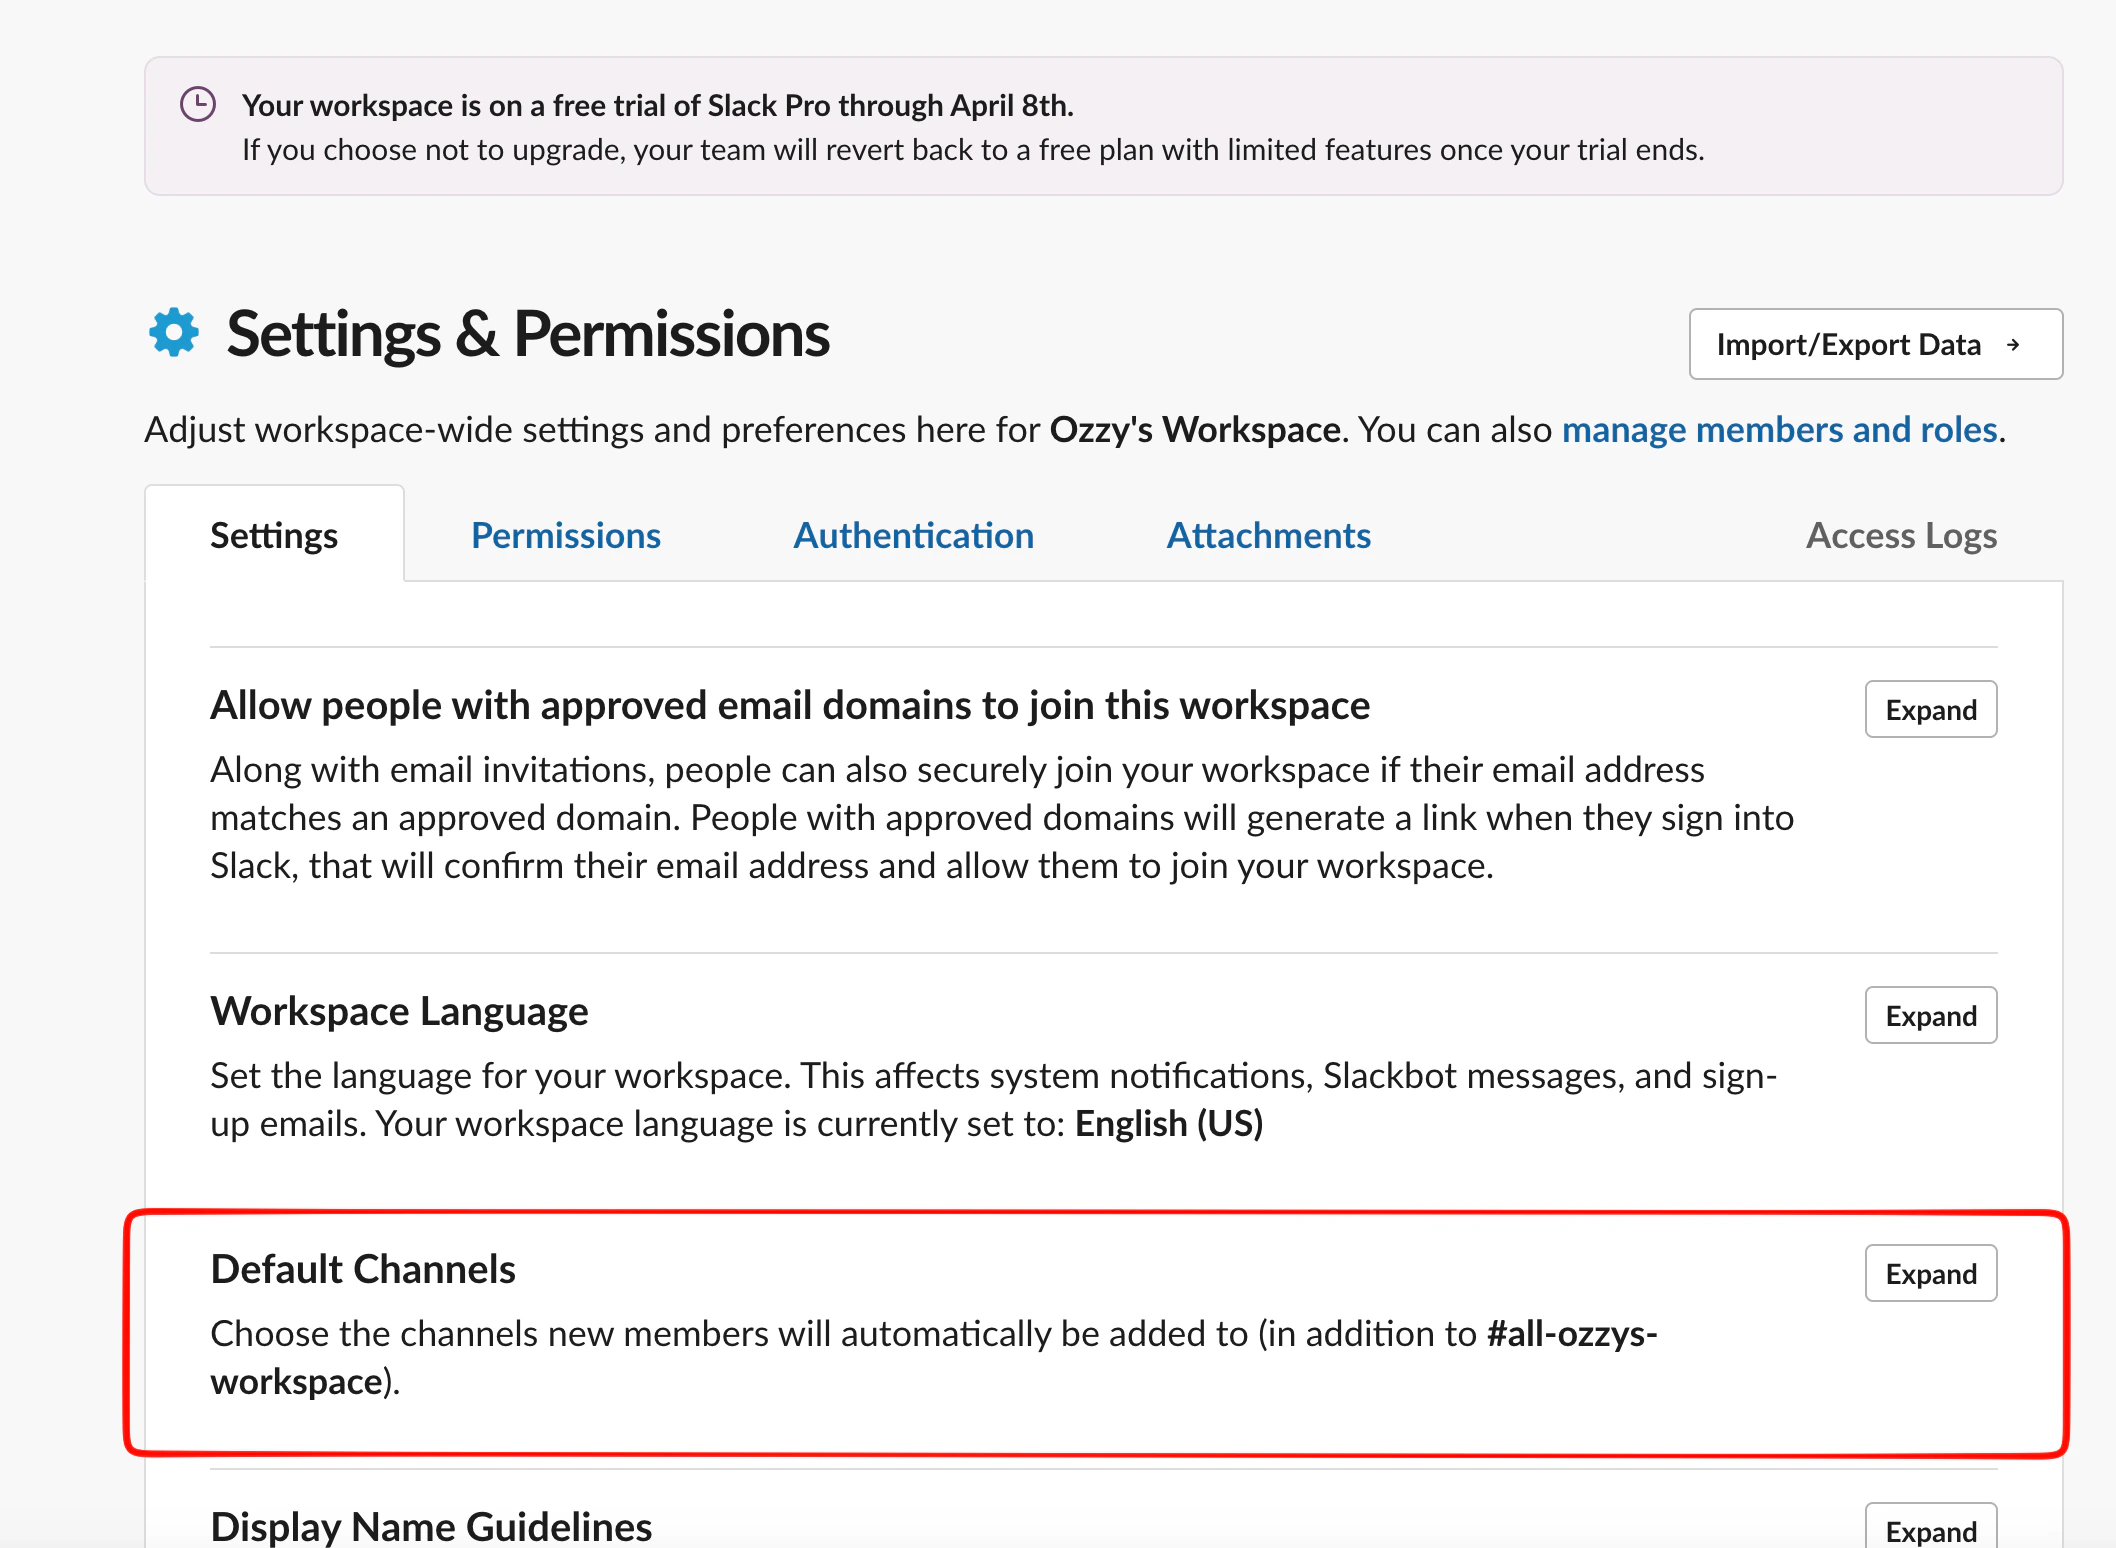
Set up default channels
New members are automatically added to default channels when they join. Set these now so every member lands in the right place from day one.In Workspace settings, find Default Channels and click Expand.
Default channels settings
Not sure which channels to create? Start with these four:
#welcome-start-here — onboarding, community norms, first post
Purpose: [One sentence explaining what this channel is for]
Post here: [Types of content that belong]
Don’t post here: [What to avoid or where to go instead]Example — #welcome-start-here:
Purpose: Your first stop in this community.
Post here: Introduce yourself, ask how things work.
Don’t post here: Support questions (use #help).
Activating a channel enables Tightknit to track activity, provide analytics, and use Slack features (polls, anonymous posting, etc.) in that channel. The channel content stays in Slack only.Creating a feed connects an activated channel to your community site, syncing messages to the web where members can view and engage outside of Slack.
1
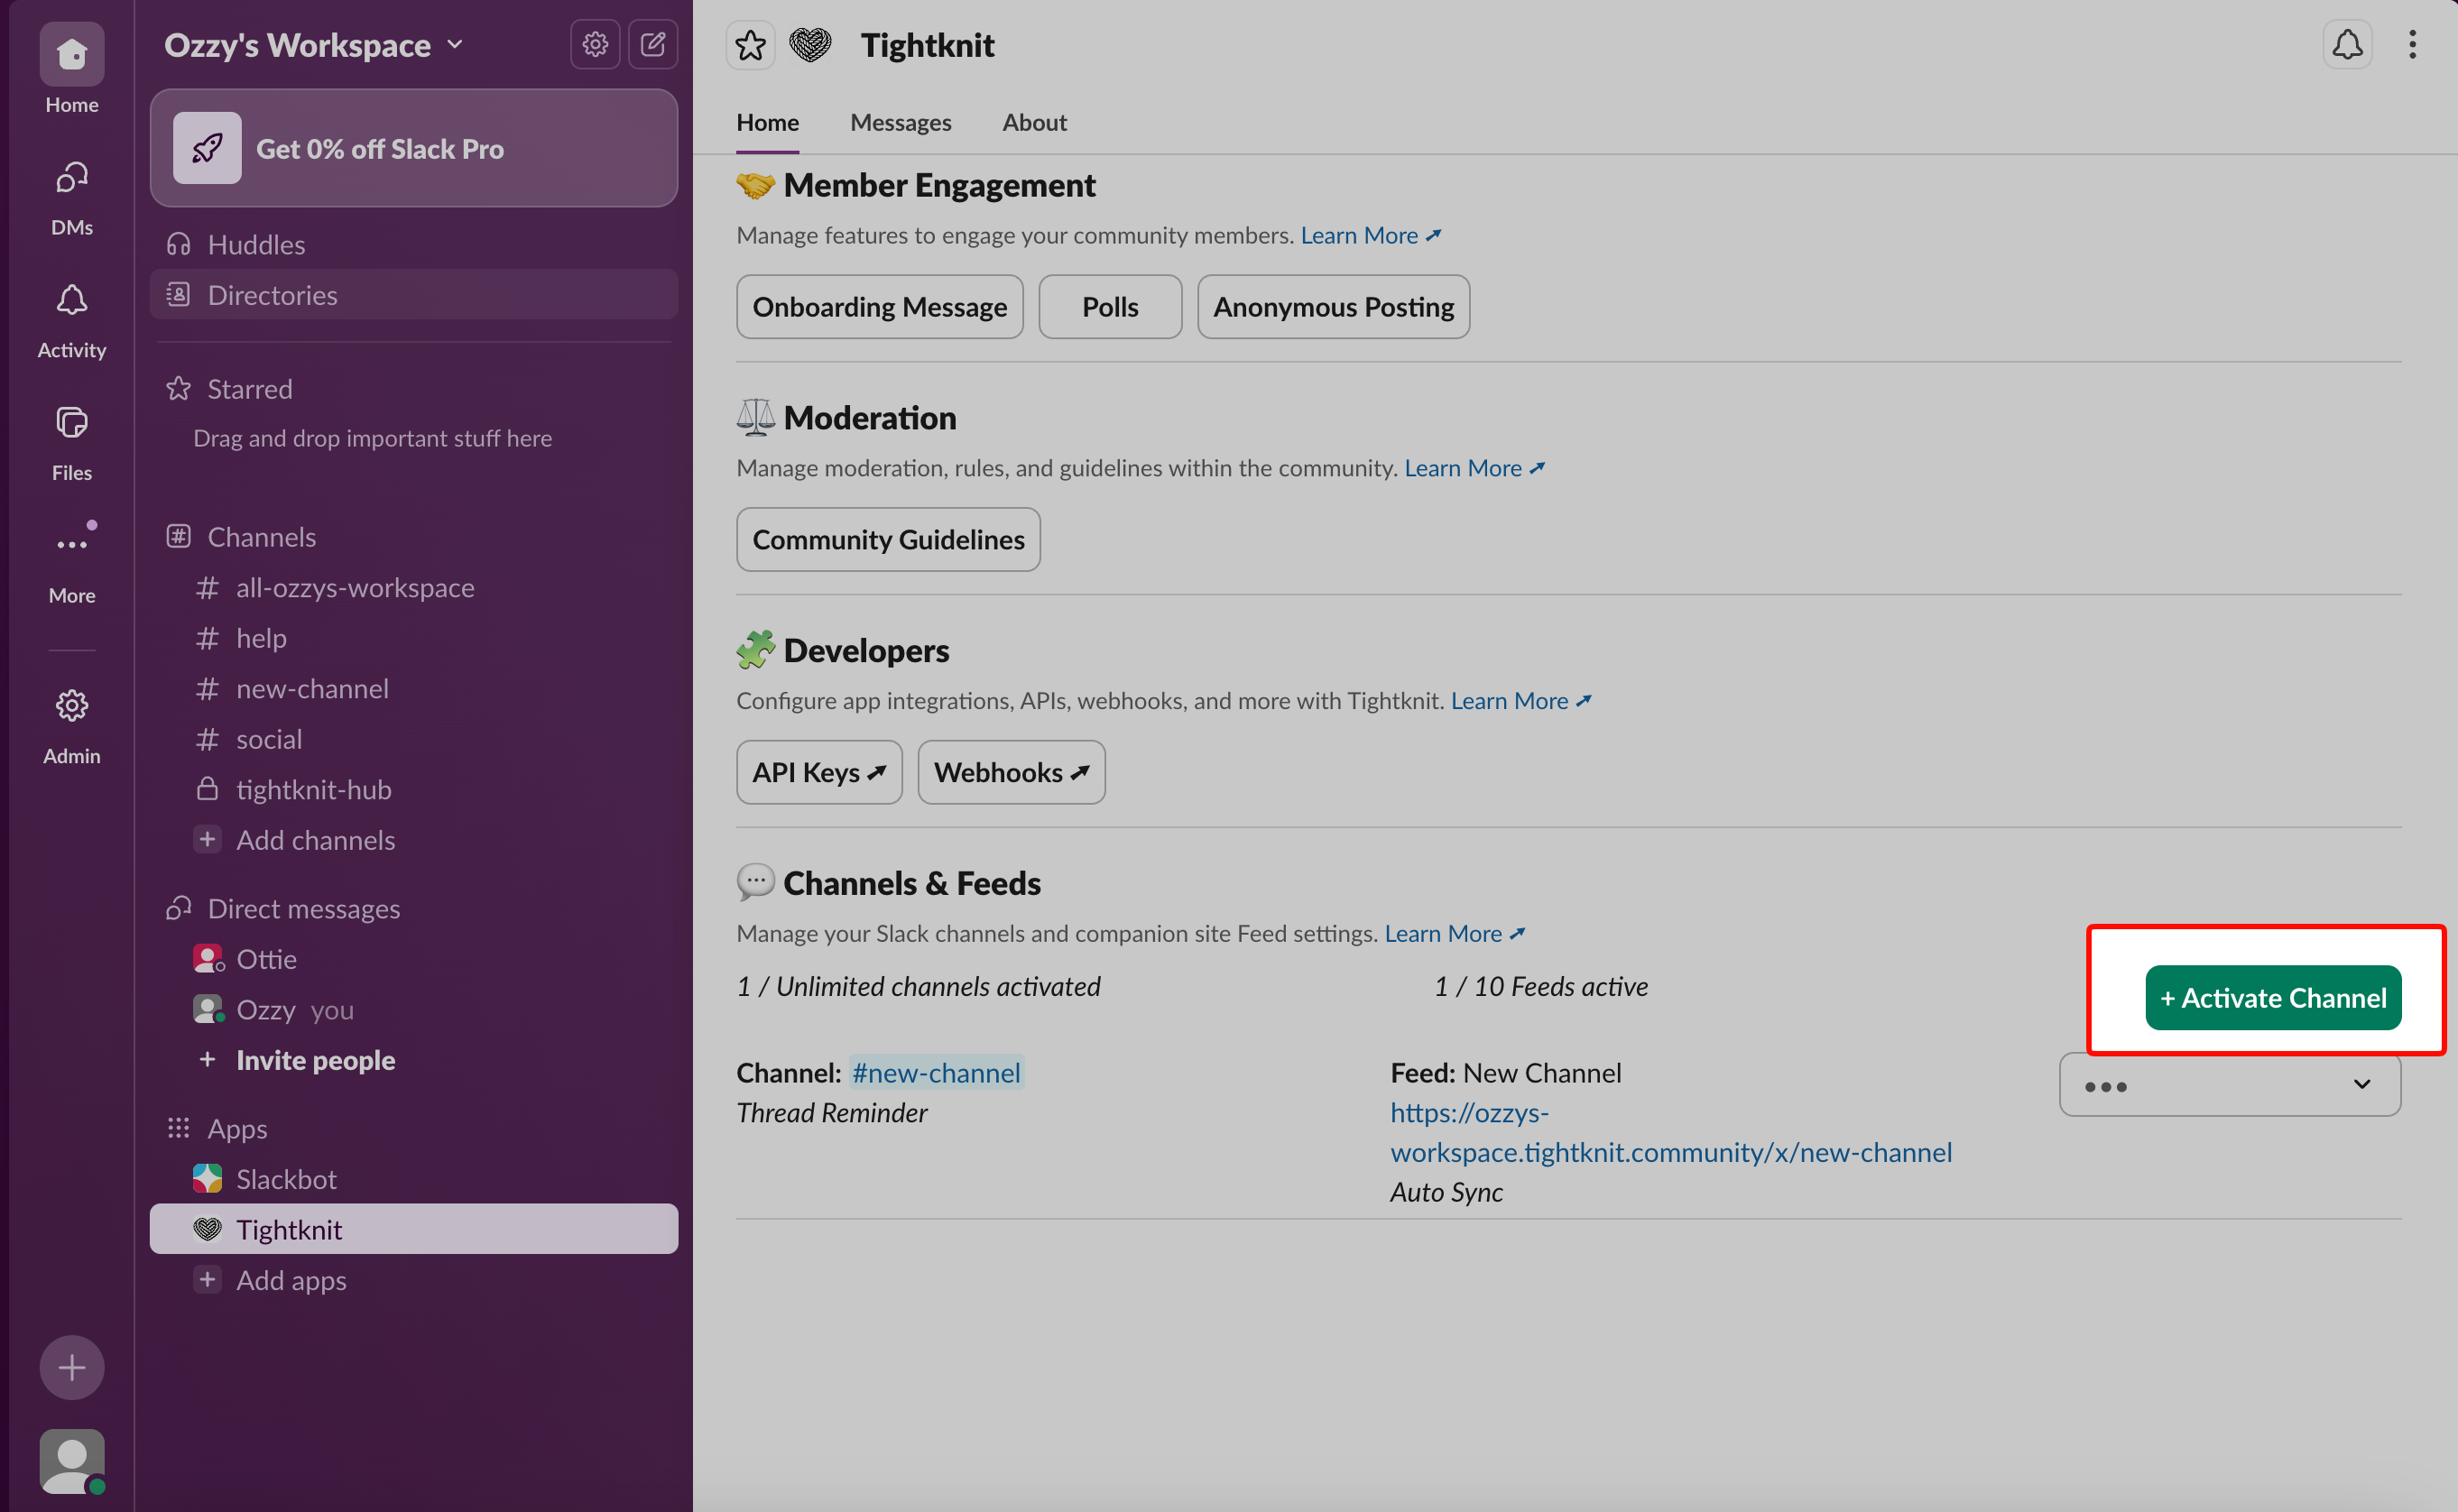
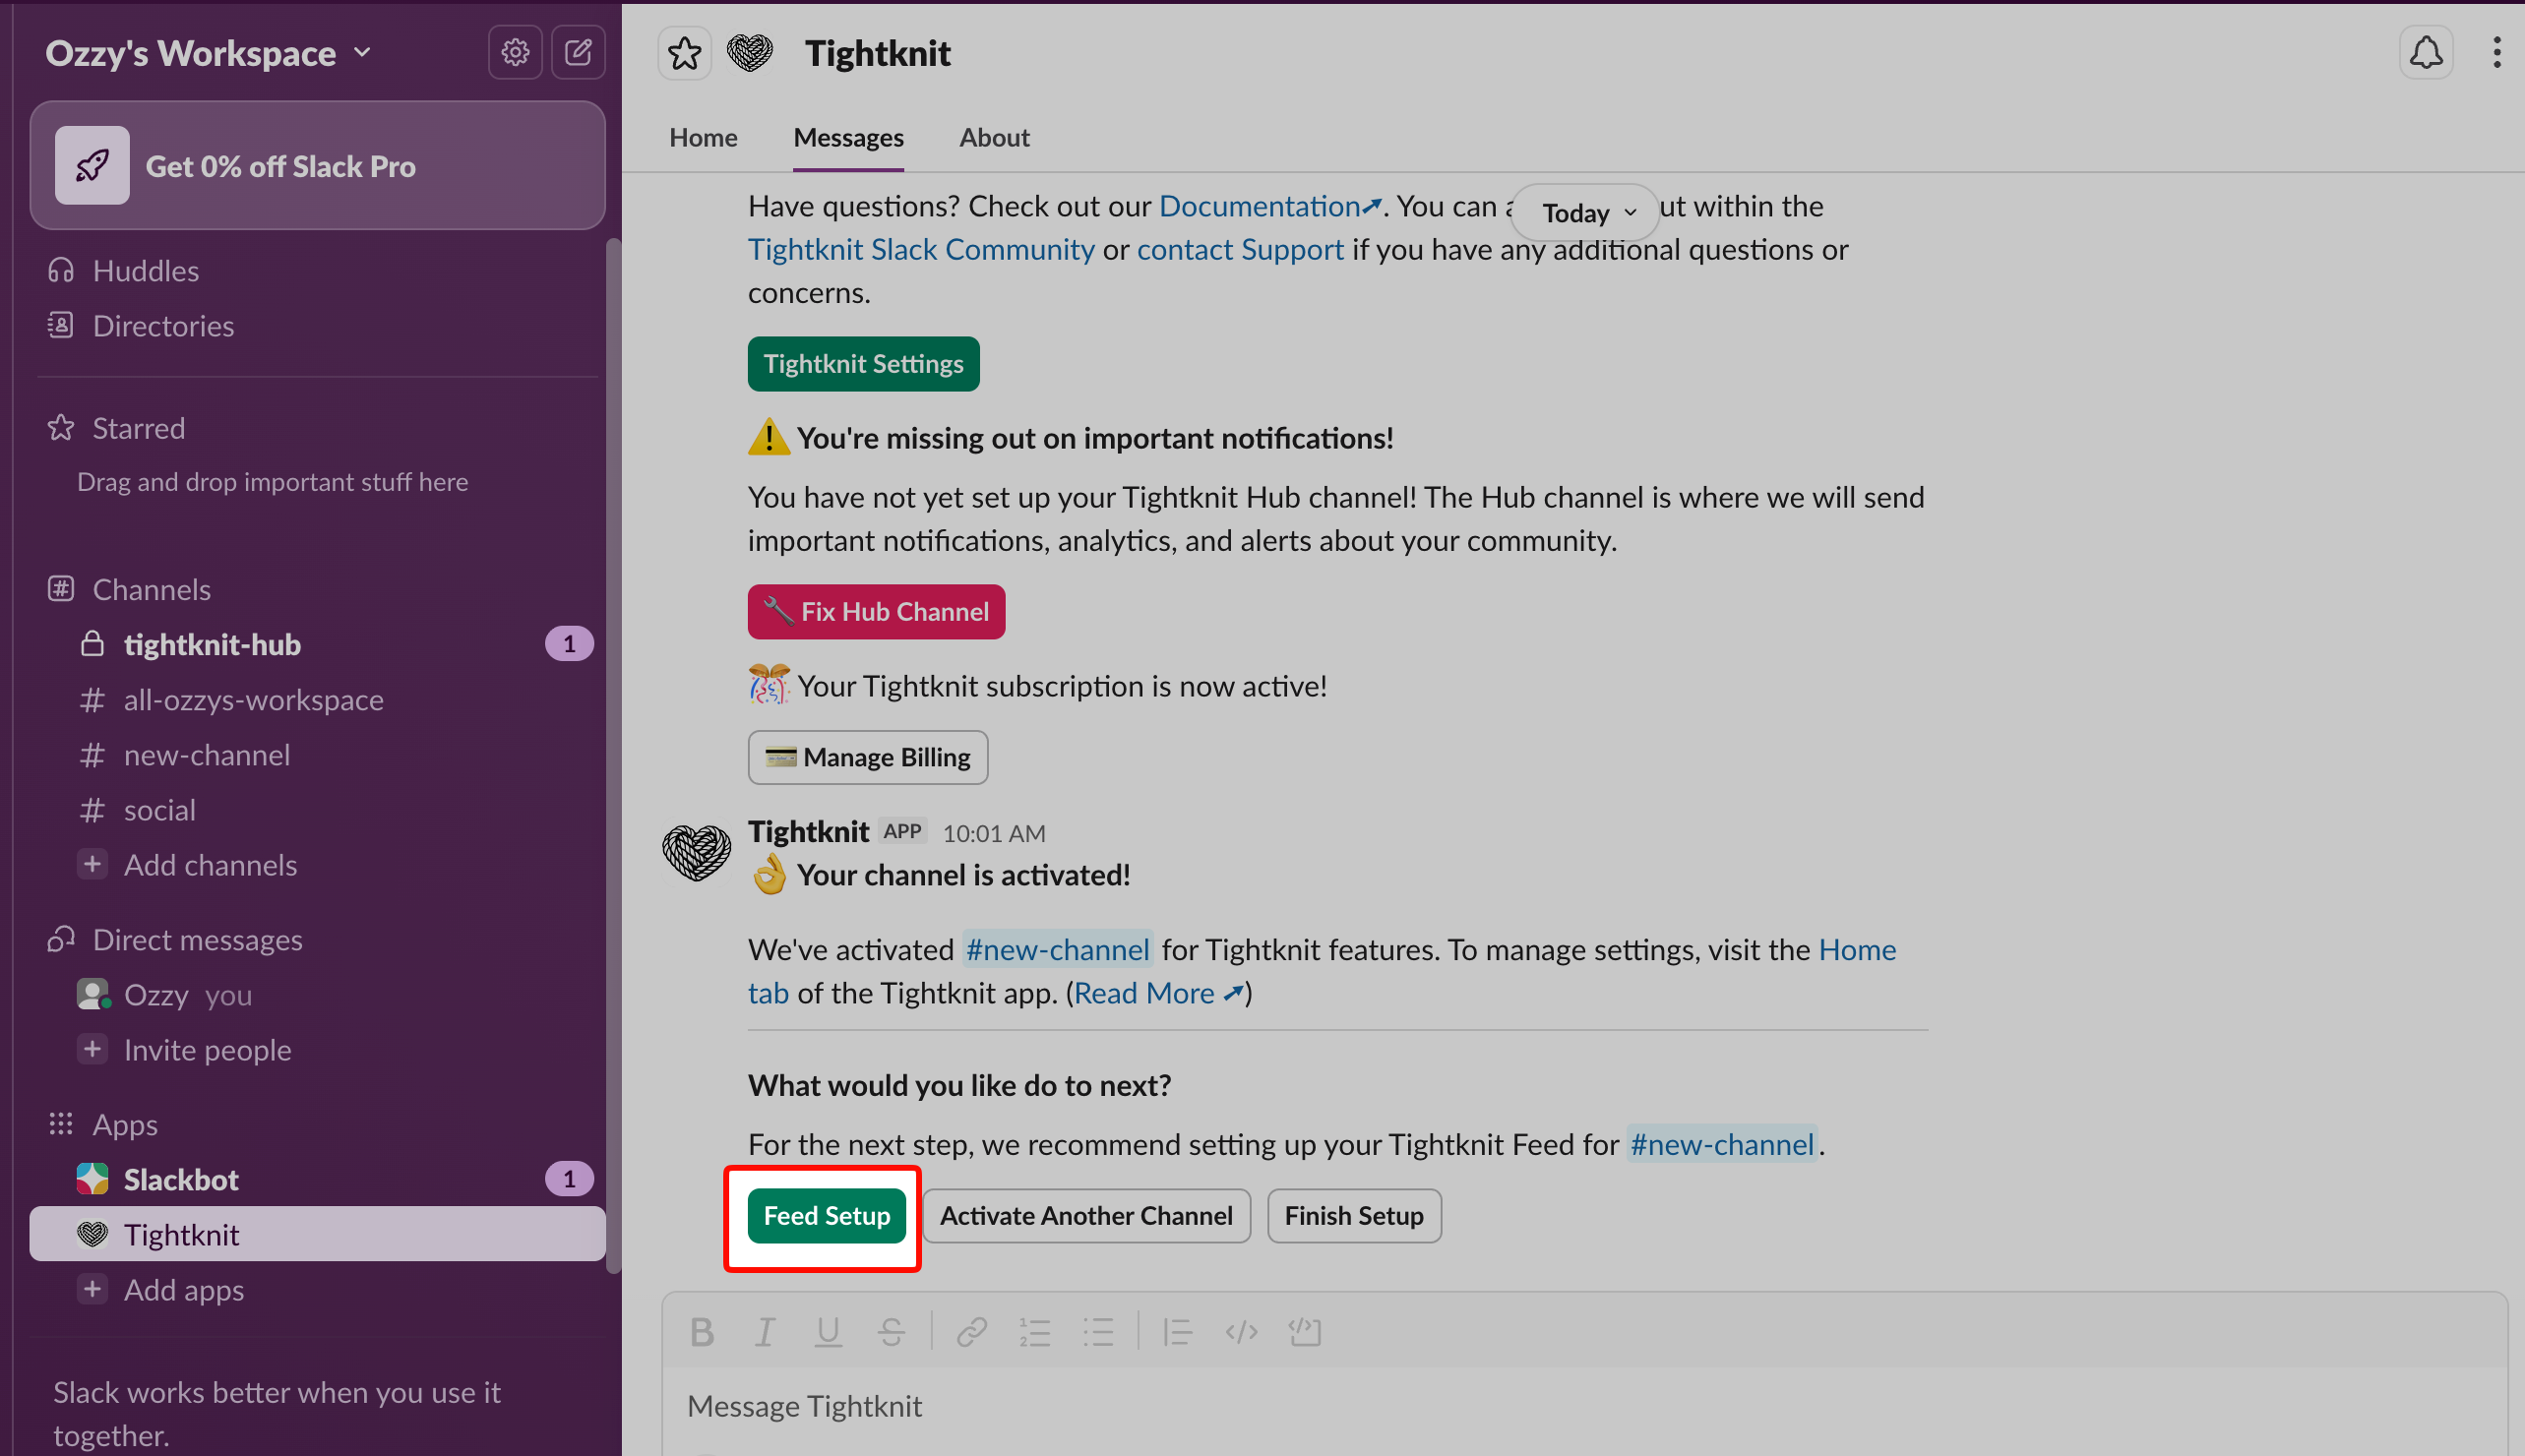
Activate a channel
Open the Tightknit app in Slack
Go to the Home tab and scroll to Feed Setup or Channels
Click + Add Channel and select your channel
Click Submit
Activating a channel in Tightknit
2
Create a feed
Connect your channel to the community site:
In the Tightknit app Home tab, scroll to Feed Setup
Click Create Feed and select an activated channel
Name your feed (this appears in your site’s navigation)
Configure settings:
Community site access: Who can view the feed on your site. A feed that Tightknit created for you starts at Disabled, so nothing reaches the site until you change it. See Feed visibility
Message sync: Sync all messages or manually select
Display mode: Blog view or discussion view
Posting permissions: Enable posting from site if needed
Click Continue and verify the feed on your community site
Feed setup configuration
Important notes
Private channels can be activated and can have feeds. Their posts are only ever visible to the feed’s members, never publicly. See Private channels and feeds
Announcements channels: Set posting permissions to “admins only” before activating
You must activate a channel before creating a feed for it
Feeds appear in your site’s navigation sidebar using the feed name you chose
A private channel can have a feed. The difference from a public channel is who can read the feed’s posts on your community site: only the feed’s members, never anonymous visitors and never every logged-in member.
1
Add the Tightknit app to the channel
Tightknit cannot sync a private channel it has not been added to. @mention the app in the channel, or add it from the channel’s Integrations tab.
2
Activate the channel
Activate it the same way as a public channel. Tightknit creates a feed for the channel automatically.
3
Set the feed to Feed members
Open the feed’s settings and set Community site access to Feed members. Until you do, the feed stays Disabled and none of its posts appear on your site.
Feed members is the only setting that puts a private channel’s posts on your site. Public and Authenticated only are never offered for a private channel’s feed.A feed’s member list mirrors the Slack channel and stays in sync as people join and leave it. To give access to someone who is not in the Slack channel, such as a site-only member, add them to the feed from Studio. See Managing feed members.
If Feed members is not offered when you edit the feed, the advanced access options are not switched on for your community yet. Contact [email protected].
Activating a channel ingests its messages into the Studio, including for private channels. Studio access is governed by Studio user roles, not by Slack channel privacy or the feed’s community site access. Only activate private channels whose content is appropriate for your Studio team to see.
Was this page helpful?
Assistant
Responses are generated using AI and may contain mistakes.