You need a Zoom Business, Education, or Enterprise account with admin privileges to create admin meeting templates. If you only have a free or Pro account, you can still create personal templates, but they won’t be available to other hosts in your organization.
Prerequisites
Before you start, make sure you have:- A Zoom Business, Education, or Enterprise account
- Account owner or admin privileges
- Meeting Templates enabled in your account settings (Zoom’s guide on enabling templates)
Creating Your Template
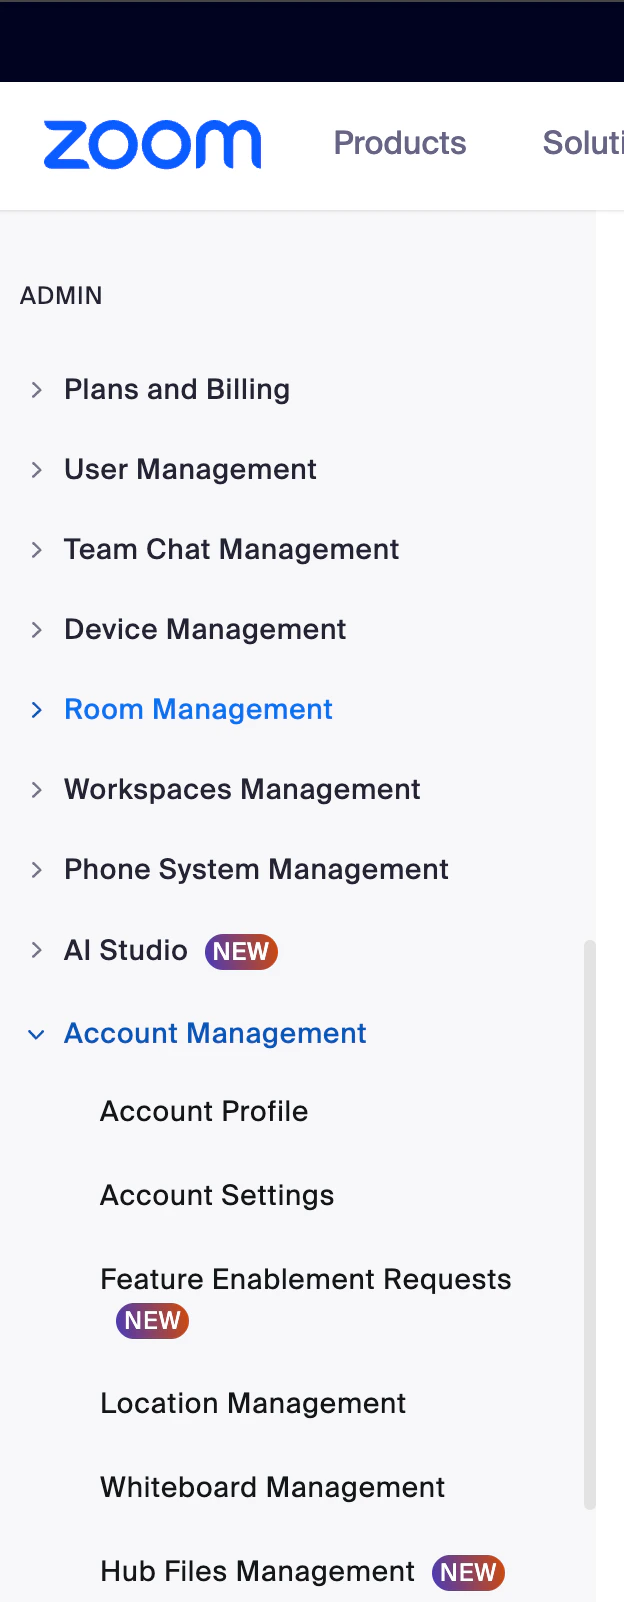
Navigate to Meeting Templates
- Sign in to the Zoom web portal as an admin.
- In the left sidebar under Admin, expand Account Management and click Account Settings.
- Click the Meeting tab.
- In the left sub-navigation, click Schedule Meeting and find Meeting Templates.
- Click Manage Templates then + Add Template.
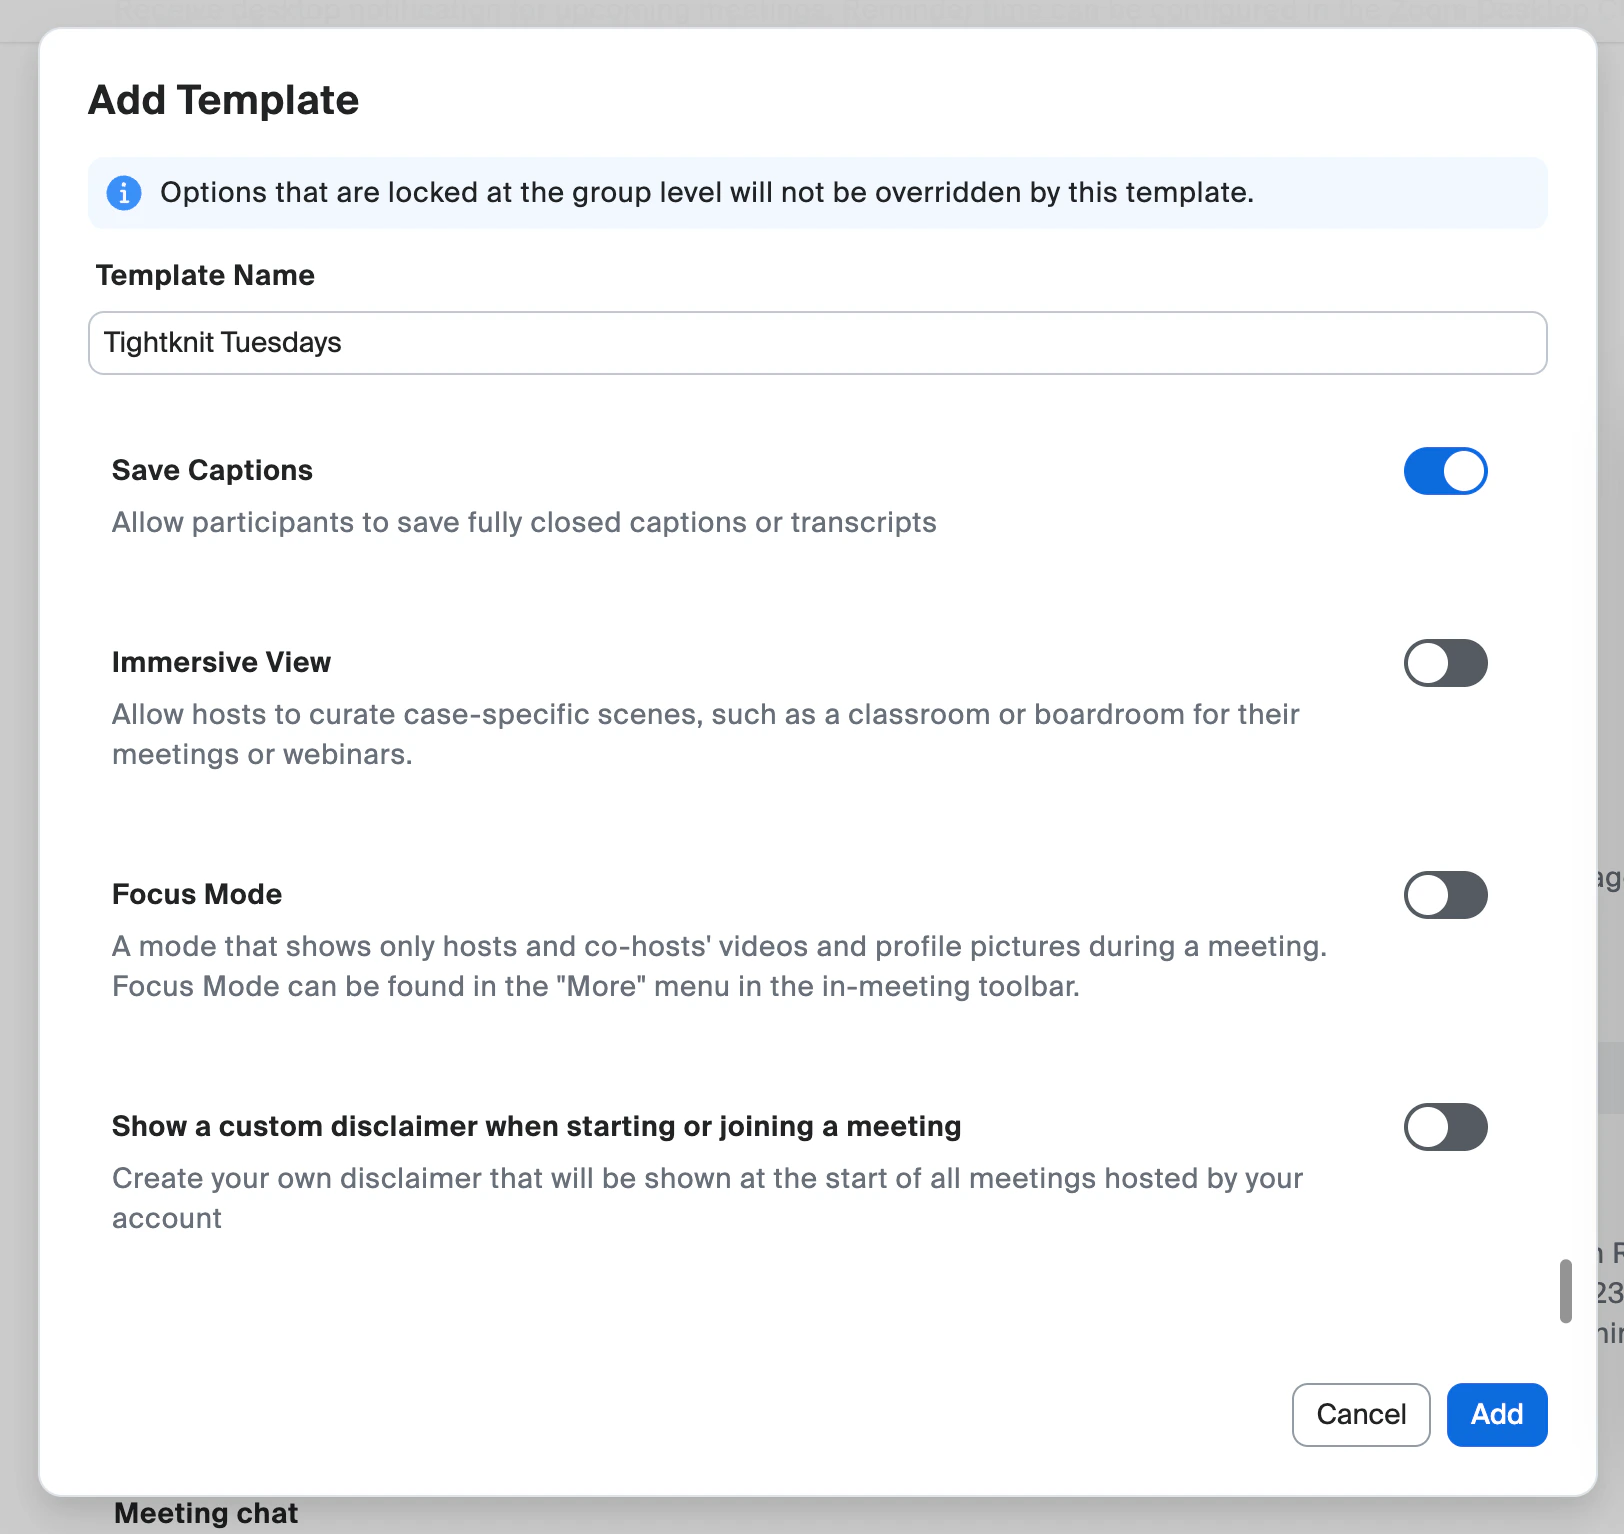
Name Your Template
Give your template a clear, descriptive name that tells hosts exactly what it’s for.
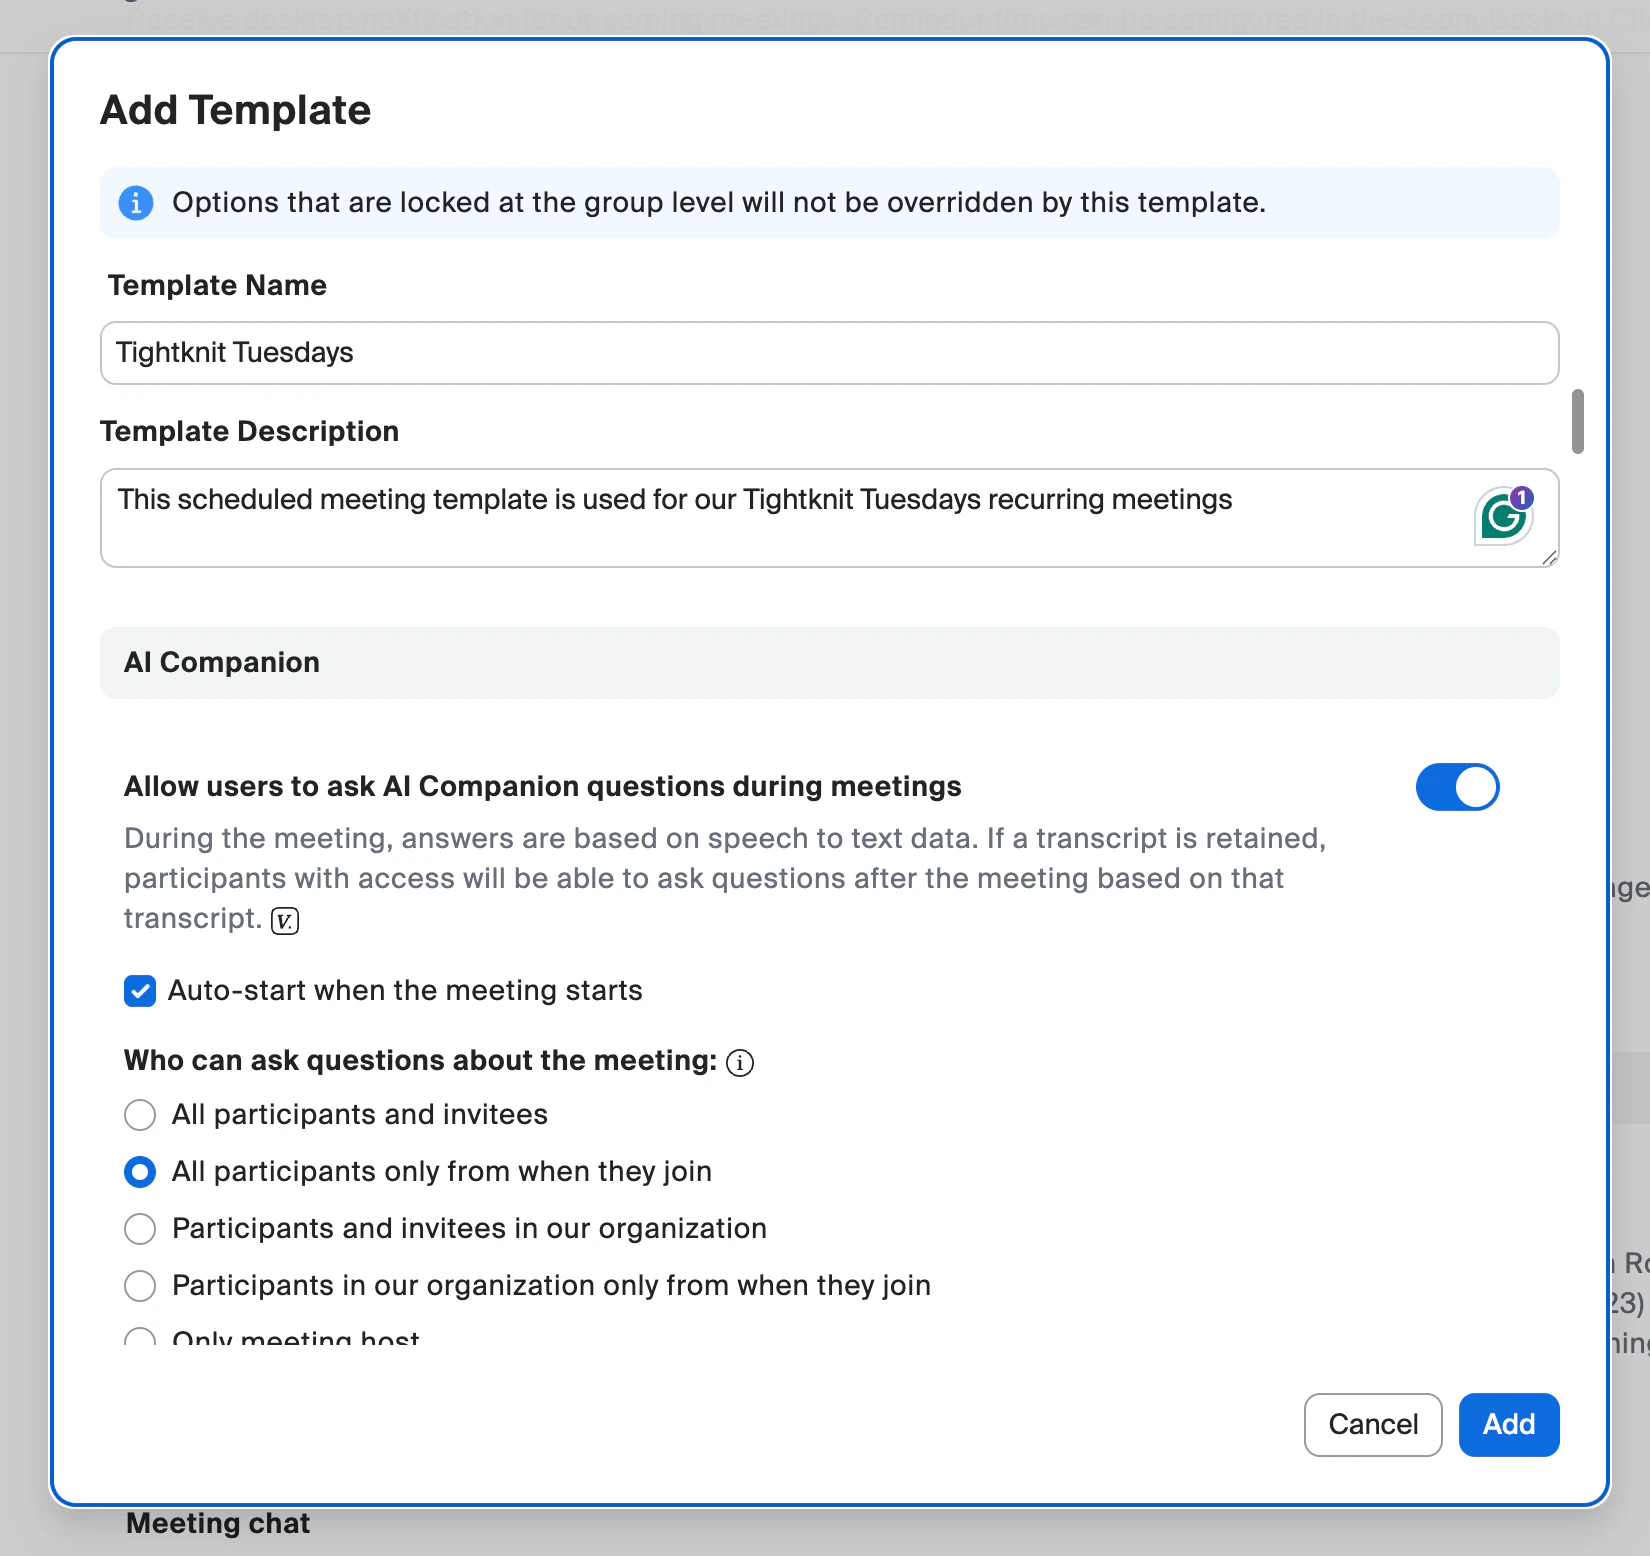
| Field | What to enter |
|---|---|
| Template Name | The name of your recurring event (e.g., “Tightknit Tuesdays”) |
| Template Description | A brief note on when to use this template (e.g., “This scheduled meeting template is used for our Tightknit Tuesdays recurring meetings”) |
Configure AI Companion & Summary
These settings control Zoom’s built-in AI features for catching up and summarizing.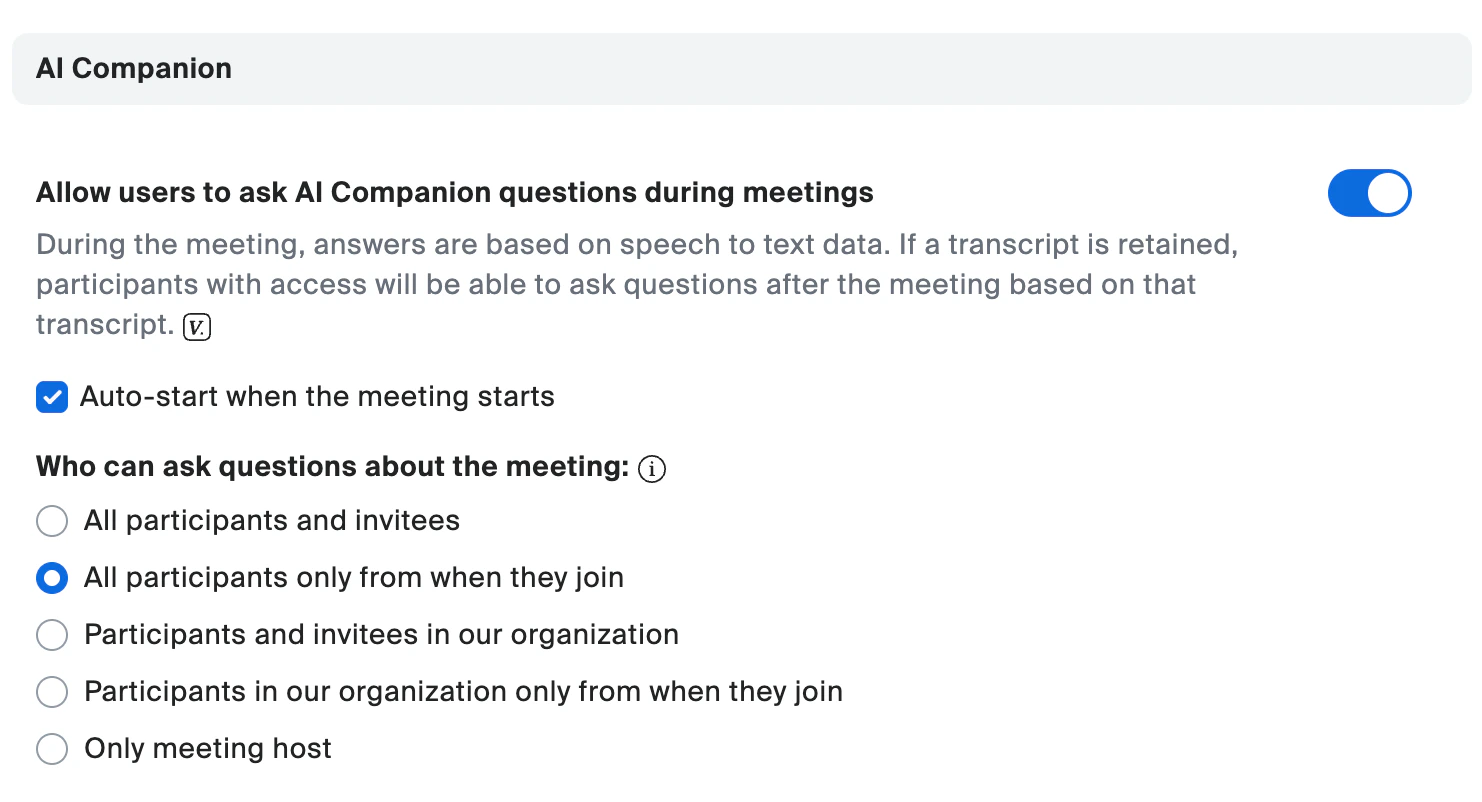
AI Companion Questions
Recommendation: On, auto-start, all participants can ask from when they joinIf someone joins late, they can ask Zoom’s AI companion what they missed. This is especially helpful for community events where people drop in at different times.Meeting Summary (AI Companion)
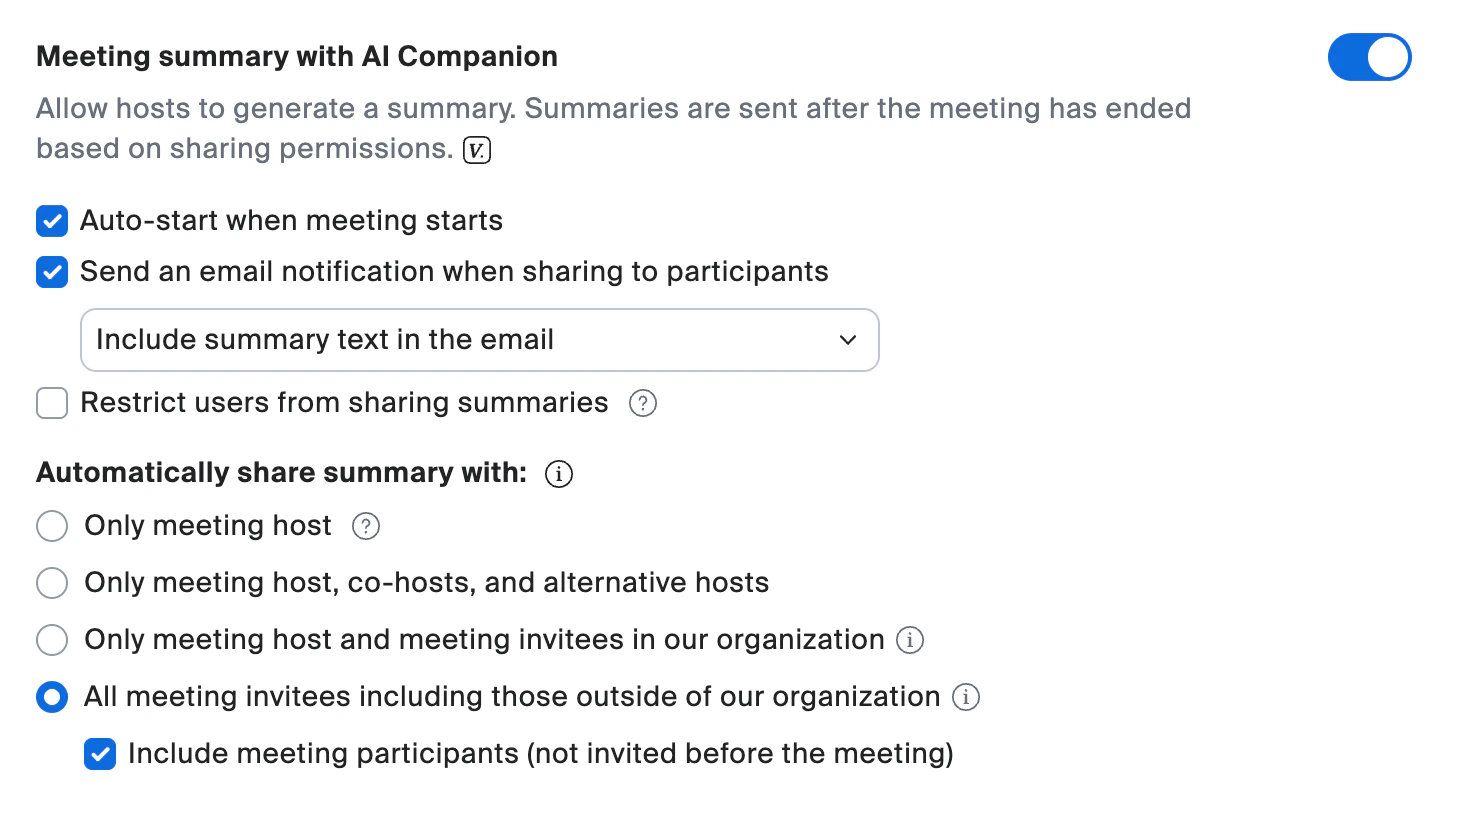
Recommendation: On, auto-start when the meeting startsThis generates an automatic summary of the meeting. Configure it to:- Auto-start when meeting starts: Yes
- Send an email notification when sharing to participants: Yes
- Include summary text in the email: Yes, makes it easy for attendees to get the recap without logging into Zoom
- Automatically share with: All meeting invitees including those outside of our organization
- Include meeting participants (not invited before the meeting): Yes
Configure the Waiting Room
Recommendation: It dependsThe waiting room holds participants in a lobby until the host lets them in.
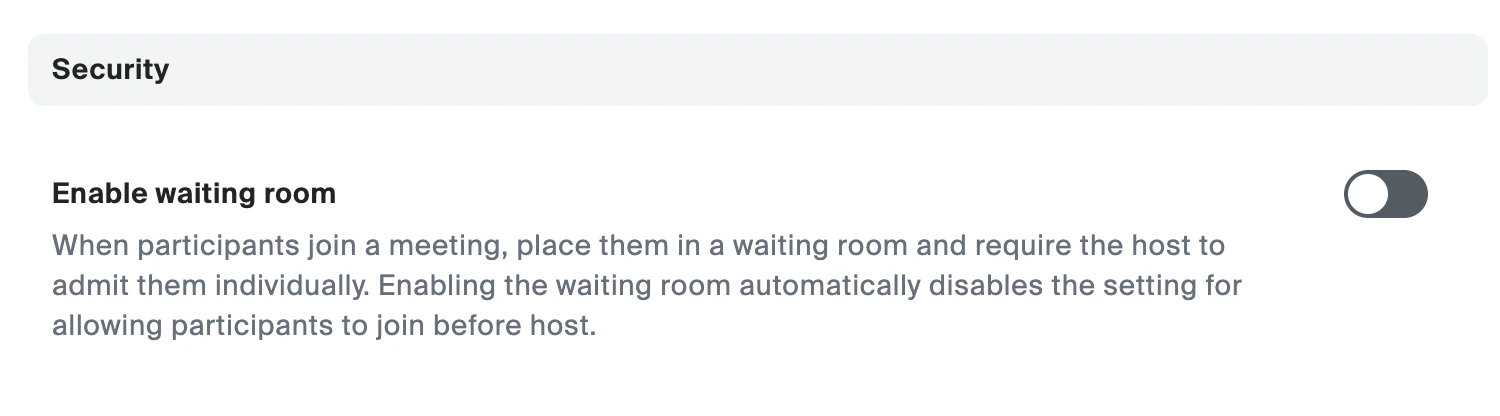
| Scenario | Recommendation |
|---|---|
| You have a co-host who can manage admissions | Turn it on, adds a layer of control |
| You’re running the event solo | Turn it off, you won’t have bandwidth to admit people while presenting |
Configure Video & Audio Defaults
These settings control what happens the moment someone joins your meeting.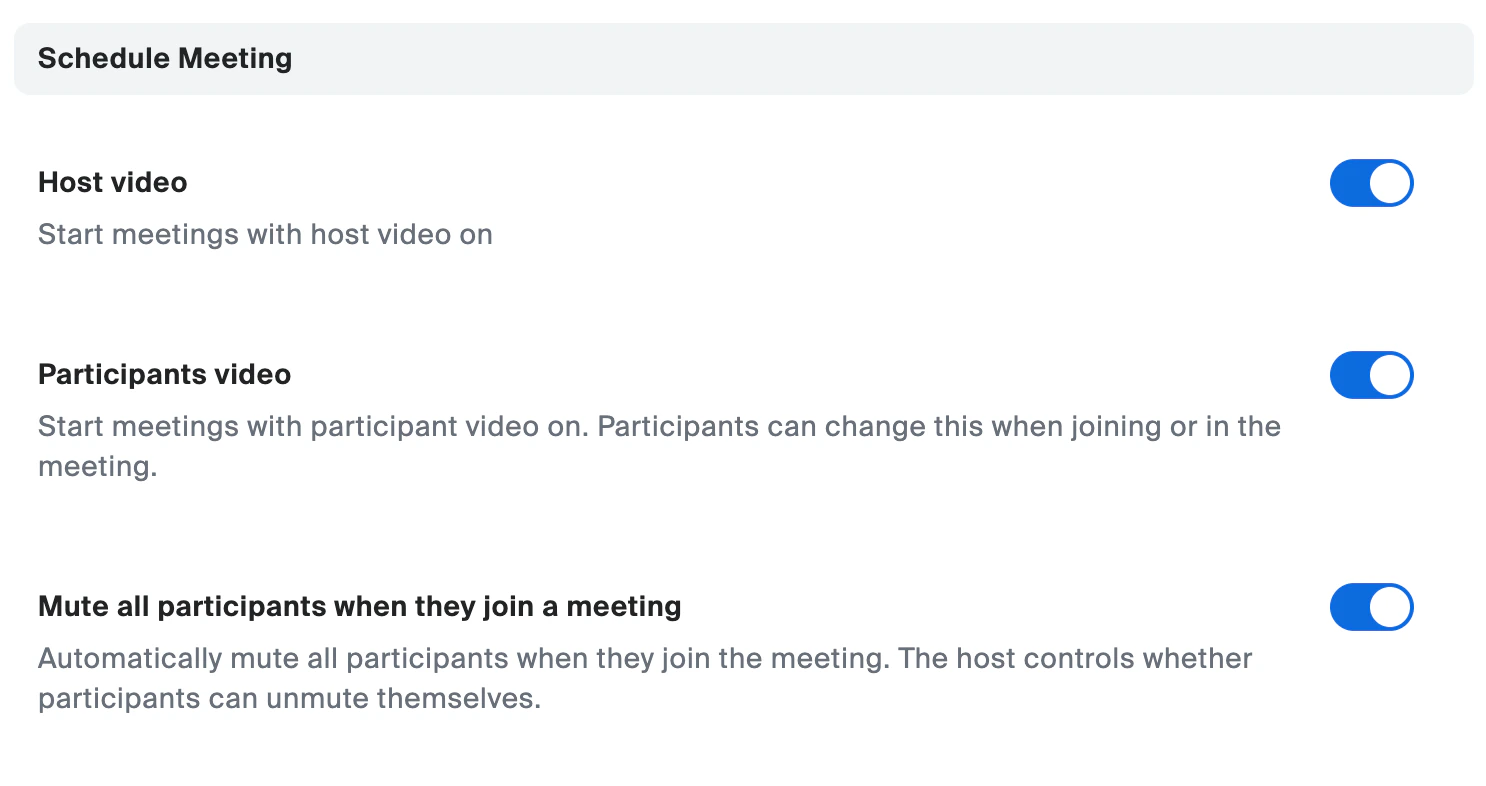
Host Video
Recommendation: OnAs the host, your camera should almost always be on. You’re the face of the event, and being visible builds trust with your community.Participant Video
Recommendation: On (or Off depending on event type)For community events where you want to build intimacy and connection, leaving participant video on encourages face-to-face interaction. For larger webinar-style events, consider turning it off so participants aren’t caught off guard.Mute Participants on Join
Recommendation: OnThis is critical for any event with more than a handful of people. Without it, someone will inevitably join with background noise that disrupts the entire meeting. Participants can unmute themselves when they want to speak.This is a meeting template, not a webinar. Participants can unmute and turn on video. If you need stricter control, consider Zoom’s webinar product instead (that’s a separate guide).
Configure Recording
Recording your community events creates replay content, clips for social, and a reference for attendees who couldn’t make it.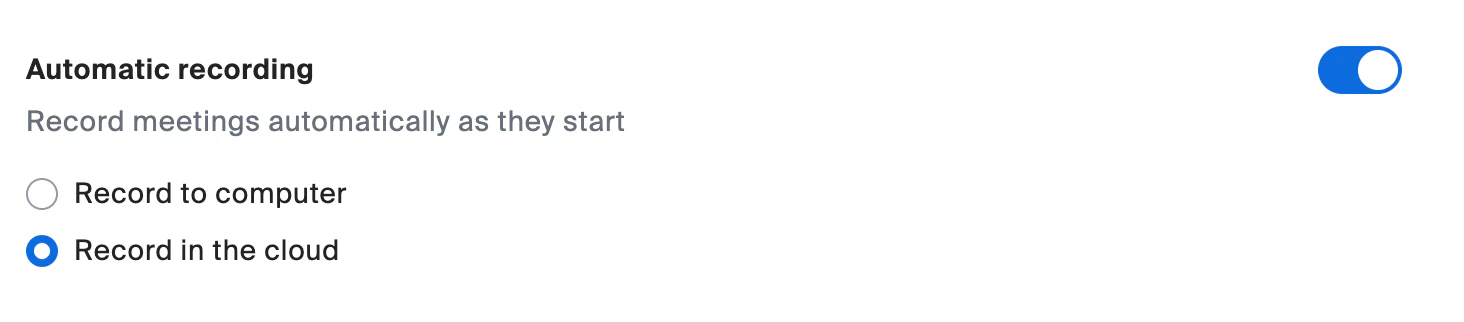
Auto-Record
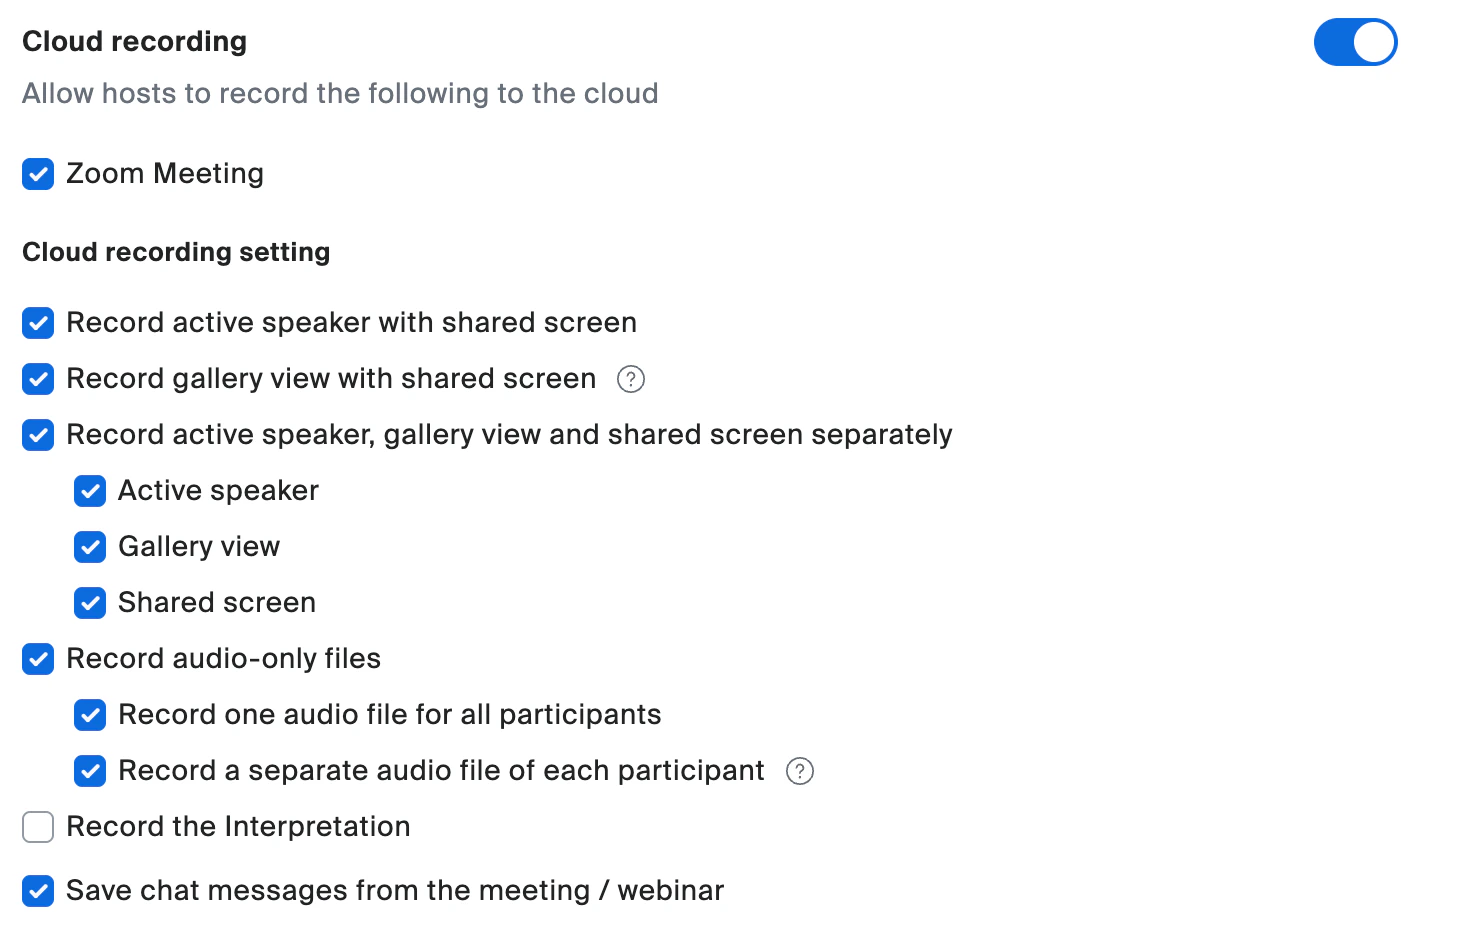
Recommendation: On, record to the cloudCloud recording is more reliable than local recording. If your internet hiccups or your laptop crashes, the cloud recording continues from Zoom’s servers. It also makes sharing easier since the recording lives in Zoom’s cloud rather than on your hard drive.Cloud Recording Settings
Configure these for maximum flexibility when editing and repurposing content later:| Setting | Recommendation | Why |
|---|---|---|
| Record active speaker with shared screen | On | The default combined view, good baseline |
| Record gallery view with shared screen | On | Captures the full room alongside any presentation |
| Record active speaker, gallery view, and shared screen separately | On | Gives you separate video files for higher-quality editing |
| Record audio-only files | On | Both combined and separate per-participant |
| Record the Interpretation | Off | Only needed for multilingual events with hired interpreters |
| Save chat messages | On | Captures links and resources shared during the event |
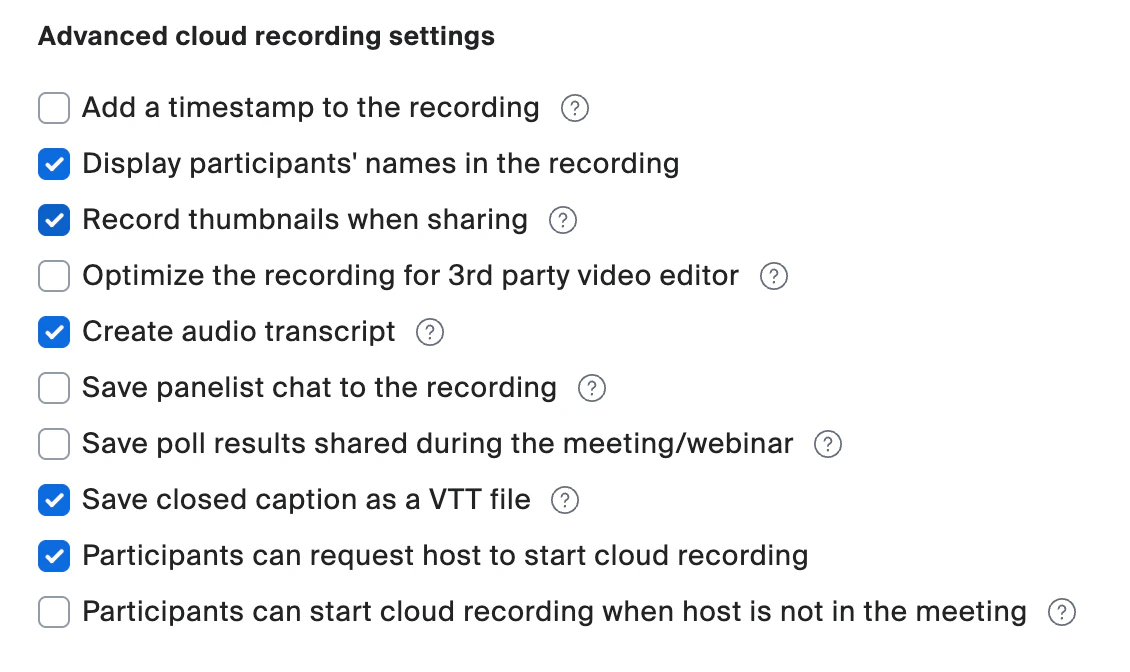
Advanced Cloud Recording Settings
| Setting | Recommendation | Why |
|---|---|---|
| Add timestamp | Off | Adds unnecessary clutter, doesn’t look professional |
| Display participant names | On | Helps viewers identify speakers |
| Record thumbnails when sharing screen | On | Shows who’s presenting alongside shared content |
| Optimize for third-party video editor | Off (or On if you edit) | Larger files but better for tools like Premiere, Final Cut, or Descript |
| Create audio transcript | On | Generates a searchable text transcript |
| Save panelist chat to recording | Off (or On if needed) | Captures chat in the recording file itself |
| Save poll results | Off (or On if needed) | Useful for follow-ups |
| Save closed caption as a VTT file | On | Creates subtitle files for publishing |
| Participants can request recording | On | Lets attendees nudge you if you forget |
Configure In-Meeting Chat
Chat settings control how participants communicate during the event.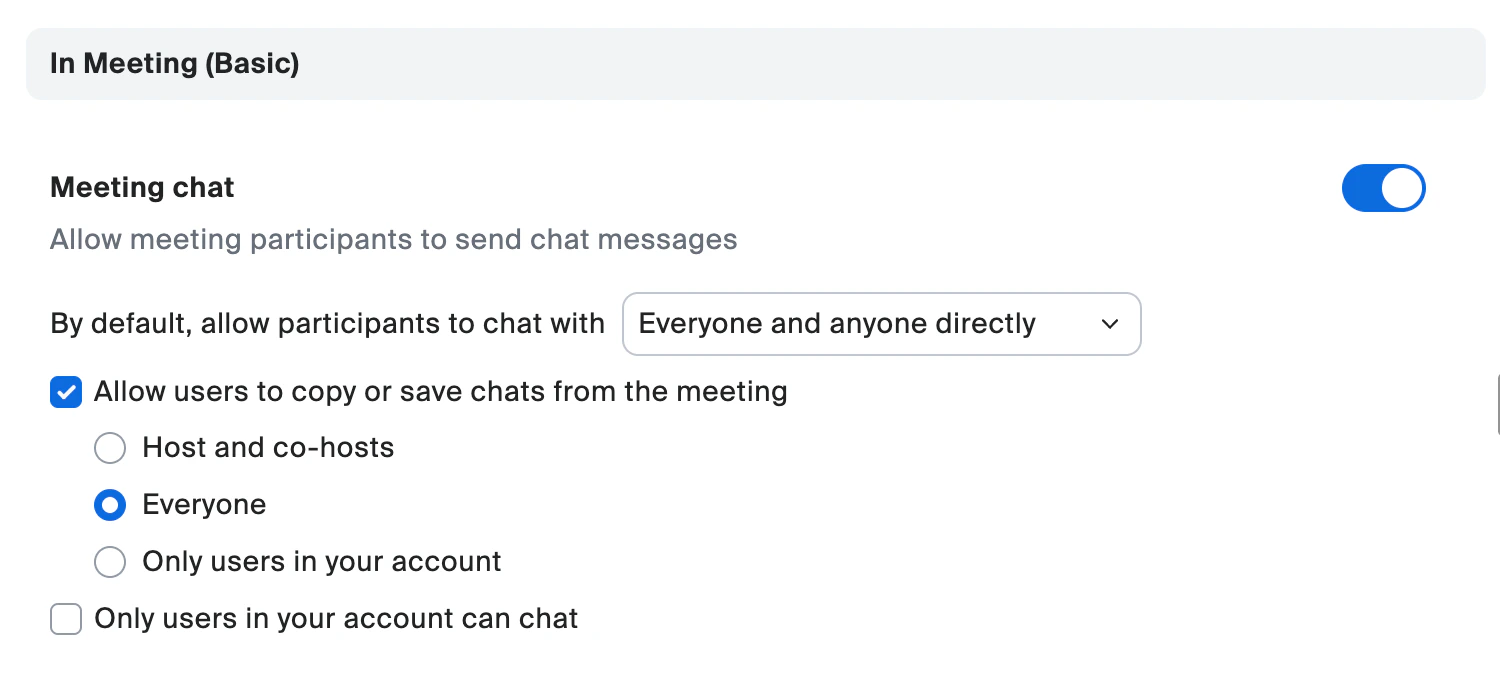

Chat Permissions
Recommendation: Everyone and anyone directly (or Host only for large events)For community events where interaction is the goal, allowing everyone to chat creates a more engaging experience. For very large or formal events, restrict to host-only.Continuous Meeting Chat
Recommendation: On for recurring meetings, Off for one-offsContinuous meeting chat lets the conversation persist before, during, and after the meeting in Zoom’s Team Chat.Other Chat Settings
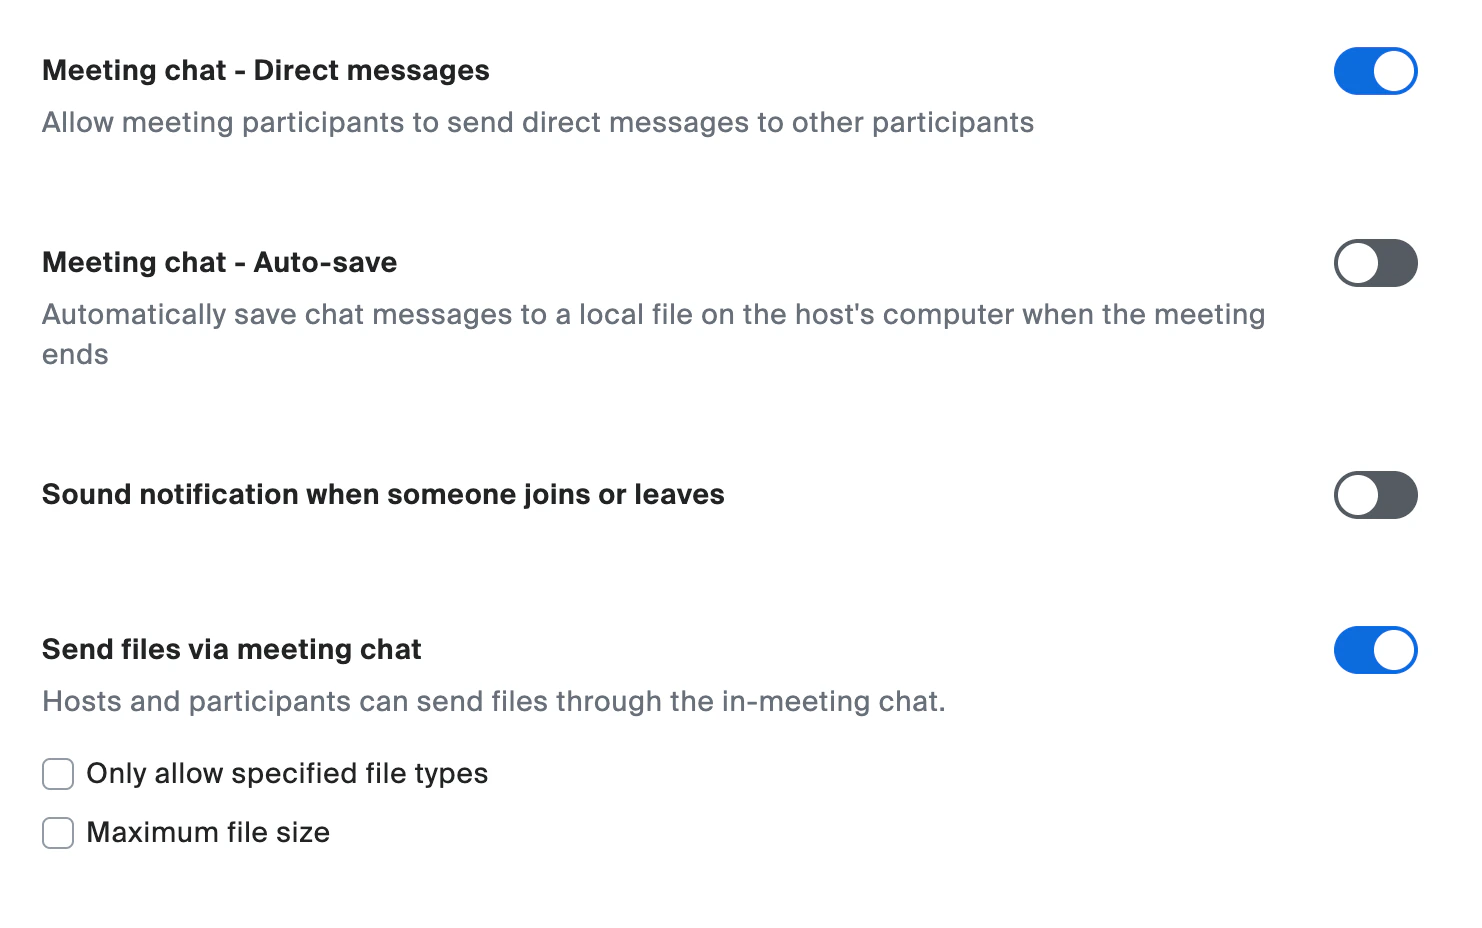
| Setting | Recommendation | Why |
|---|---|---|
| Allow direct messages | On (for community events) | Lets participants connect, great for networking |
| Meeting chat auto-save | Off | Cloud recording saves chat separately |
| Sound notification when someone joins or leaves | Off | Avoids constant disruptions |
| Send files via meeting chat | On | Lets participants share resources |
Configure Feedback, Polls & Surveys
Feedback to Zoom
Recommendation: On (low impact)Zoom’s own satisfaction prompt. Unobtrusive, leave it on or off, it won’t affect your attendees.Co-host
Recommendation: OnAlways leave co-host enabled so you can promote someone during the meeting if needed.Meeting Polls/Quizzes
Recommendation: OnPolls are great for icebreakers, topic voting, or quick feedback during events.Meeting Survey
Recommendation: On, create a custom surveyCheck “Add specified participant survey to all meetings scheduled with this template” and create your survey in Survey Management.
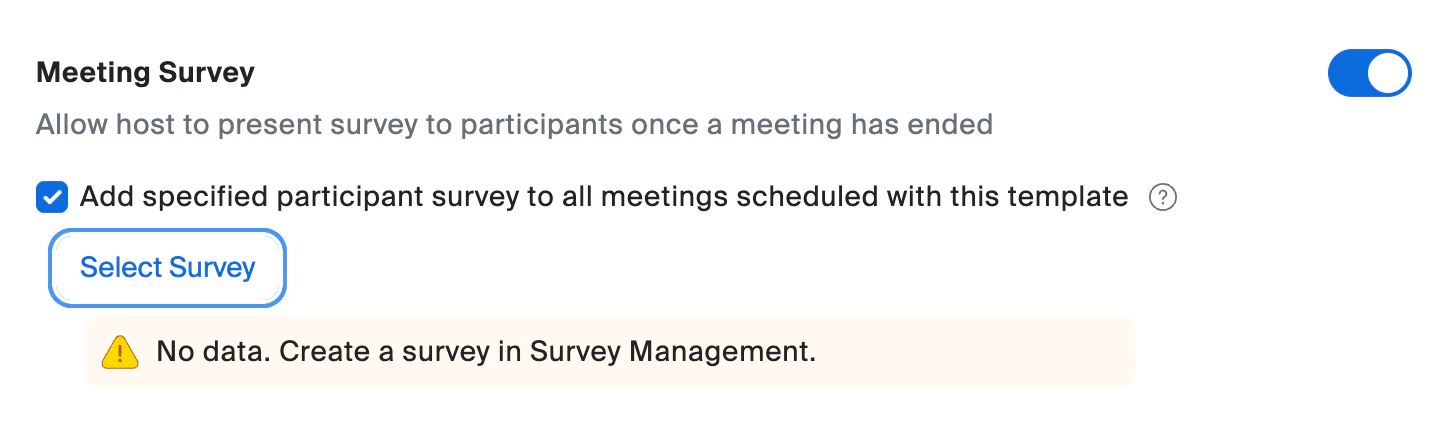
You’ll see “No data. Create a survey in Survey Management” until you set one up. Creating the survey is covered in Next Steps.
End-of-Meeting Experience Survey
Recommendation: OffThis is Zoom’s generic quality survey, not your community feedback survey. Skip it to avoid survey fatigue.
Configure Screen Sharing
Who Can Share & How Many
Recommendation: One participant at a time, Host onlyPrevents participants from hijacking the presentation. You can promote someone to co-host during the meeting.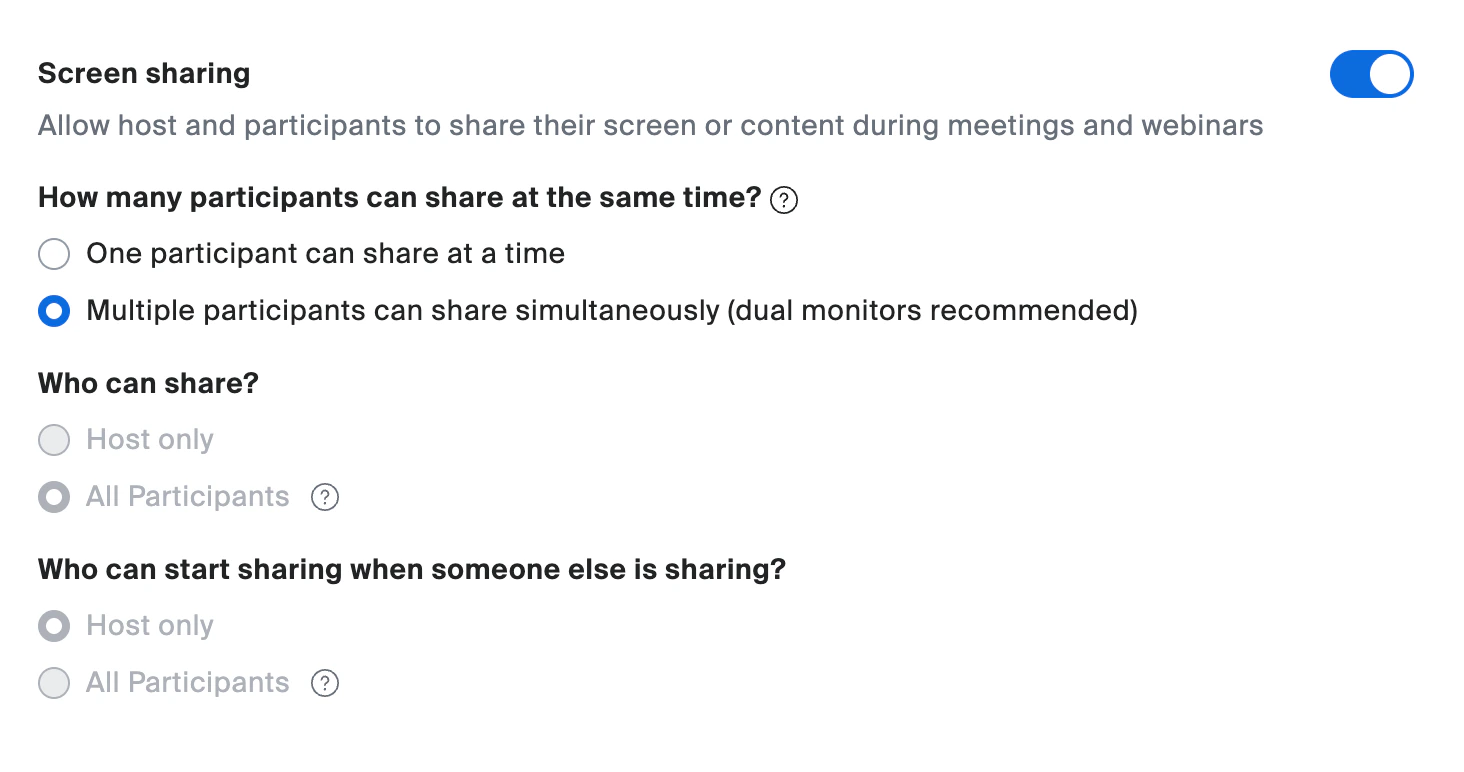
Annotation & Whiteboard Classic
Recommendation: Off for bothAnnotation and Classic Whiteboards add noise and disruption potential for community webinars.Disable Desktop Screen Sharing
Recommendation: Off (keep desktop sharing enabled)You want the option to share your full desktop when presenting.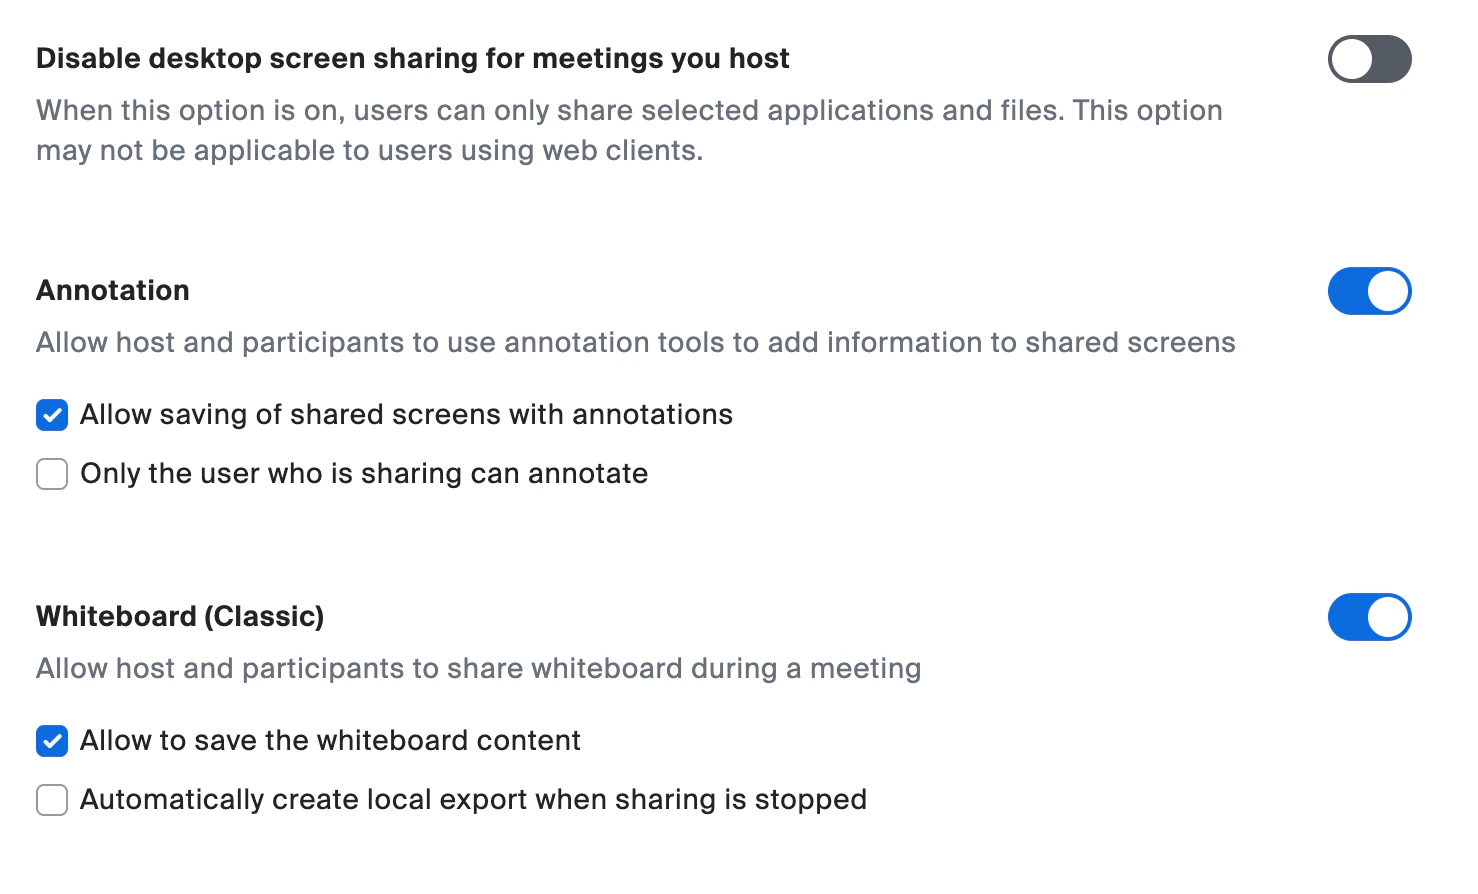
Remote Control & Slide Control
Recommendation: Off for bothRemote control is a security risk. Slide control causes confusion, most people don’t know how to use it.Allow Removed Participants to Rejoin
Recommendation: OffIf you remove someone, it’s for a good reason. Don’t let them back in.Allow Participants to Rename Themselves
Recommendation: OffPrevents trolling and maintains professionalism.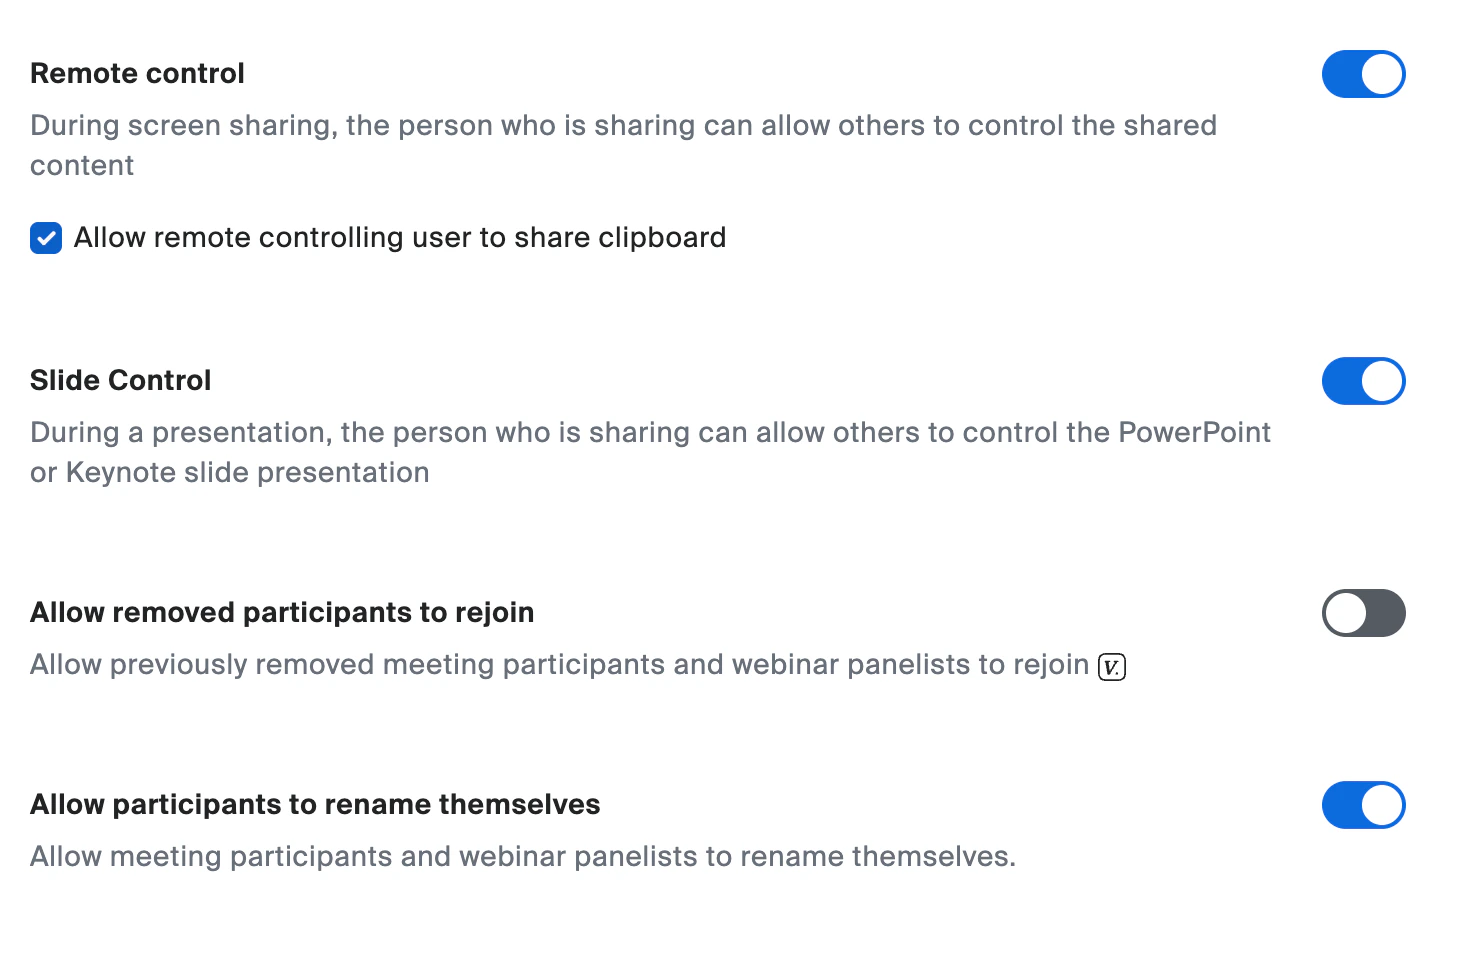
Configure Participant Management
Host/Co-host Rename in Waiting Room
Recommendation: OnHosts can rename participants in the waiting room even with self-renaming disabled. Participants get notified.Hide Participant Profile Pictures
Recommendation: OffLet people show their pictures, it adds personality to community events.Default Meeting Wallpaper
Recommendation: Set up laterA branded wallpaper is a nice touch but not required for launch.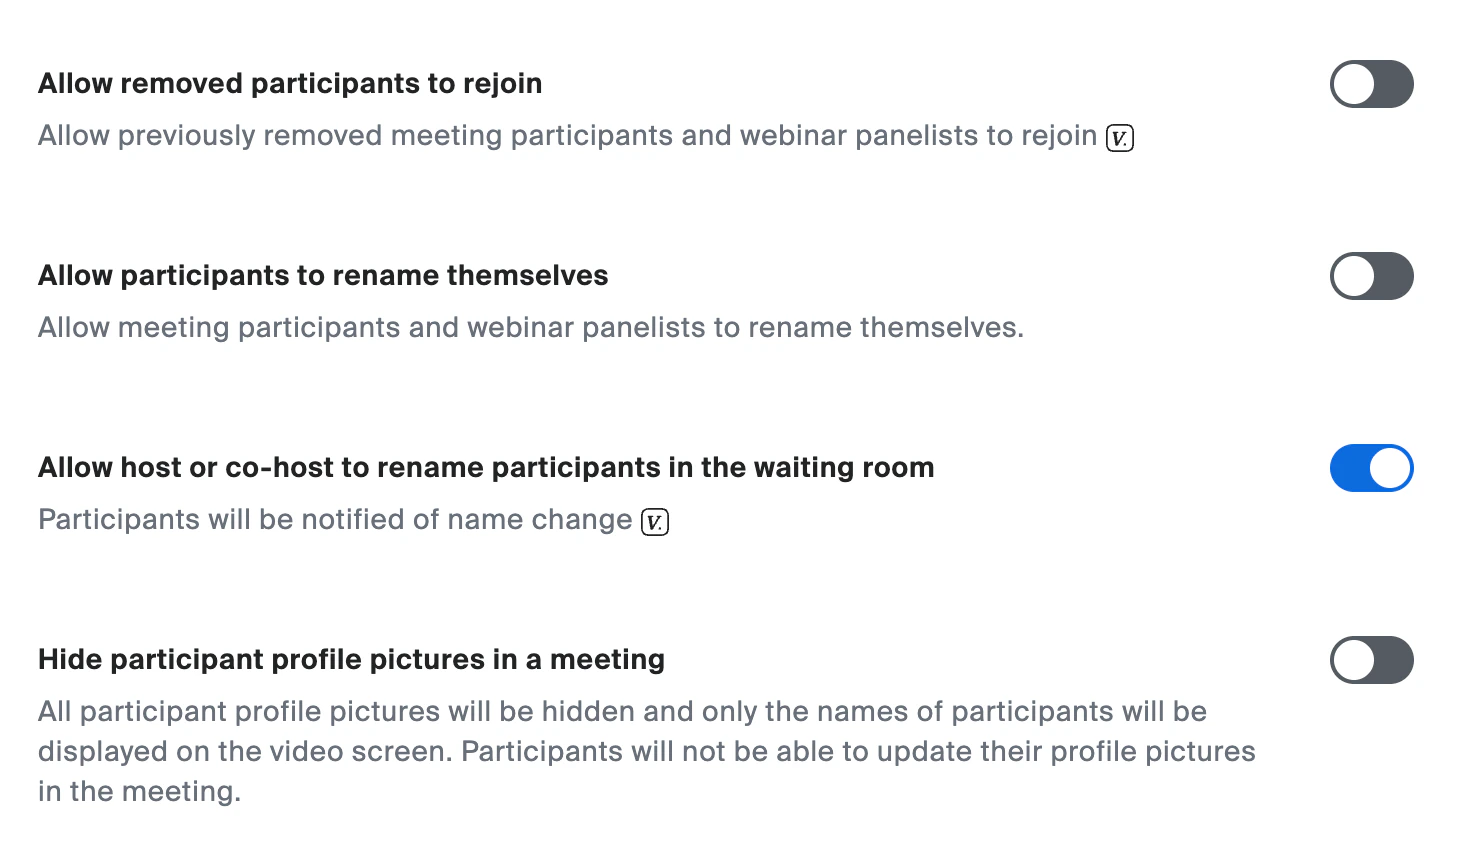

Configure Breakout Rooms
Recommendation: On, but don’t pre-assignBreakout rooms are great for workshops, cohort discussions, or small-group conversations. Leave enabled but assign live.
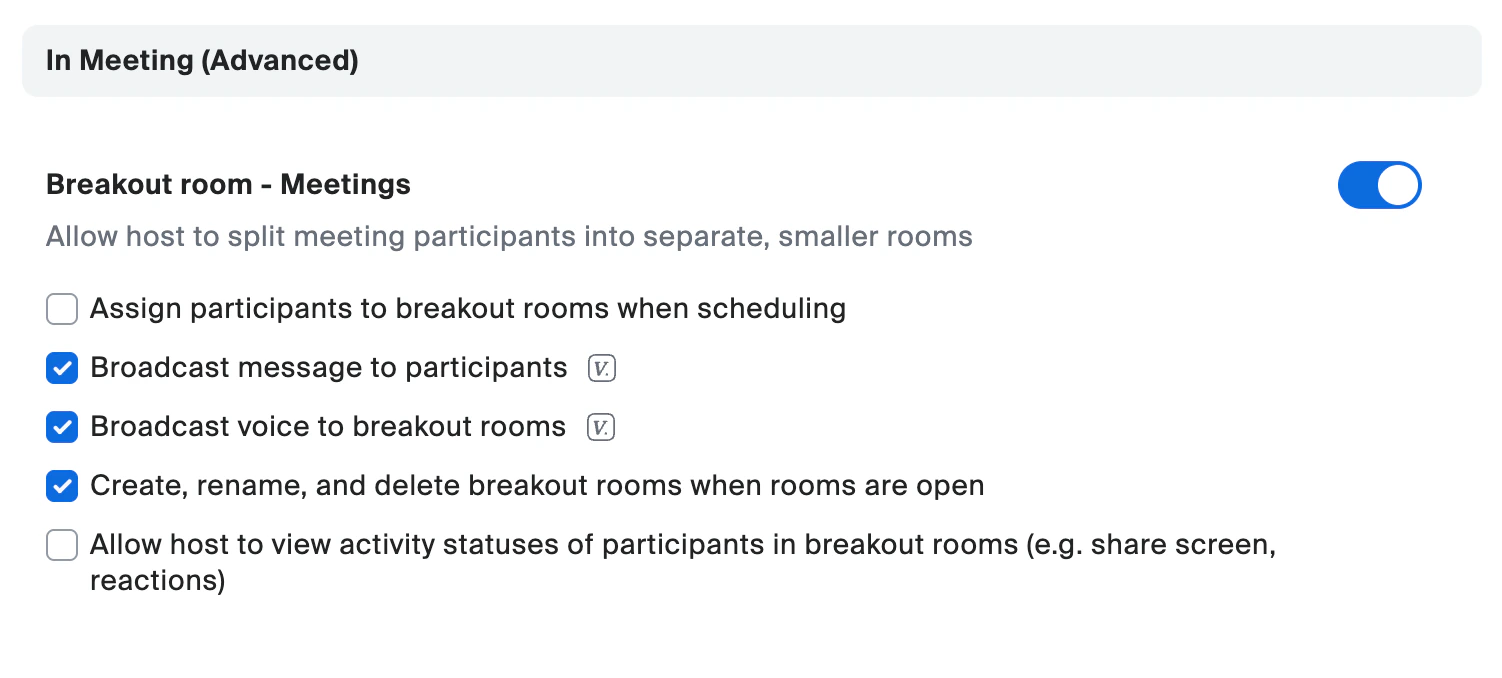
| Setting | Recommendation |
|---|---|
| Allow breakout rooms | On |
| Assign participants when scheduling | Off (unless very structured) |
| Broadcast message to participants | On |
| Broadcast voice to breakout rooms | On |
| Create, rename, delete rooms when open | On |
| Allow host to view activity statuses | Off |
Configure Accessibility & Captions
Remote Support
Recommendation: Off. IT support only, not needed for community events.Manual Captions
Recommendation: Off. Unless you have a live captioner.Automated Captions
Recommendation: OnA huge accessibility win. Makes your event accessible to deaf/hard-of-hearing members, non-native speakers, and anyone in a noisy environment.Save Captions
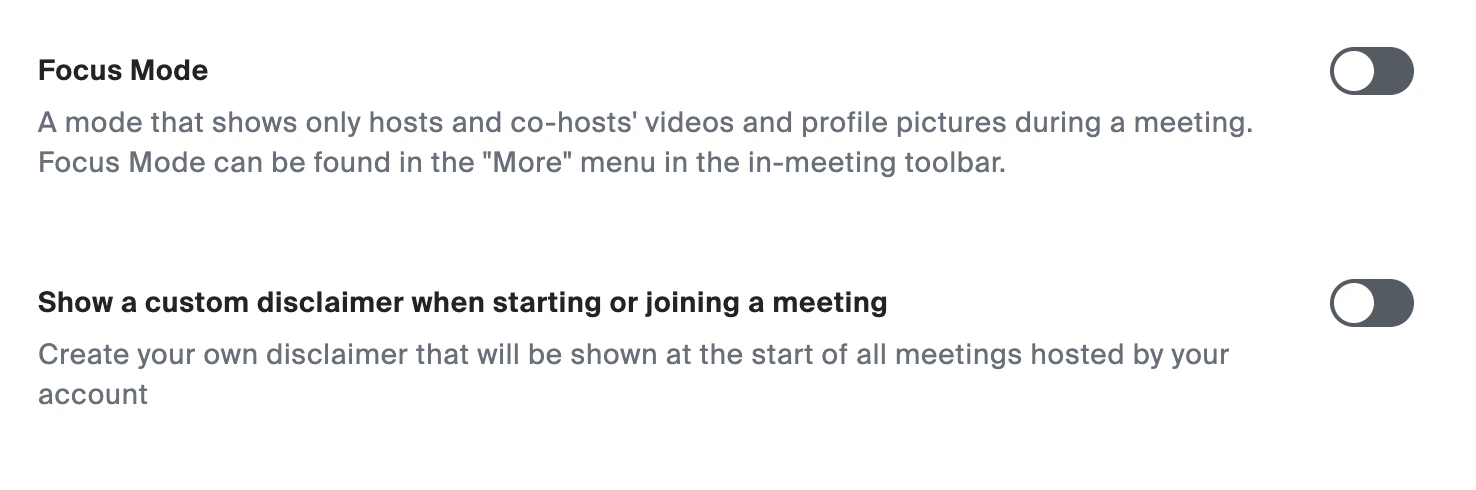
Recommendation: OnCreates a text record participants can reference later.Immersive View
Recommendation: Off. Novelty feature, not useful for professional events.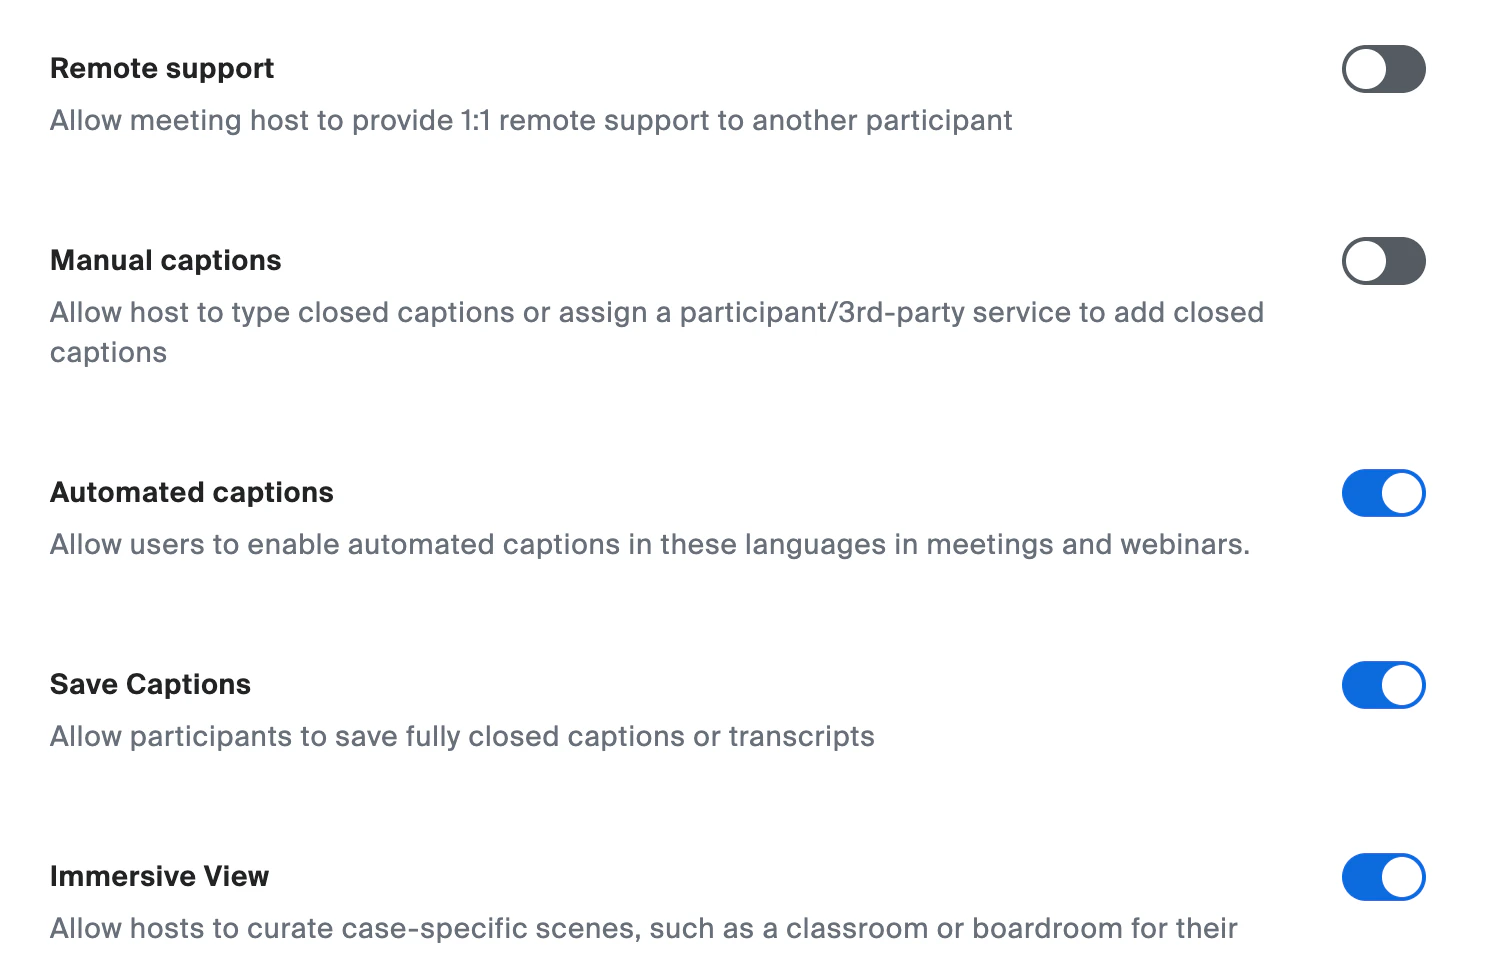
Scheduling a Meeting with Your Template
Now that your template exists, here’s how to use it.Start a New Meeting
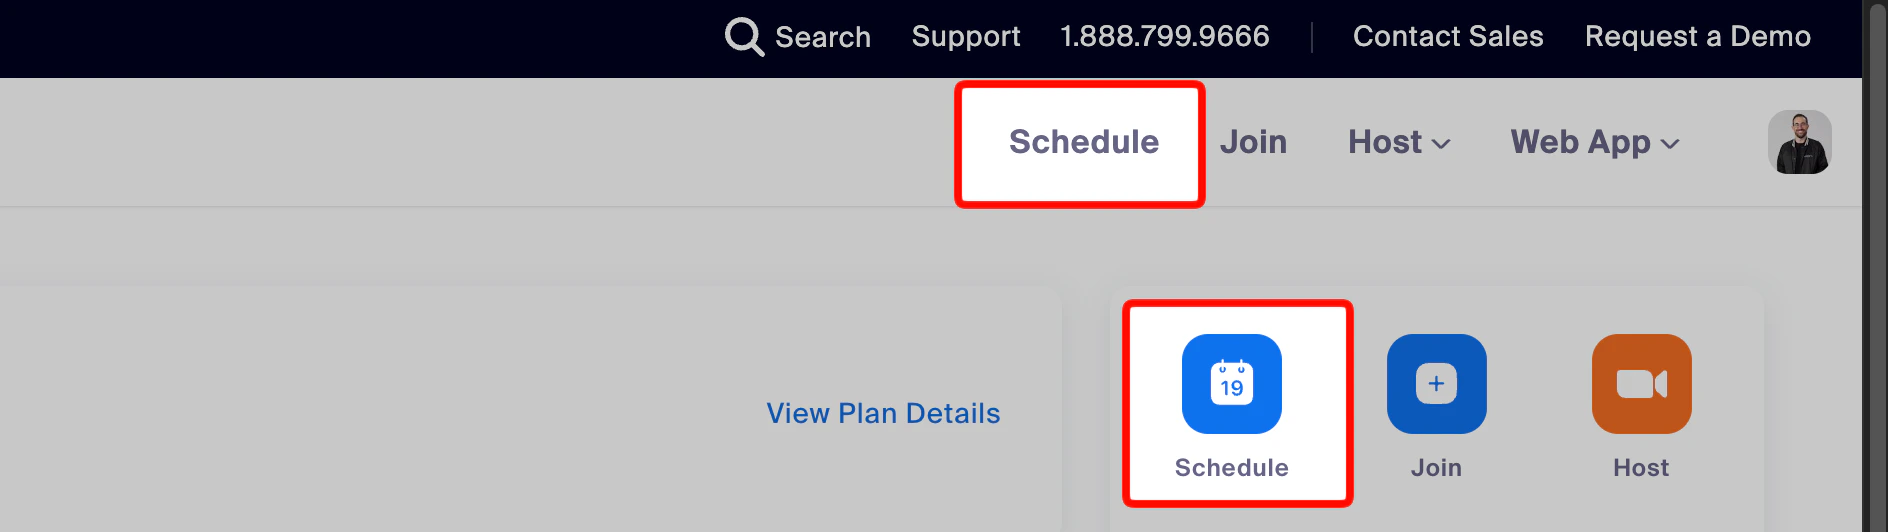
- Sign in to the Zoom web portal.
- Click Schedule in the top navigation bar.
Fill In Meeting Details
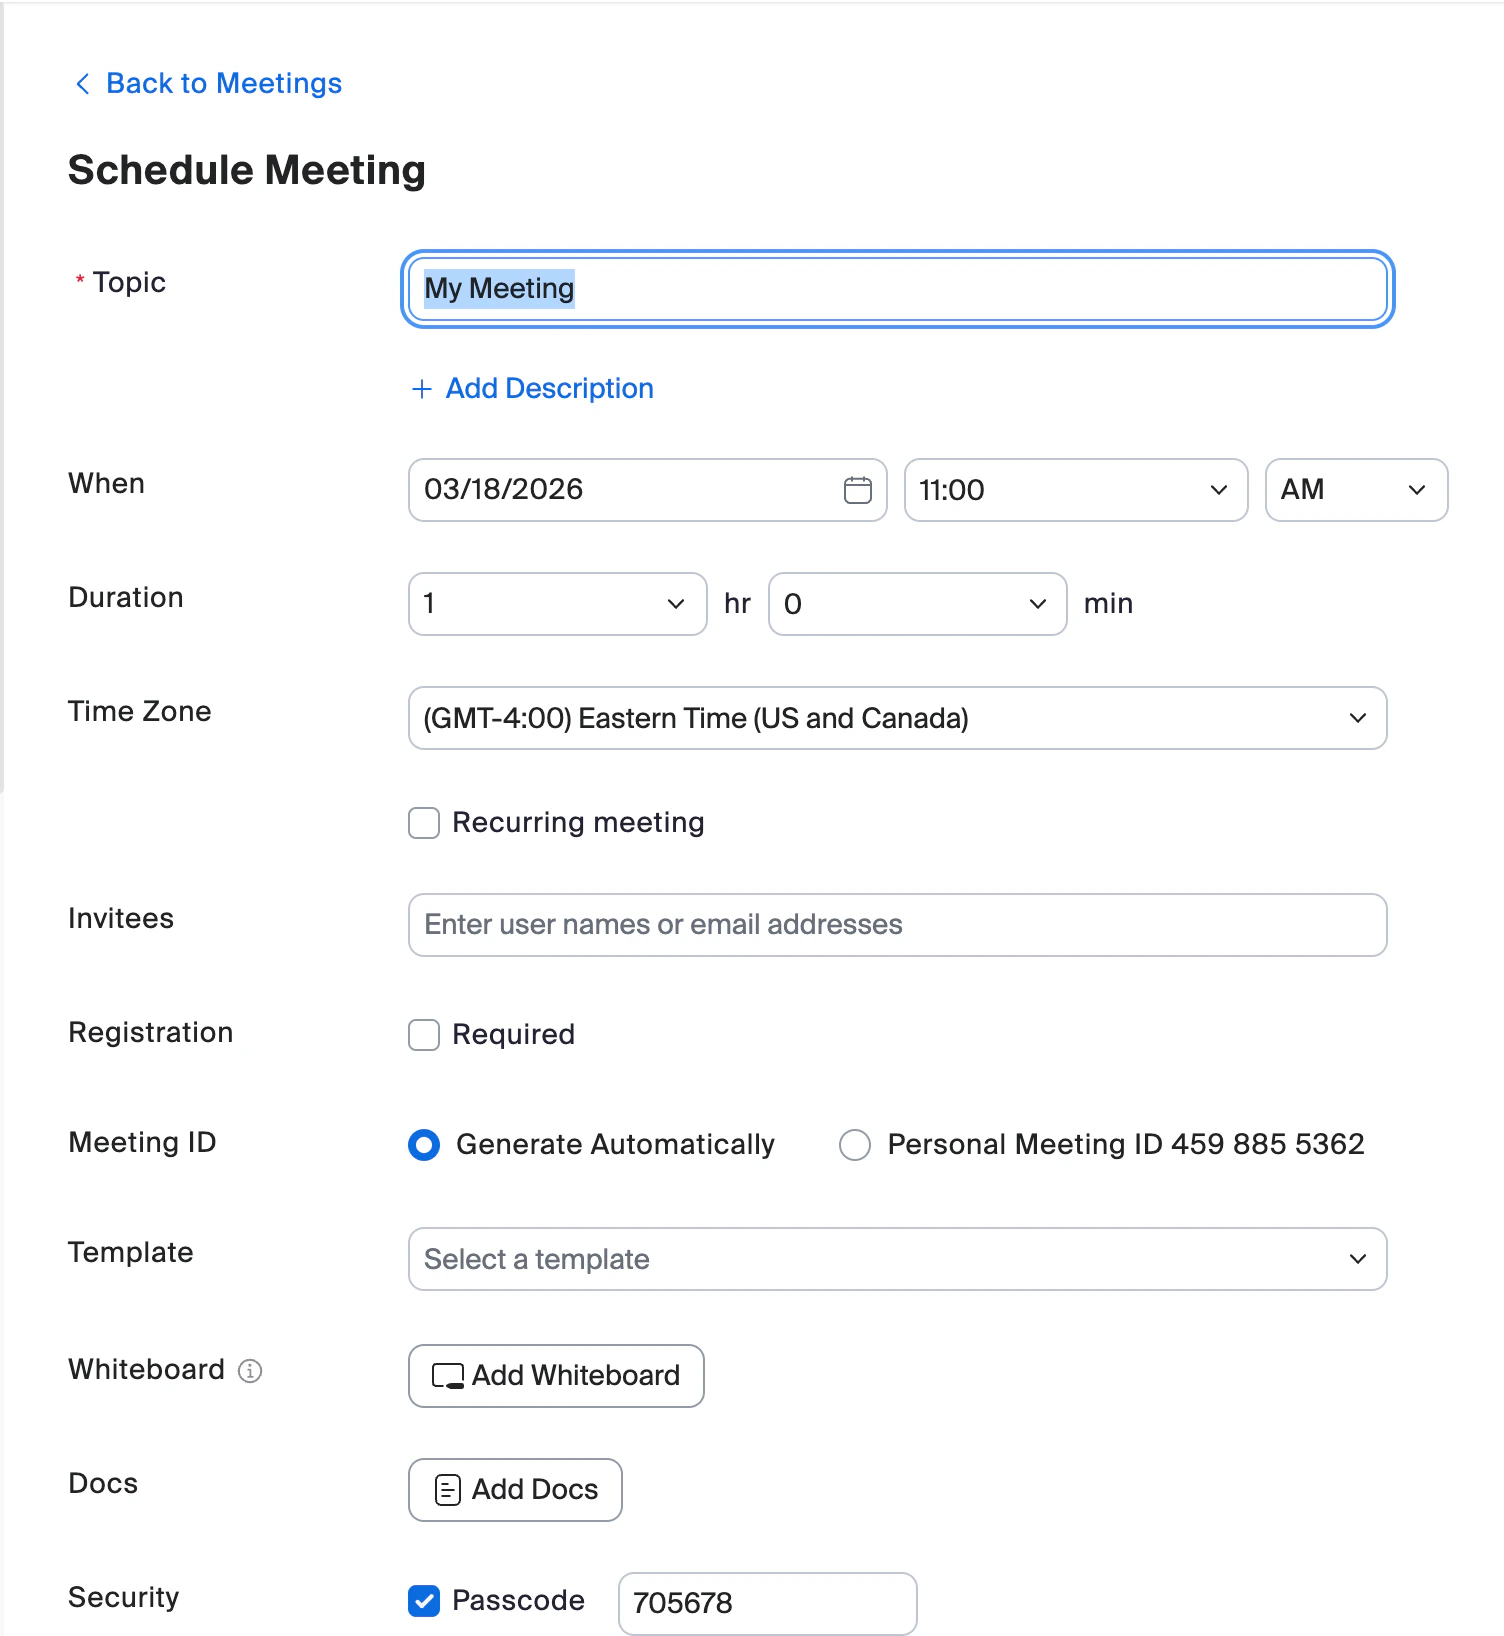
| Field | What to enter | Notes |
|---|---|---|
| Topic | Your event name (e.g., “CLG - AMA”) | Shows up in calendar invites |
| Description | Short summary | Appears on registration page and emails |
| When | Date and start time | Double-check timezone |
| Duration | Expected length | Informational only, Zoom won’t cut you off |
| Time Zone | Your local timezone | Note it in the description for global communities |
| Recurring meeting | Check if repeats | Set recurrence pattern for weekly events |
Configure Registration
Recommendation: RequiredGives you an attendee list, enables reminder emails, and provides data for follow-up.
Set the Meeting ID
Recommendation: Generate AutomaticallyDon’t use your Personal Meeting ID, it’s a static link anyone can reuse.
Select Your Template
In the Template dropdown, select your template (e.g., “Tightknit Tuesdays”). You’ll see a blue banner confirming all template settings were applied.
The template sets defaults. You can still override individual settings for this specific meeting.
Next Steps
Each of these builds on what you’ve set up in this guide. Tackle them in order, or jump to whichever is most relevant for your next event.Create a Post-Meeting Survey
Create a Post-Meeting Survey
Build a custom survey in Survey Management, then link it to your template. Ask about content quality, format preferences, and what topics to cover next. This is one of the most valuable feedback loops for community events.
Design a Custom Meeting Wallpaper
Design a Custom Meeting Wallpaper
Add community branding for a polished look when participants join. This is a quick win that makes your events feel intentional and on-brand.
Connect Your Event to Tightknit
Connect Your Event to Tightknit
Let community members register with one click from Slack. Tightknit syncs registrations to Zoom, sends confirmations, and posts events in your Slack channel.What the Tightknit integration gives you:
- One-click registration from Slack, no forms, no friction
- Automatic sync of registrations to your Zoom meeting
- Event reminders sent to registered attendees in Slack
- A central place to post recordings and follow-ups in the event thread
Run a Test Event
Run a Test Event
Schedule a test meeting with your template. Walk through as both host and attendee. Verify recording, survey, and registration flow. Catching issues in a dry run is much better than discovering them live.
Quick Reference
| Category | Setting | Recommended |
|---|---|---|
| AI Companion | Allow questions | On (auto-start) |
| AI Companion | Meeting summary | On (auto-start, share broadly) |
| Waiting Room | Off (solo) / On (co-host) | |
| Video | Host video | On |
| Video | Participant video | On |
| Audio | Mute on join | On |
| Whiteboard | Standalone | On |
| Recording | Auto-record | Cloud |
| Recording | Separate files | On |
| Recording | Audio transcript | On |
| Recording | Save captions as VTT | On |
| Chat | Permissions | Everyone (or Host only for large) |
| Chat | DMs | On |
| Chat | Join/leave sound | Off |
| Chat | File sharing | On |
| Feedback | Co-host | On |
| Feedback | Polls/Quizzes | On |
| Feedback | Meeting survey | On |
| Feedback | End-of-meeting survey | Off |
| Screen Sharing | Who can share | Host only |
| Screen Sharing | Annotations | Off |
| Screen Sharing | Remote control | Off |
| Participants | Rejoin after removal | Off |
| Participants | Rename | Off |
| Breakout Rooms | Enabled | On |
| Breakout Rooms | Pre-assign | Off |
| Breakout Rooms | Broadcast message & voice | On |
| Captions | Automated | On |
| Captions | Save | On |
| Immersive View | Off | |
| Focus Mode | Off | |
| Custom Disclaimer | Off | |
| Wallpaper | Set up later |