Prerequisites
- A Slack workspace on the Business+ or Enterprise plan
- An Auth0 tenant (free tier works)
Setting up Slack SSO
In Auth0
Auth0 provides a pre-built Slack SSO integration that handles the SAML configuration for you.Open SSO Integrations
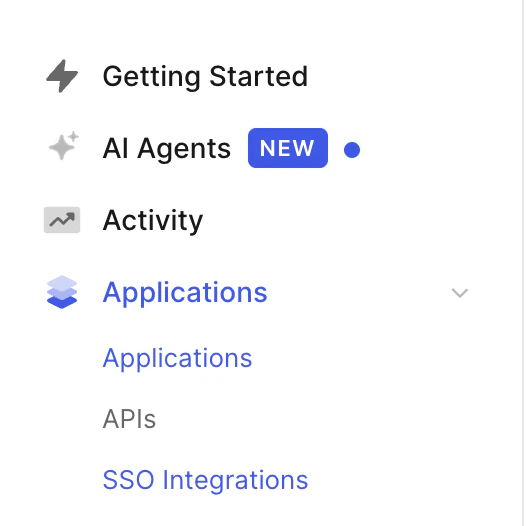
Auth0 sidebar: Applications > SSO Integrations
Create a new SSO integration

SSO Integrations page
Select Slack Single Sign On
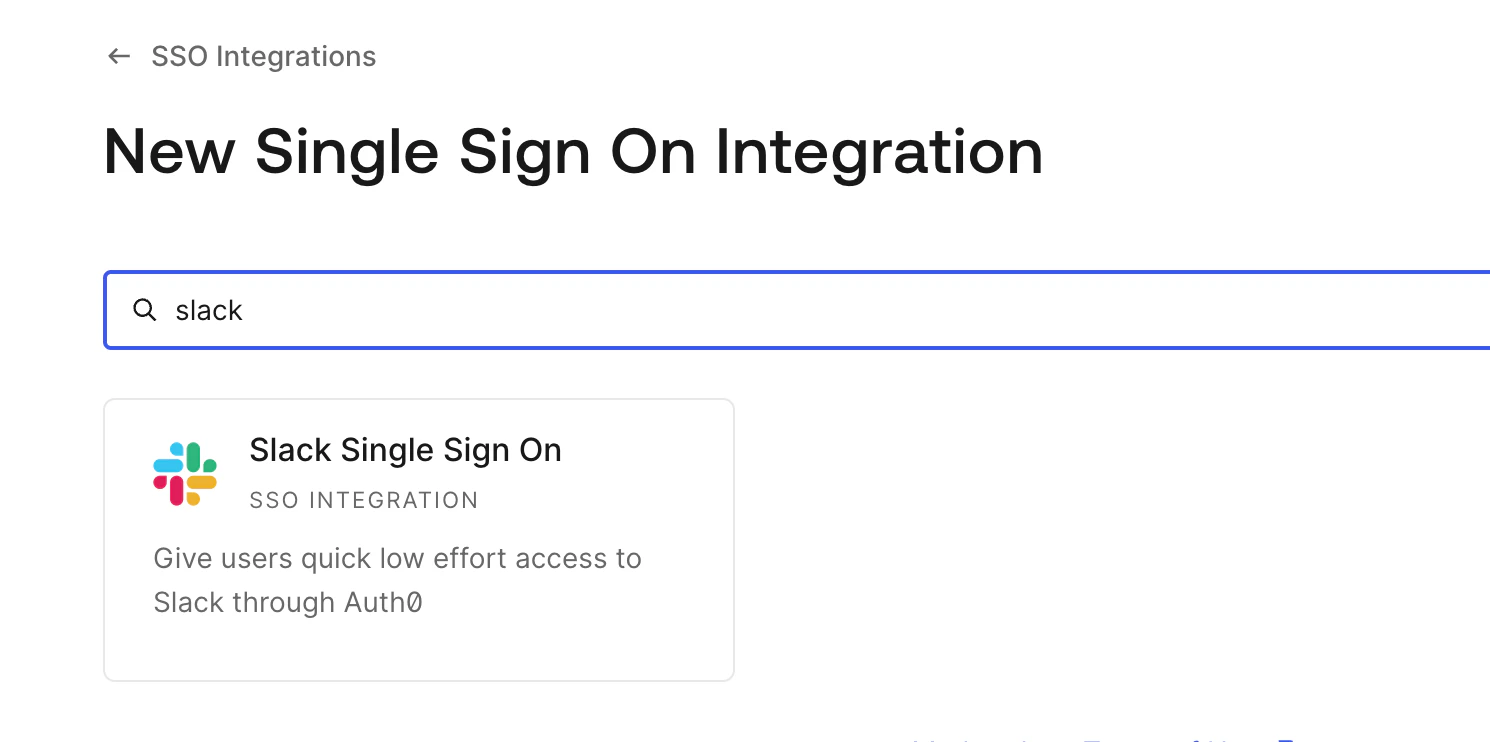
Search for the Slack SSO integration
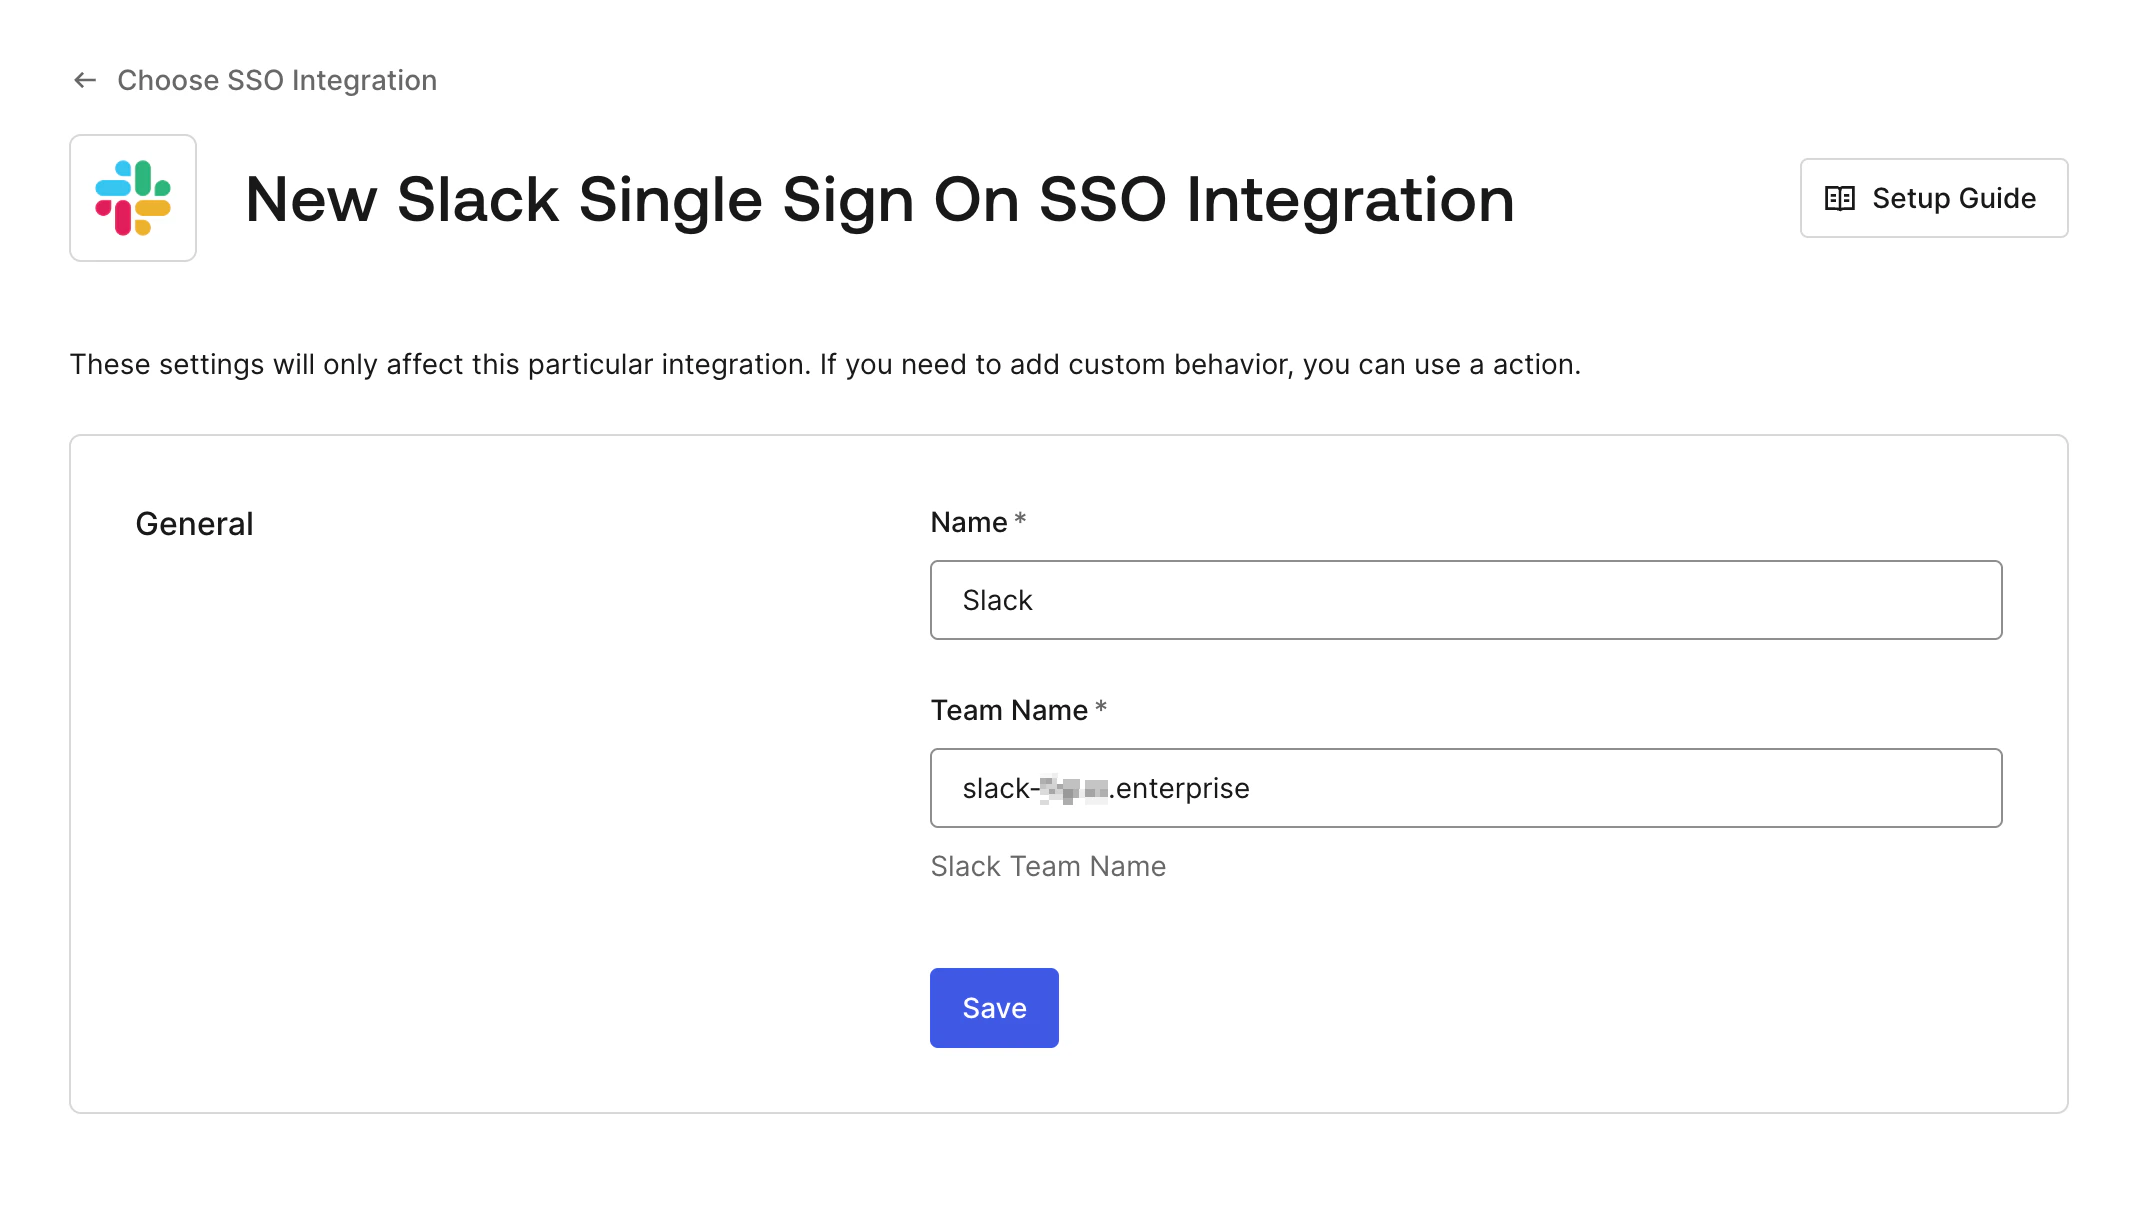
Name it and save
Slack) and your Slack Team Name, then click Save:- Business+: your workspace URL slug, e.g.
your-workspace(fromyour-workspace.slack.com) - Enterprise Grid: your Grid org slug with the
.enterprisesuffix, e.g.your-workspace.enterprise
Configure the Slack SSO integration
In Slack
Open Slack SSO Settings
Fill in the SAML fields
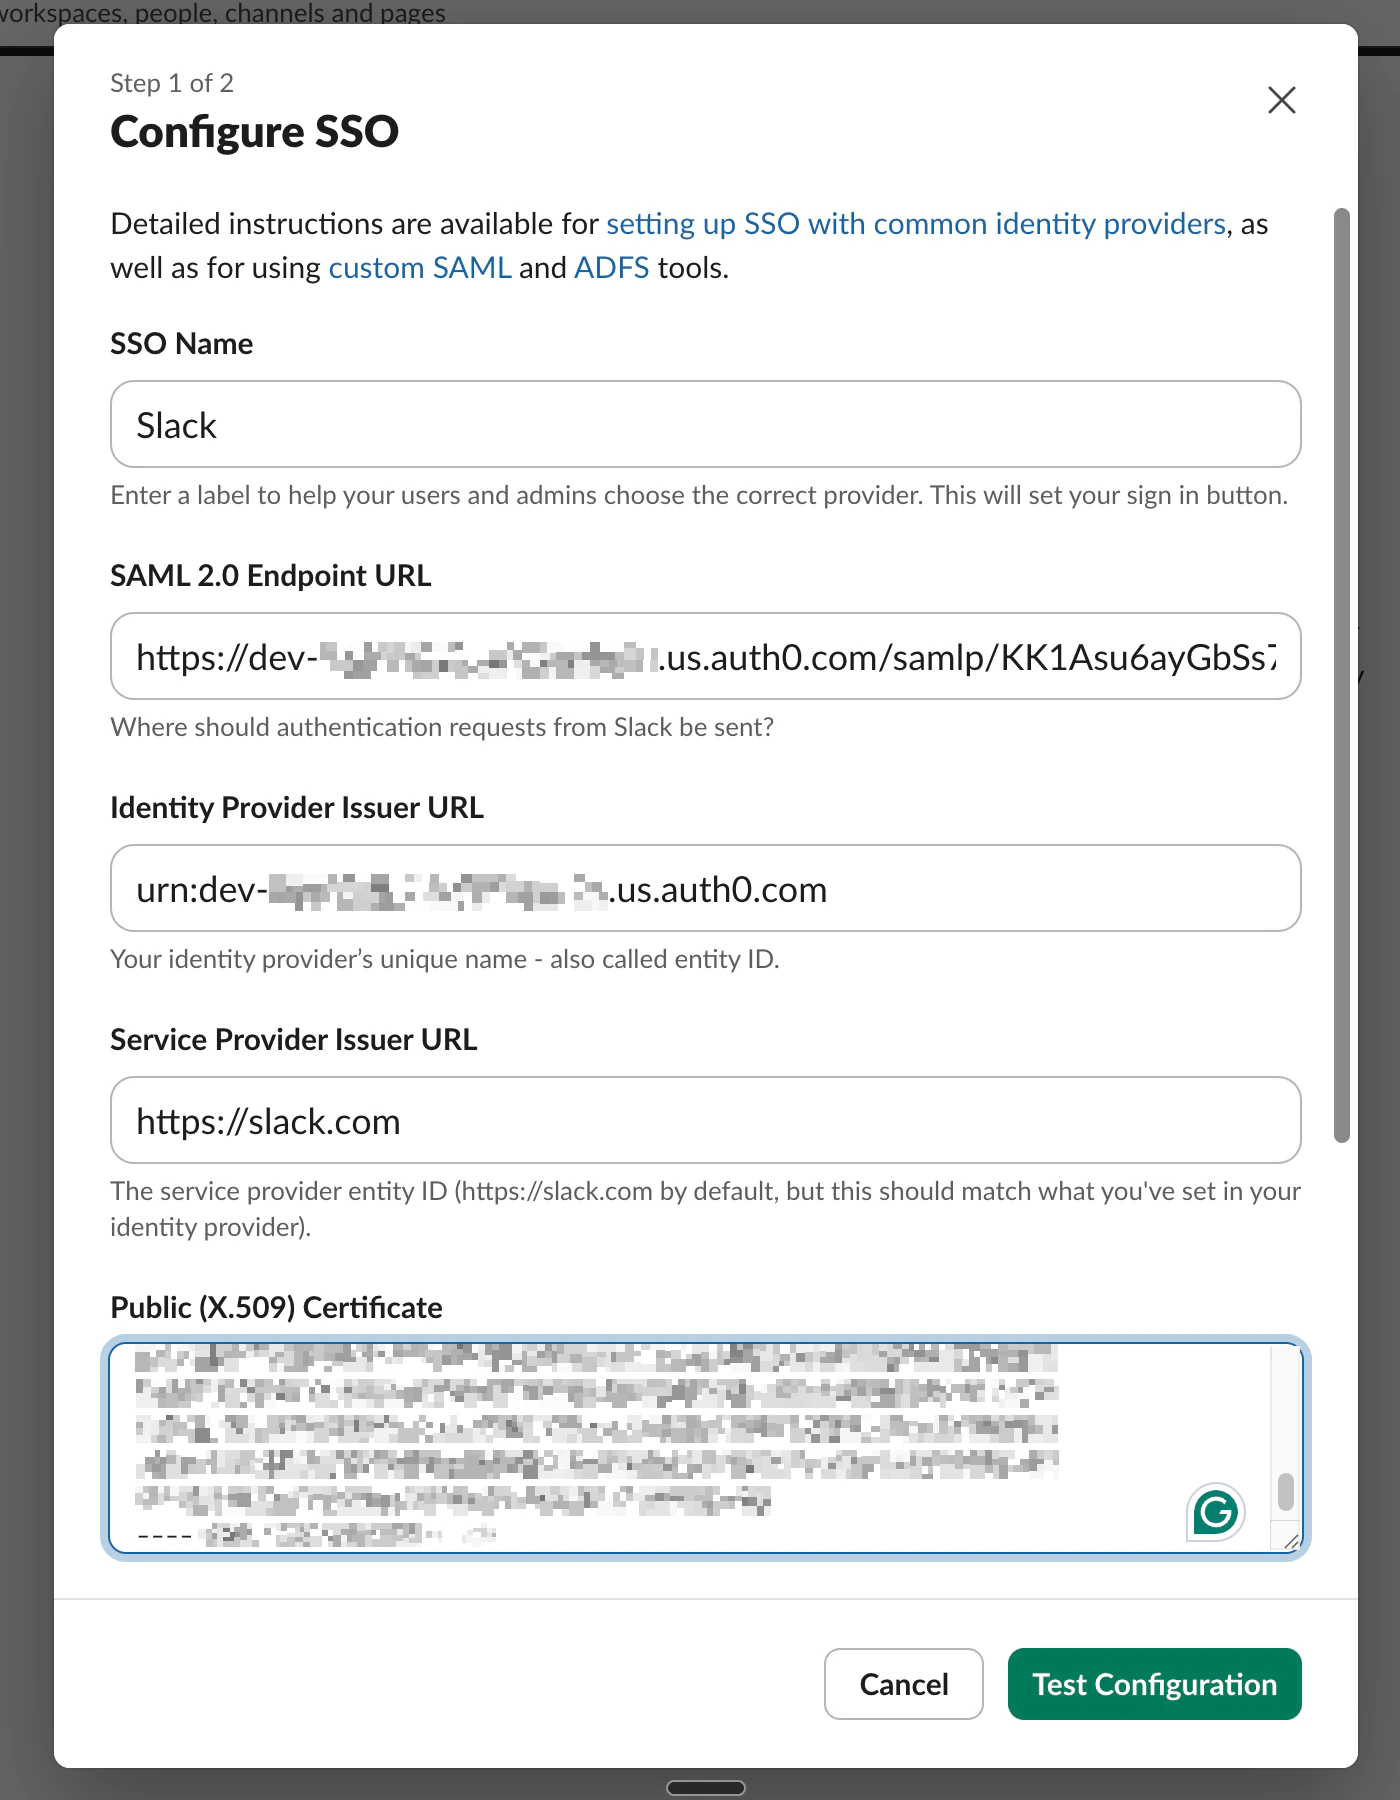
Slack Configure SSO dialog with Auth0 values filled in
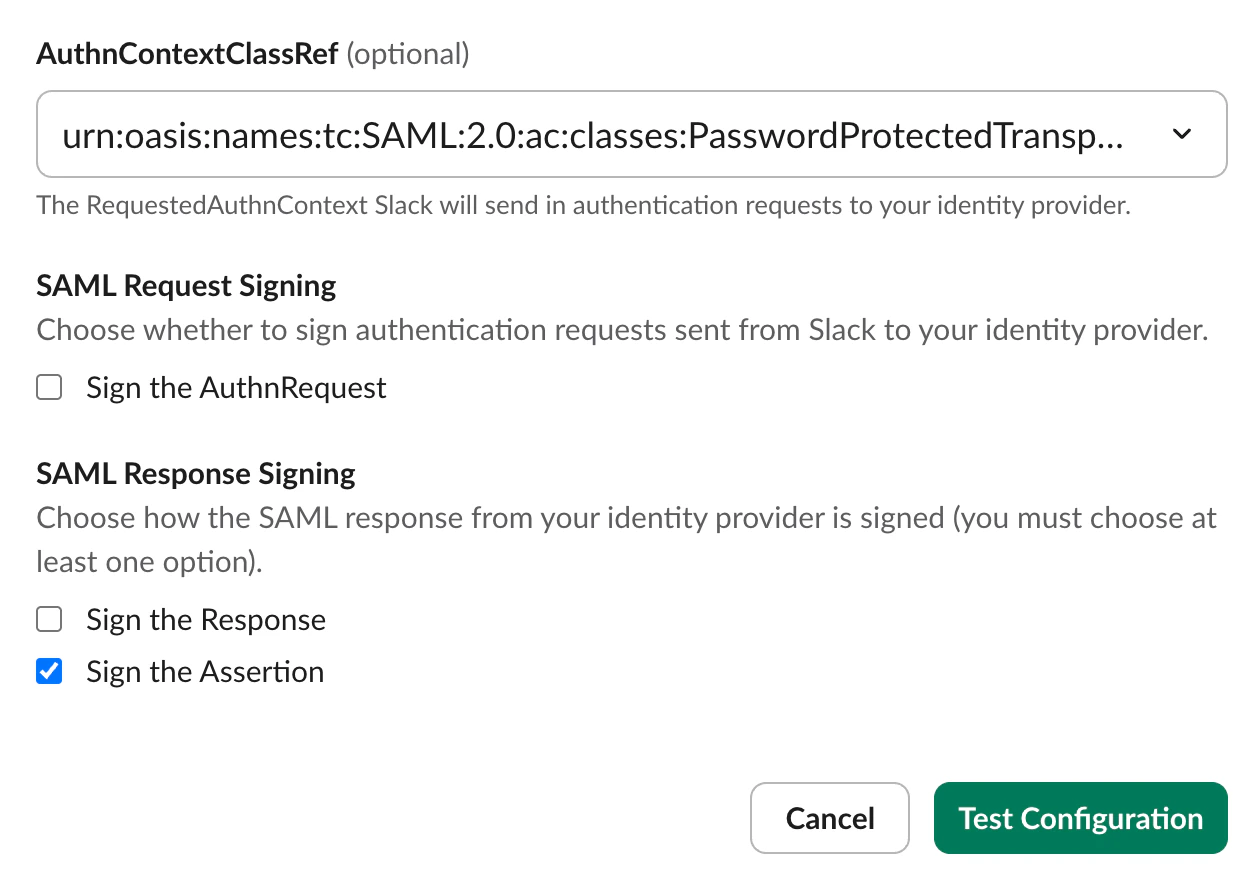
Set signing and authentication context
- AuthnContextClassRef: Leave as the default (
urn:oasis:names:tc:SAML:2.0:ac:classes:PasswordProtectedTransport) - SAML Request Signing: Leave unchecked unless your IDP requires signed requests
- SAML Response Signing: Check Sign the Assertion (at least one signing option is required)
SAML signing options
Test the configuration

Test Configuration button
Apply the configuration
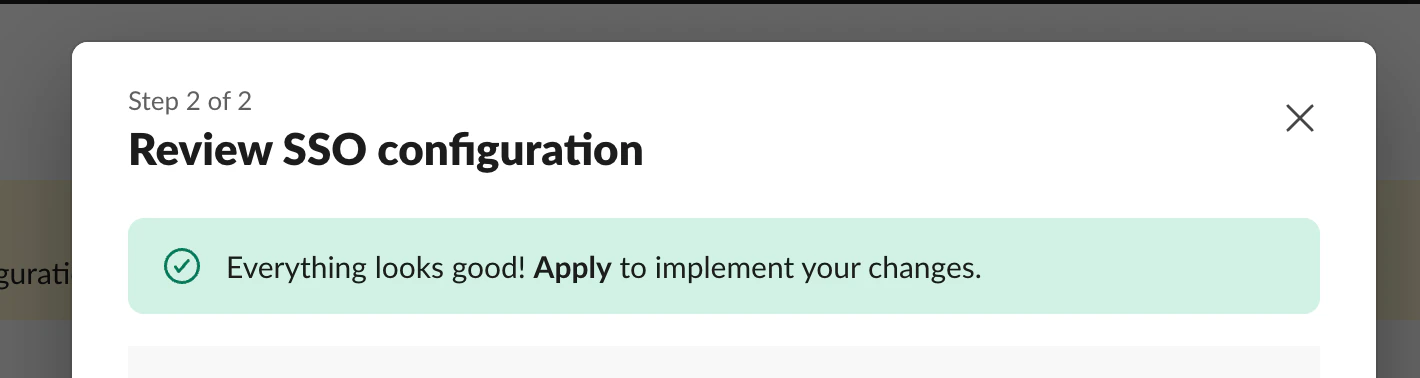
SSO configuration test passed
Signing the SAML response (optional)
InResponseTo) and is defense-in-depth, not a prerequisite — the default Auth0 Slack SSO integration signs only the assertion for this reason.Follow the steps below only if your security team explicitly requires signResponse (for example, to satisfy an internal SAML hardening policy or a compliance control). Doing so requires replacing the pre-built SSO integration with a custom SAML application.Create a custom SAML application
Enable the SAML2 Web App addon
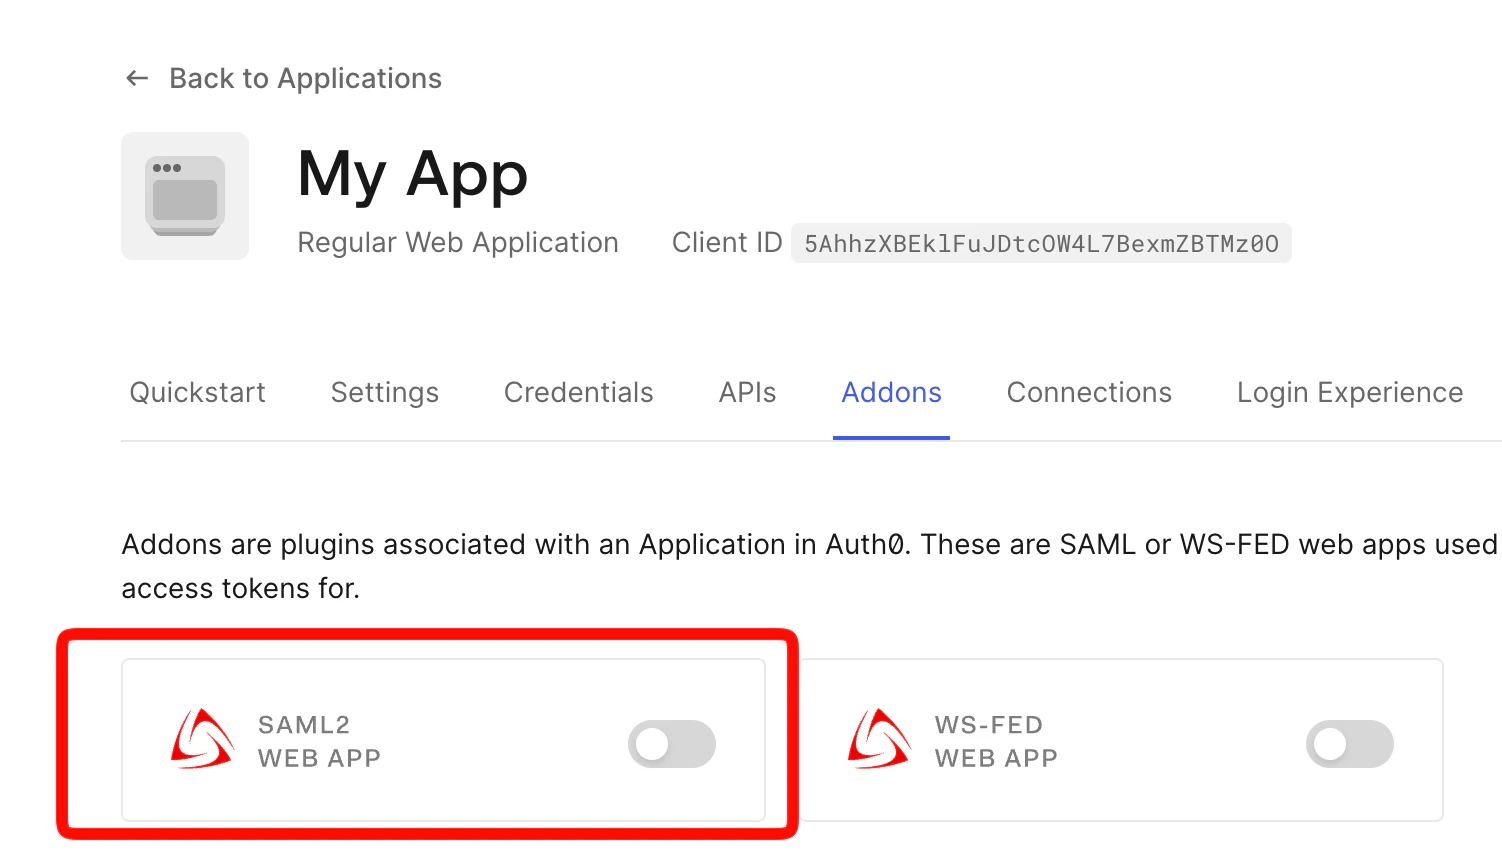
Auth0 Application Addons tab with SAML2 Web App
Set signResponse to true
signResponse property and set it to true.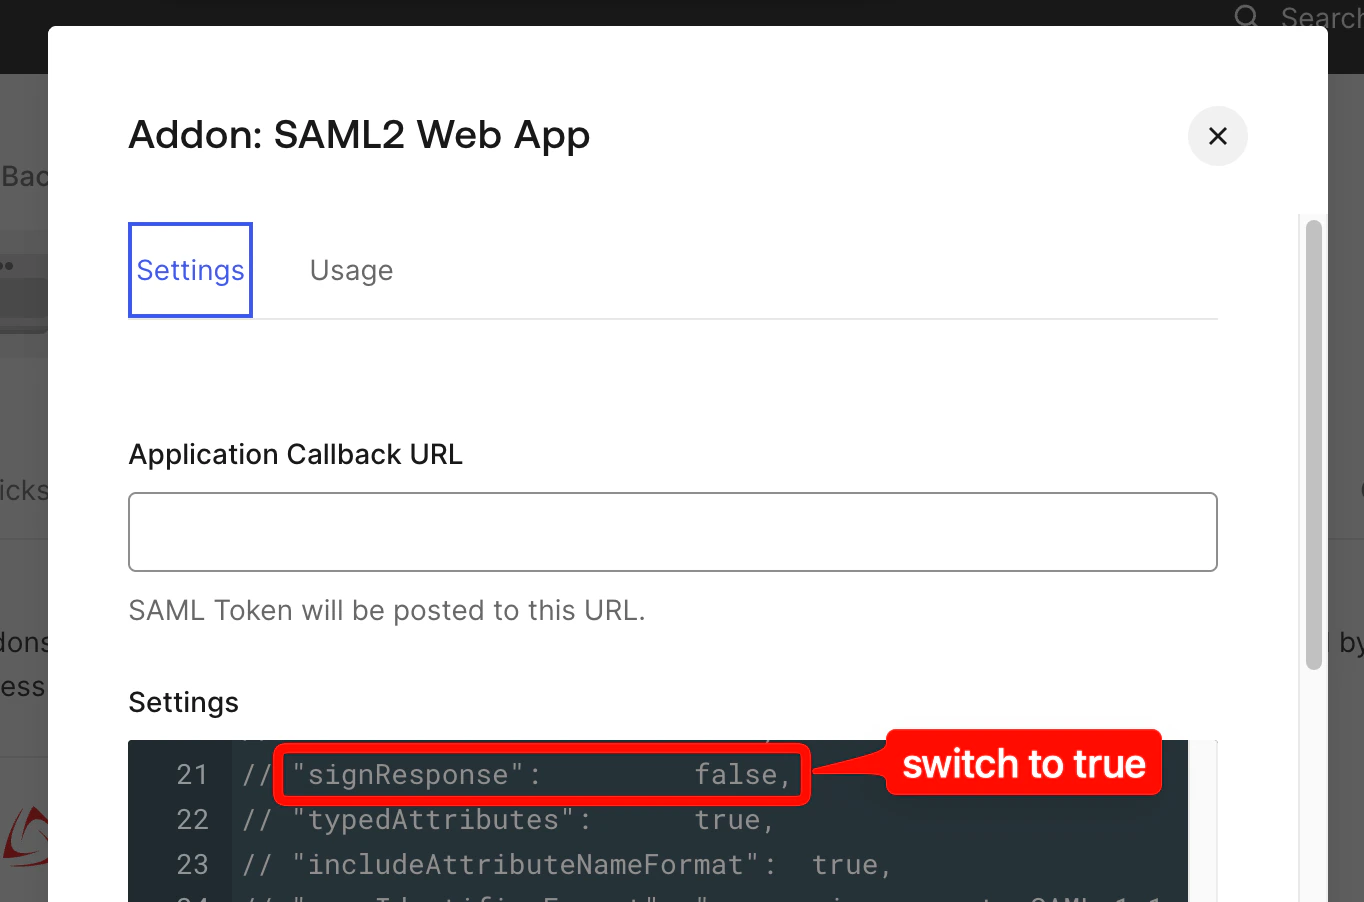
Set signResponse to true in the SAML2 addon settings
Use the new endpoint in Slack
Verifying Tightknit community membership (optional)
If you use a social connection (Google, Microsoft, etc.) as the login method in Auth0, anyone with a valid social account can authenticate, even if they are not a member of your community. The steps below add a post-login check that verifies membership via the Tightknit API before granting access. The full login flow with the membership check in place:Additional prerequisites
- A Google (or other) social connection enabled in Auth0
- A Tightknit API key for your community
In Tightknit Studio
Get your Tightknit API key
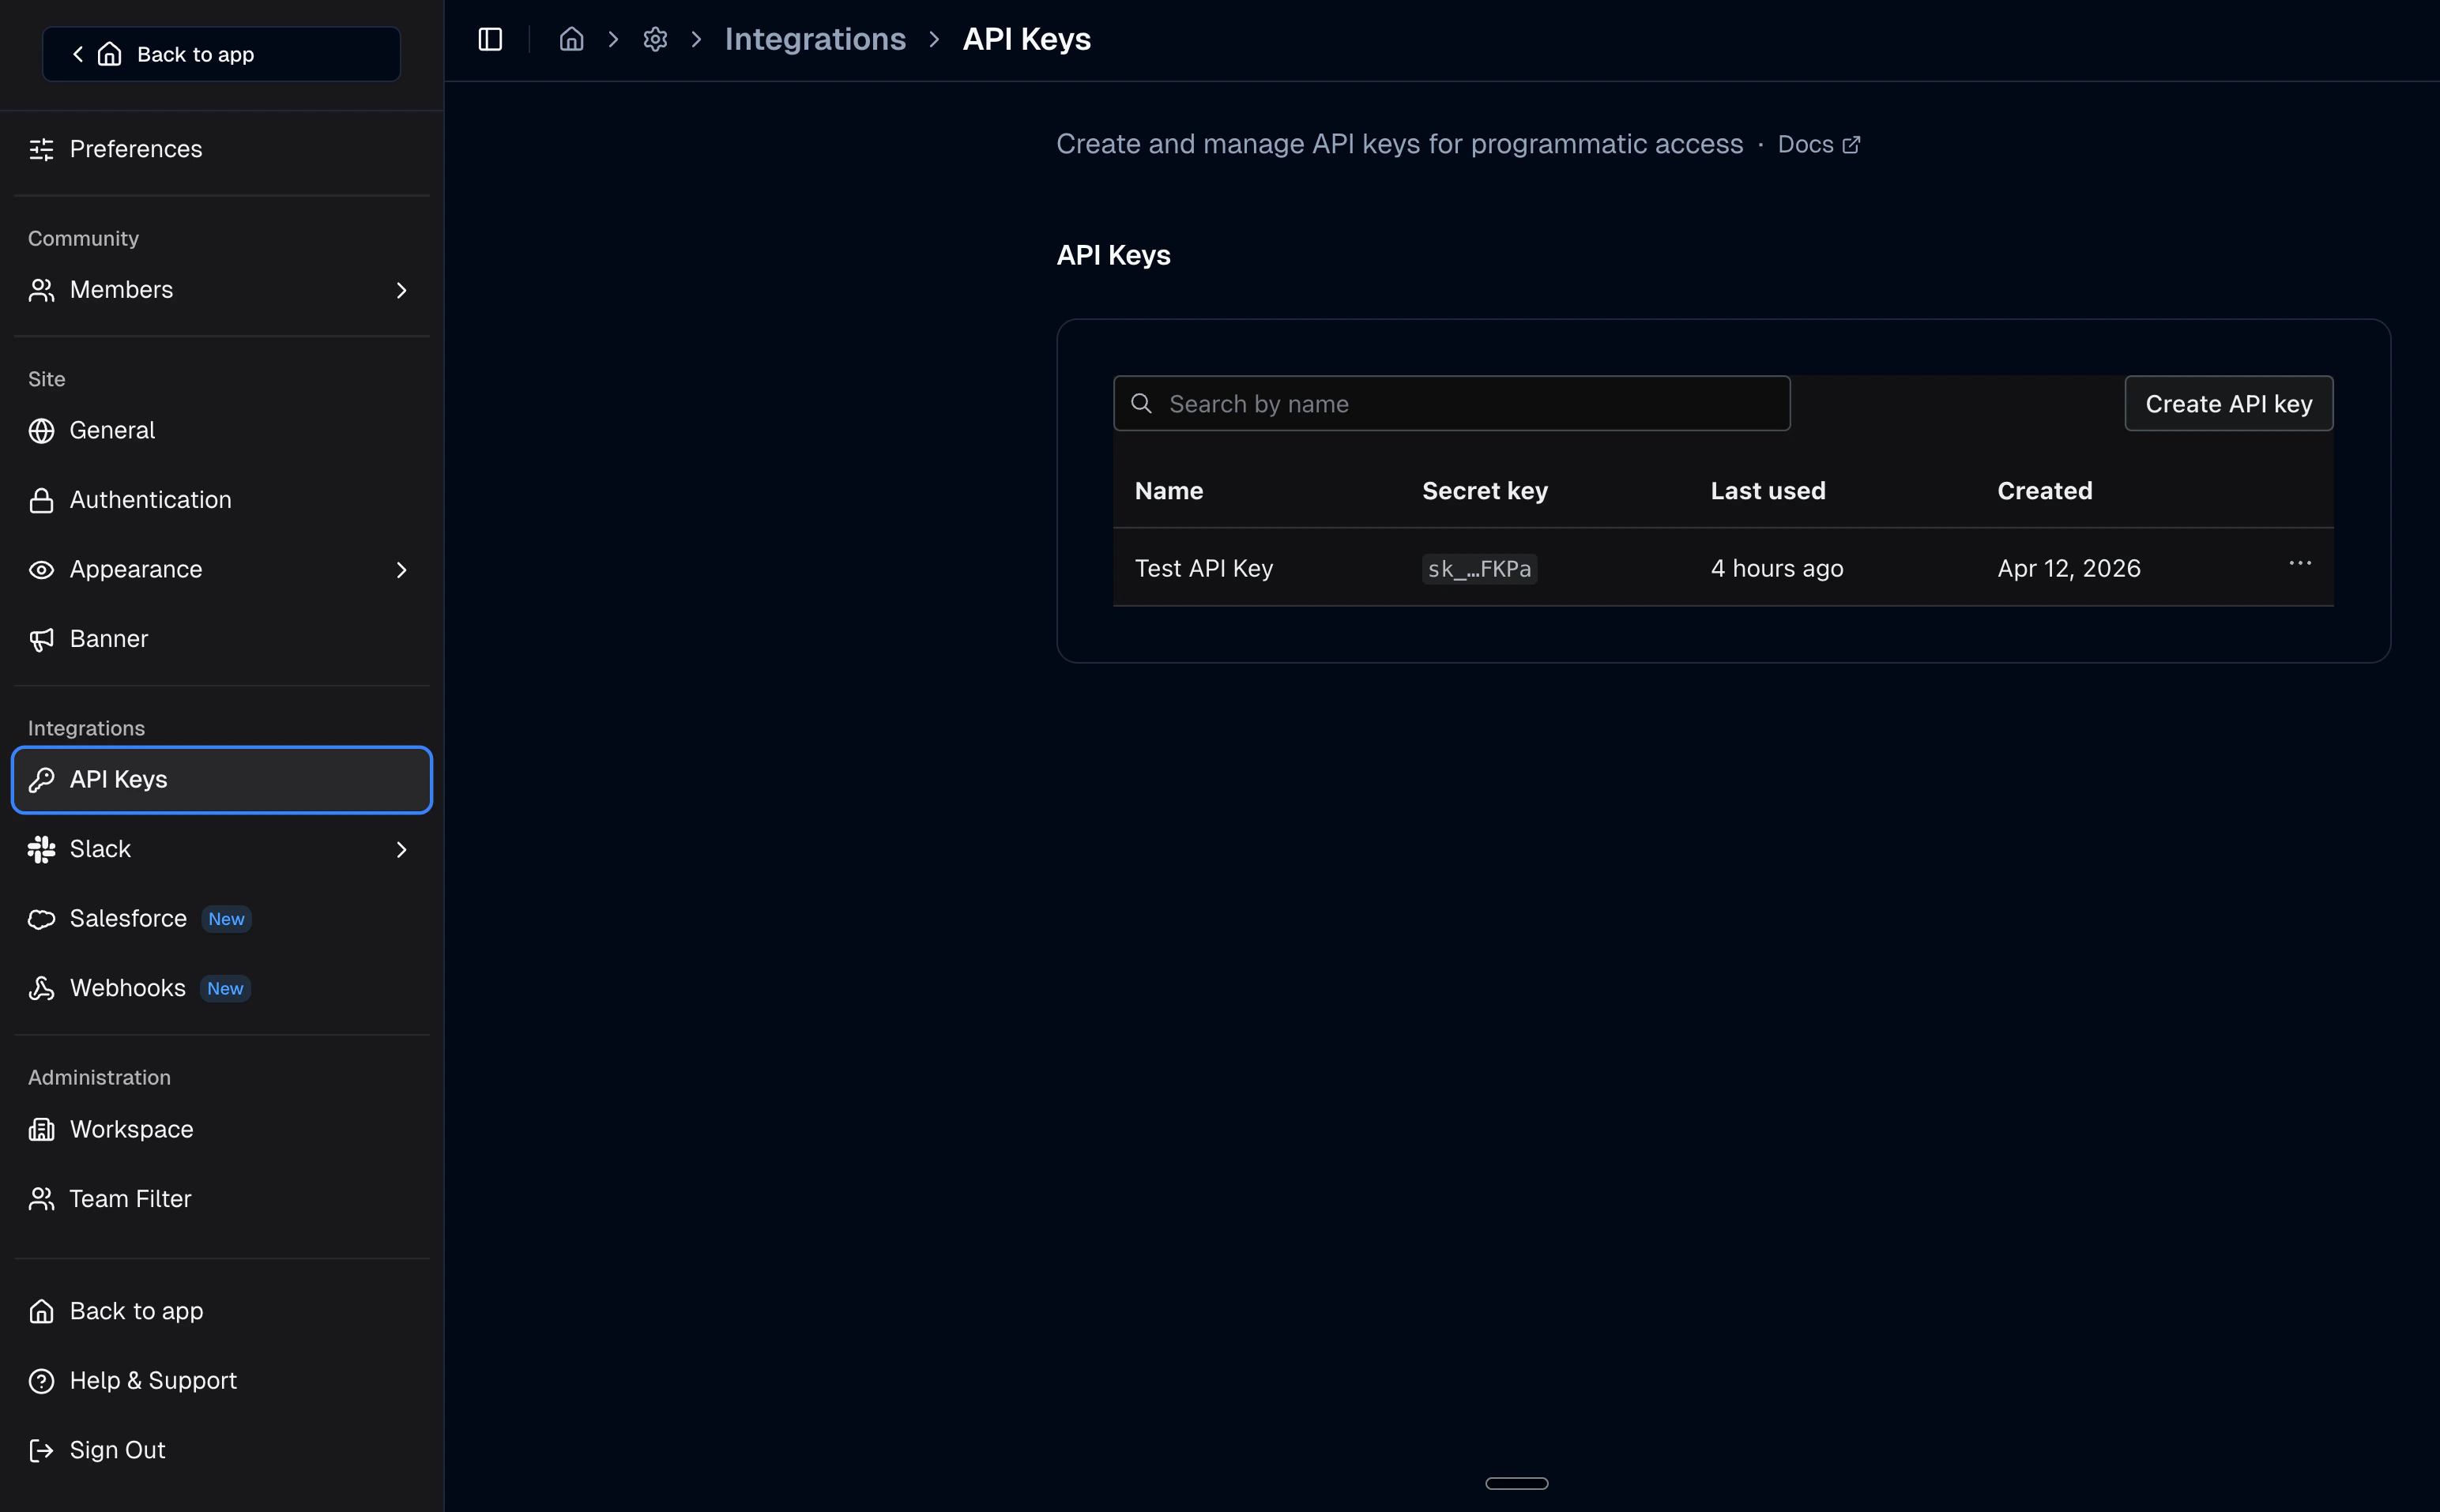
Tightknit Studio API Keys page
In Auth0
Create the post-login action
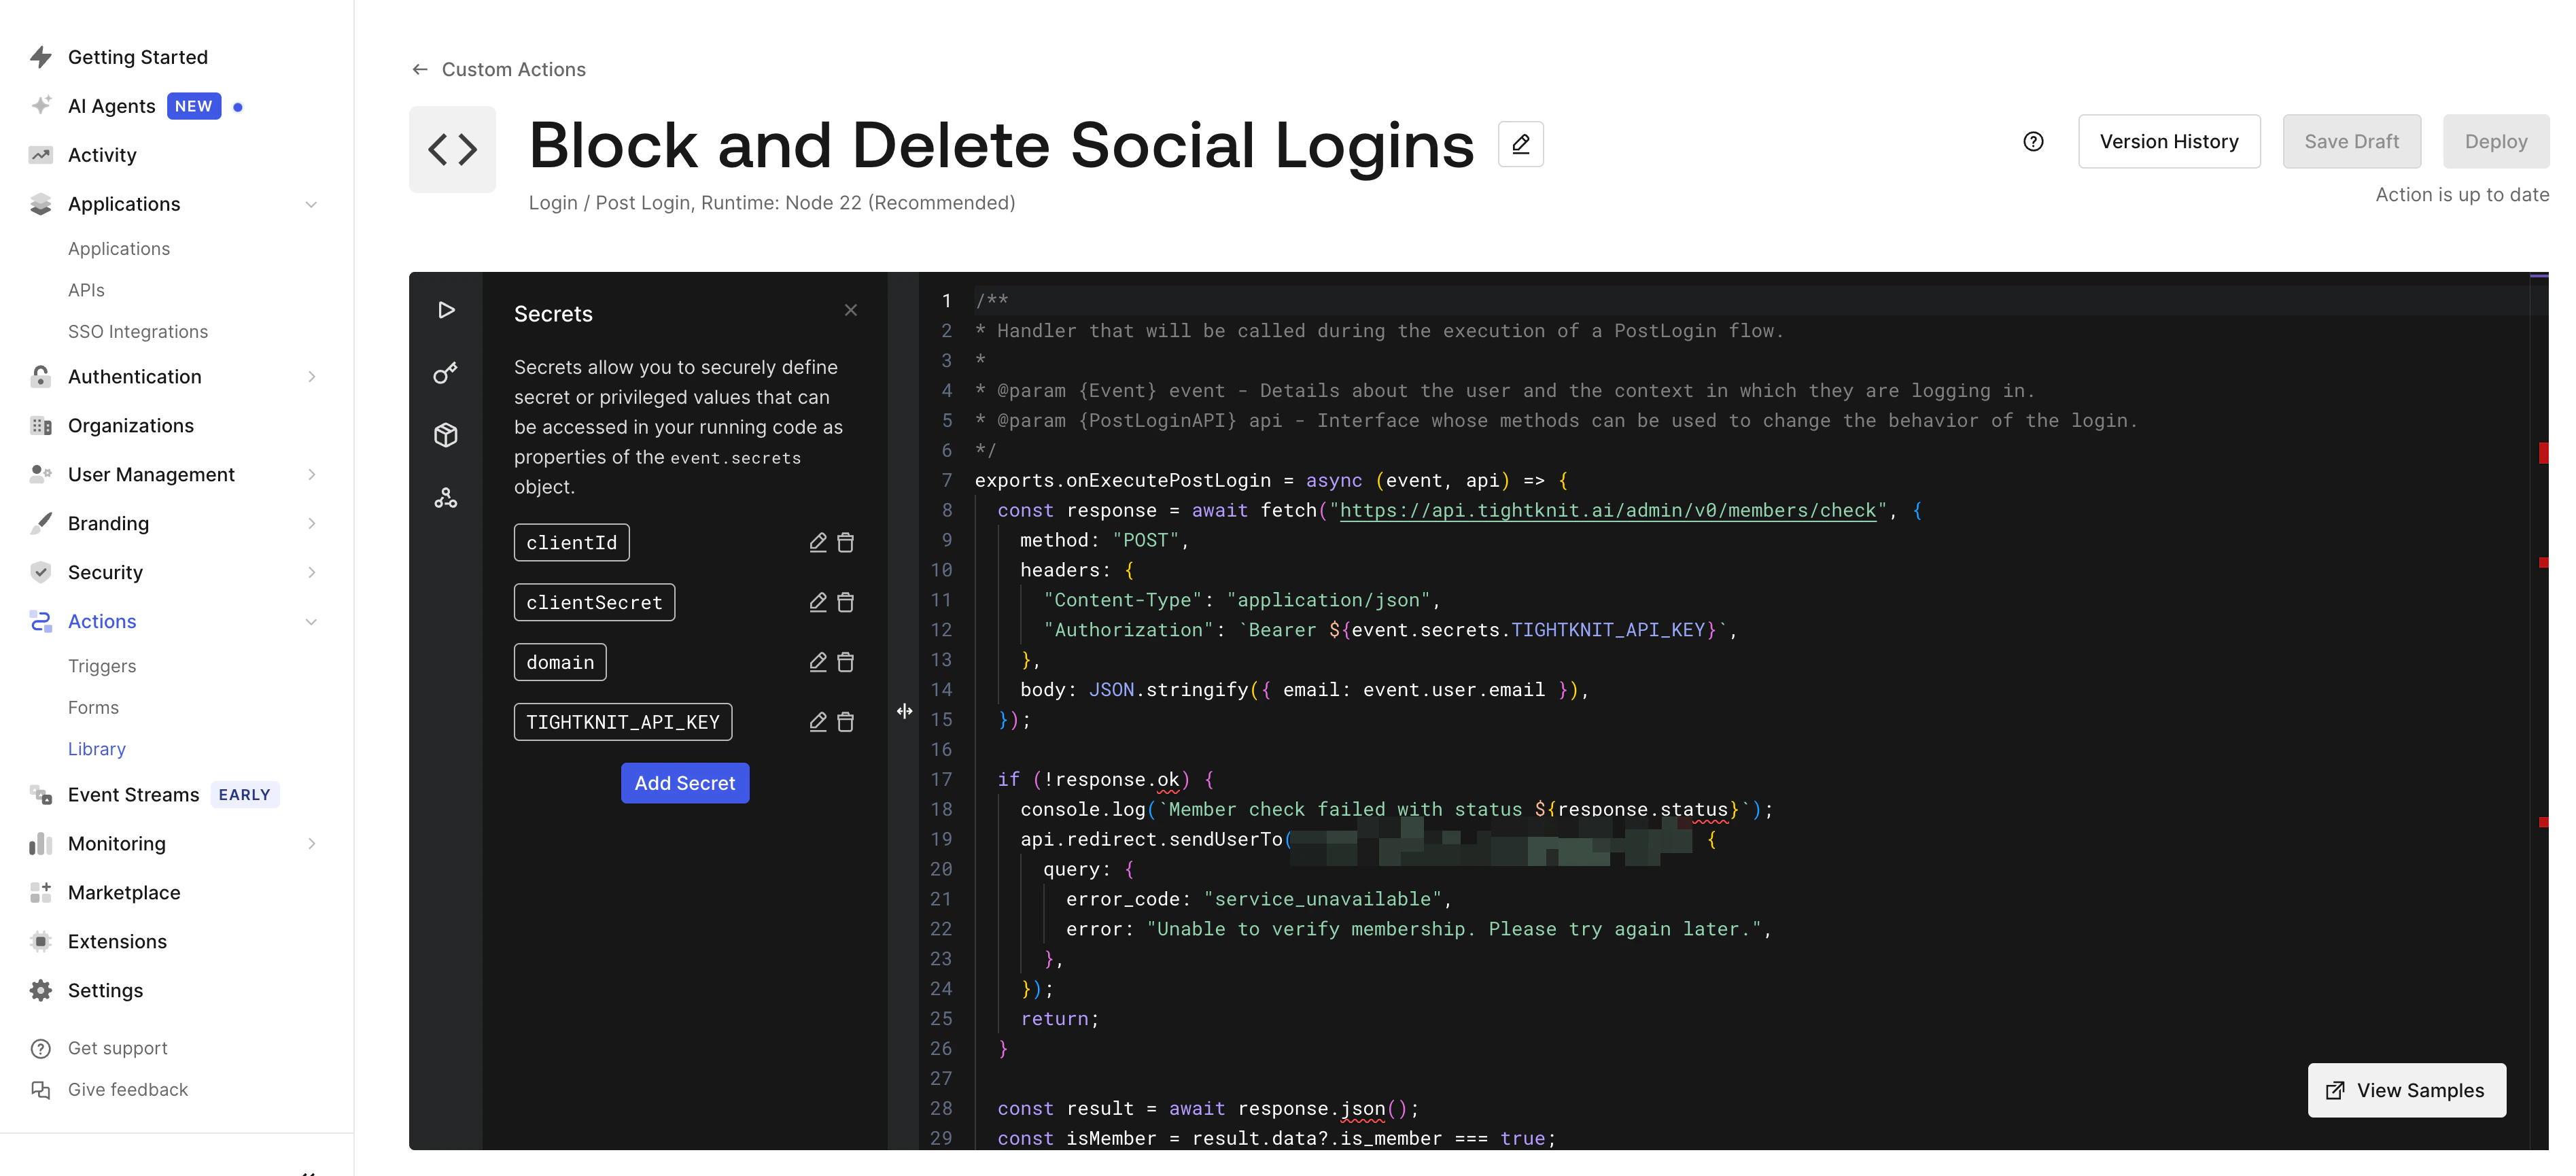
Auth0 Action editor with secrets panel
Add secrets to the action
Deploy and attach to the Login flow
- Click Deploy in the action editor
- Go to Actions > Flows > Login
- Drag Tightknit Membership Check into the flow after the default login step
- Click Apply
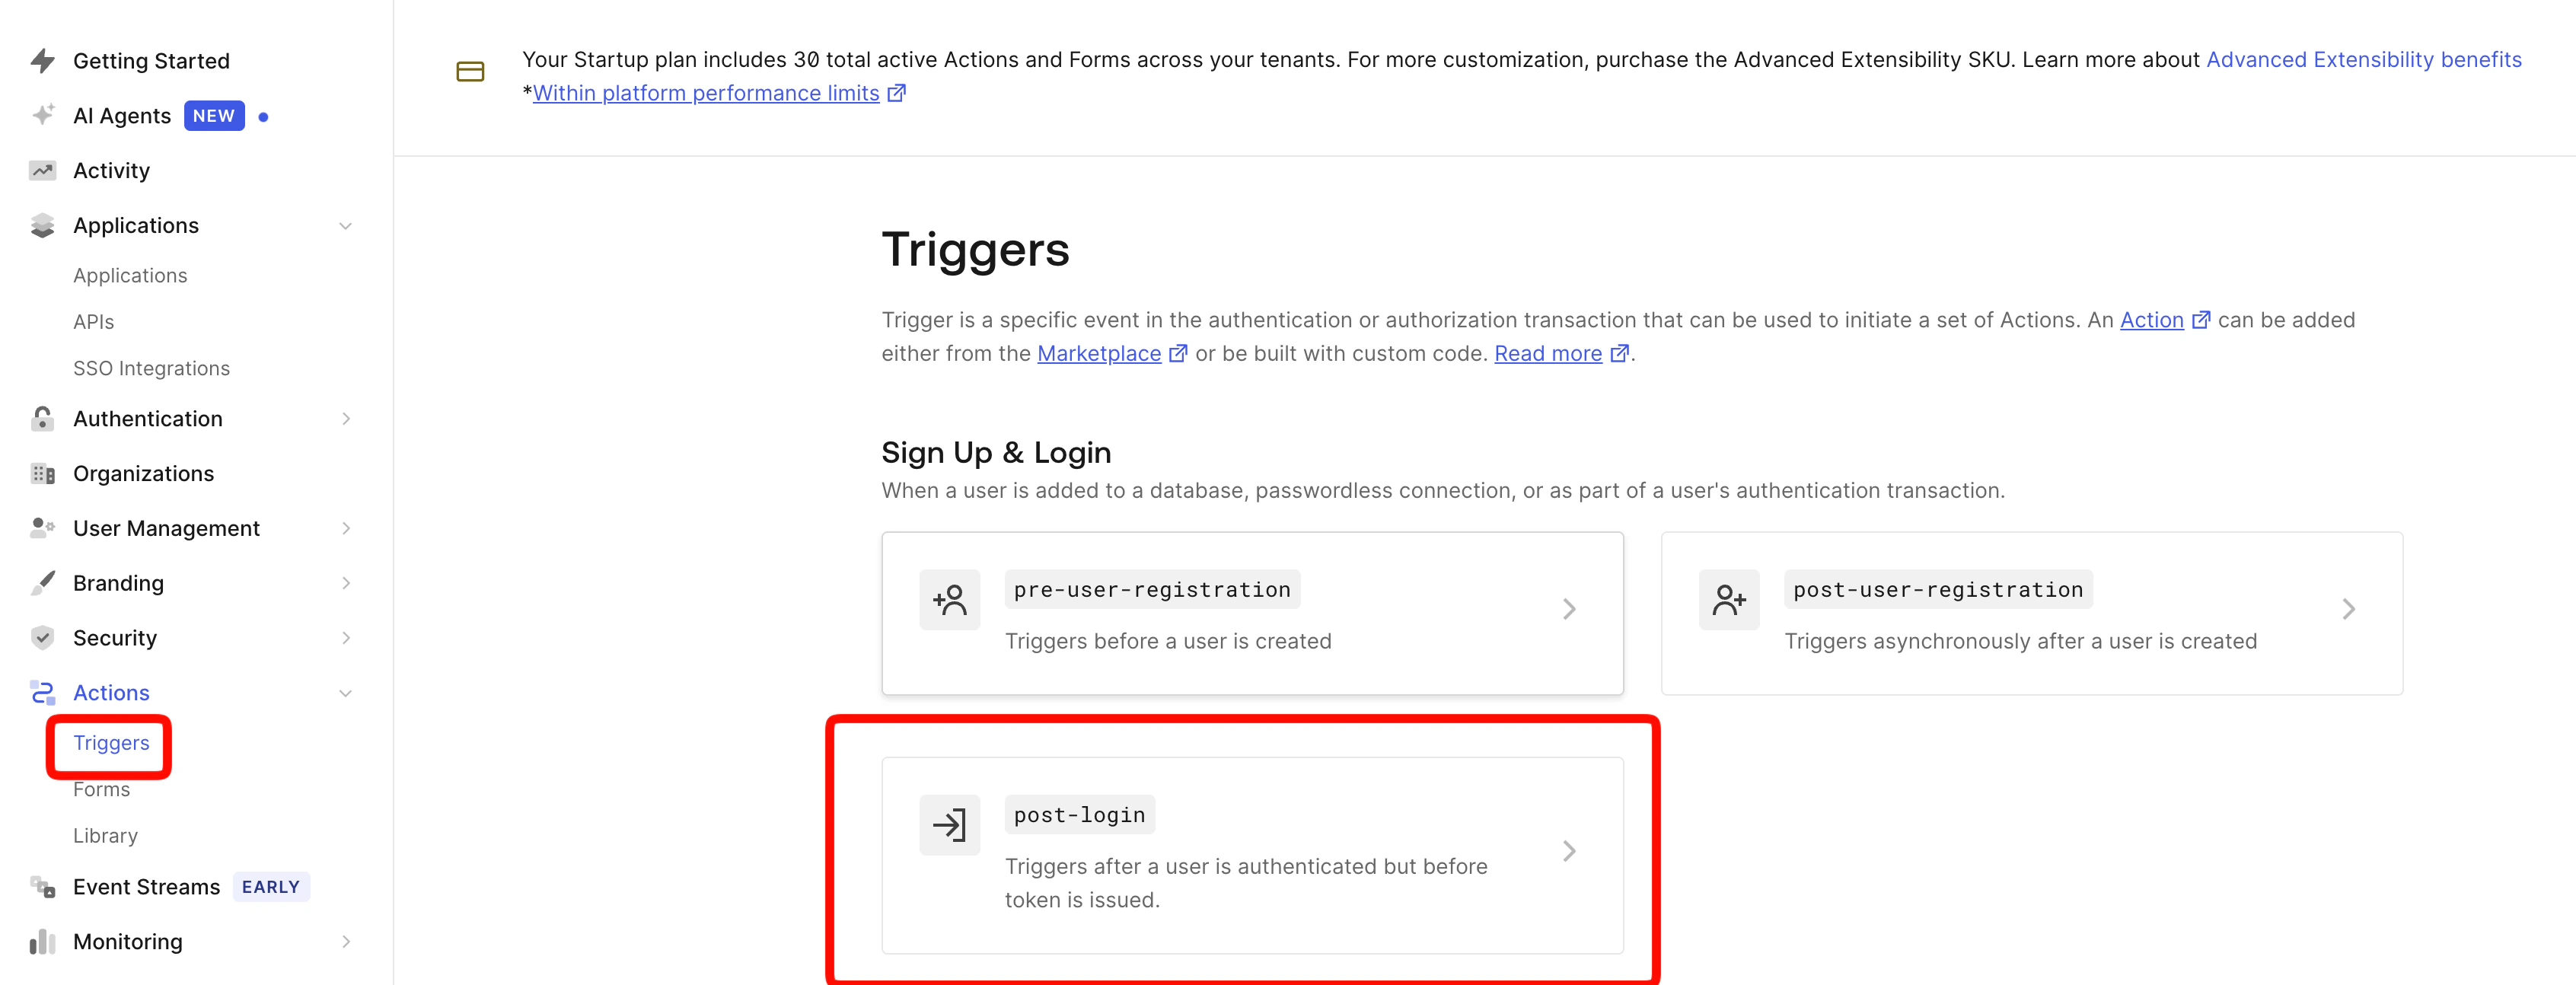
Auth0 Triggers page: select the post-login trigger

Auth0 Login Flow with the membership check action attached
Force account selection (optional)
By default, Auth0 may skip the login page using a cached session, and Google may auto-select the last used account. To force users to choose every time, run these one-time Management API calls. Get a Management API token from Applications > APIs > Auth0 Management API > API Explorer.Disable Auth0 session reuse
Force the Google account picker
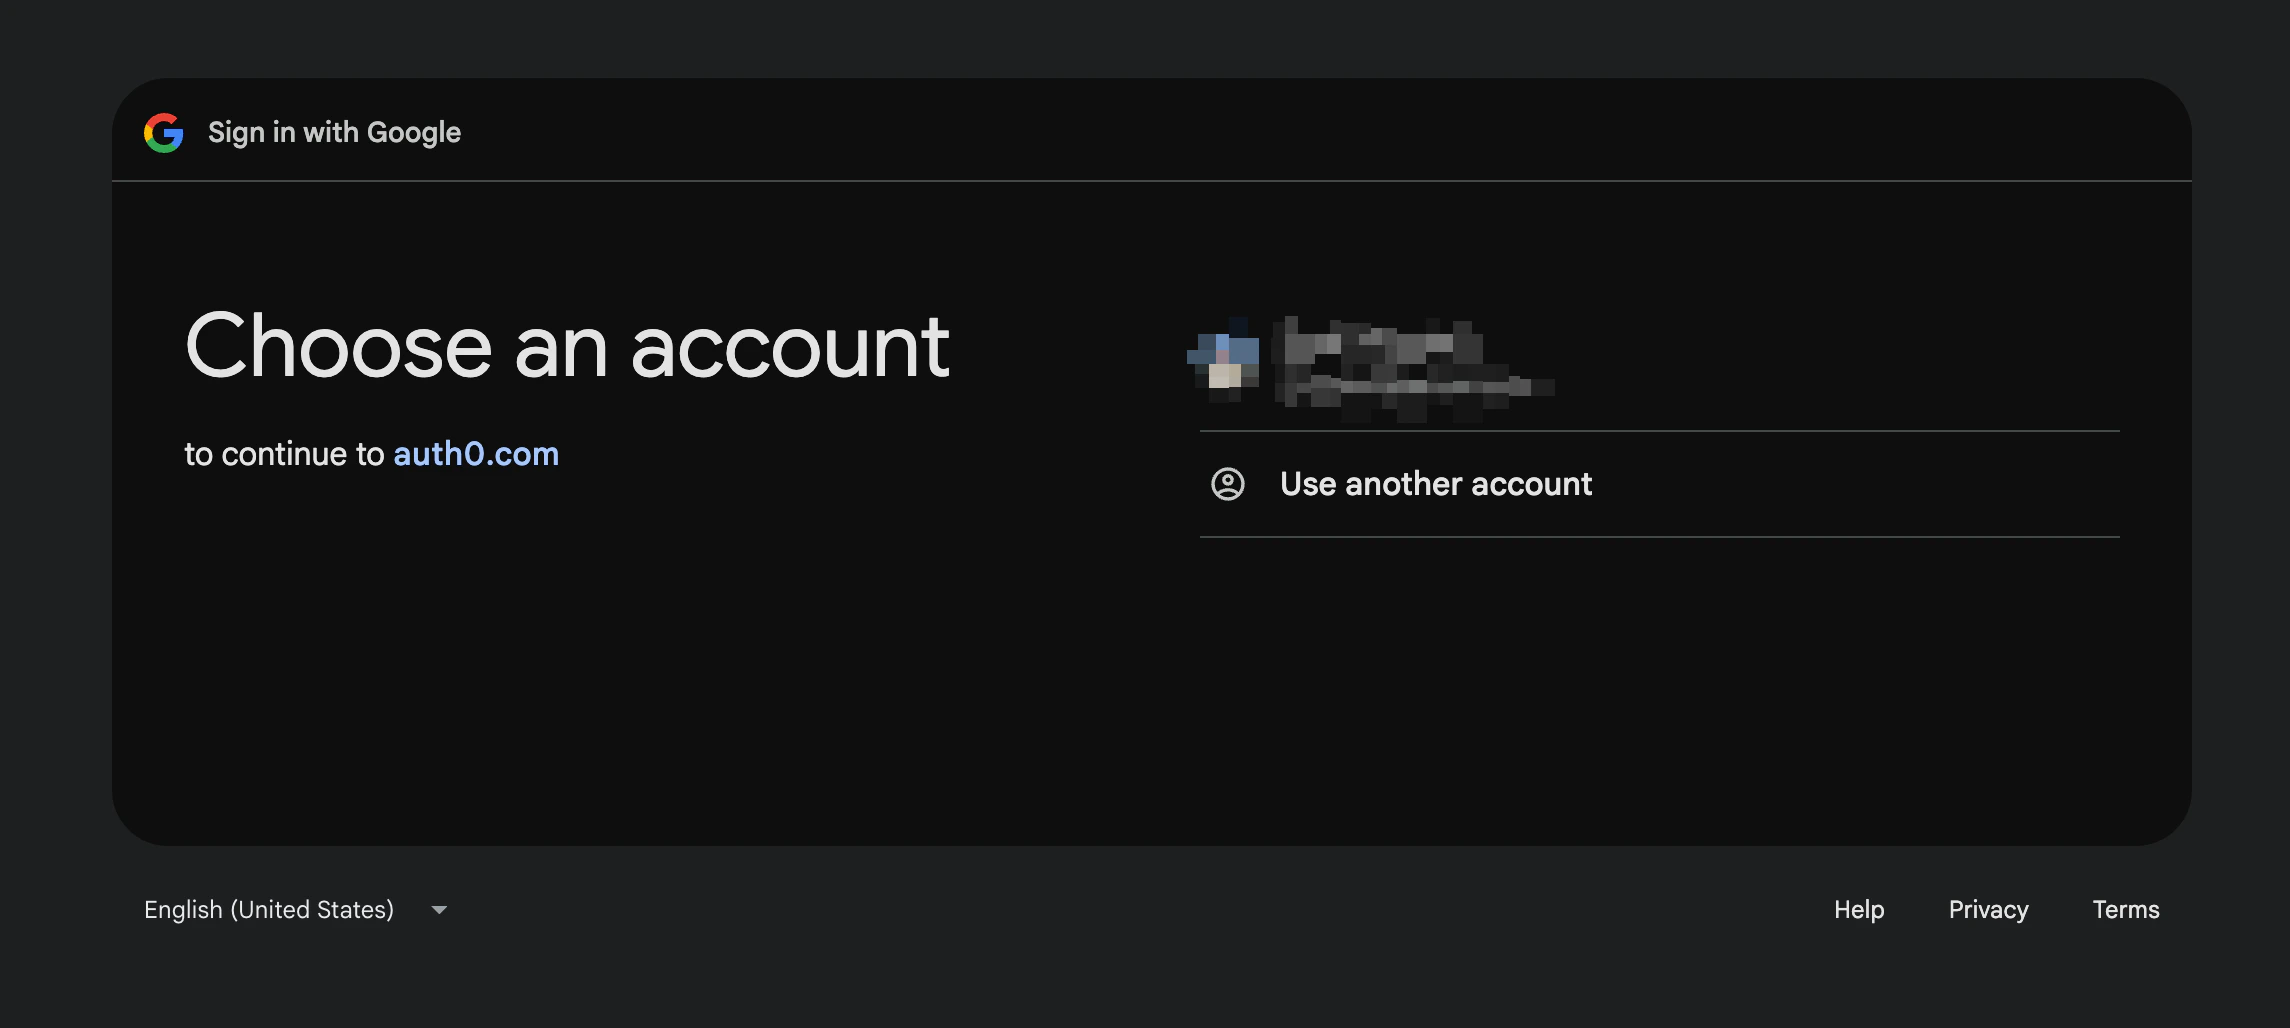
Google account picker with select_account prompt
Test
Sign in as a member
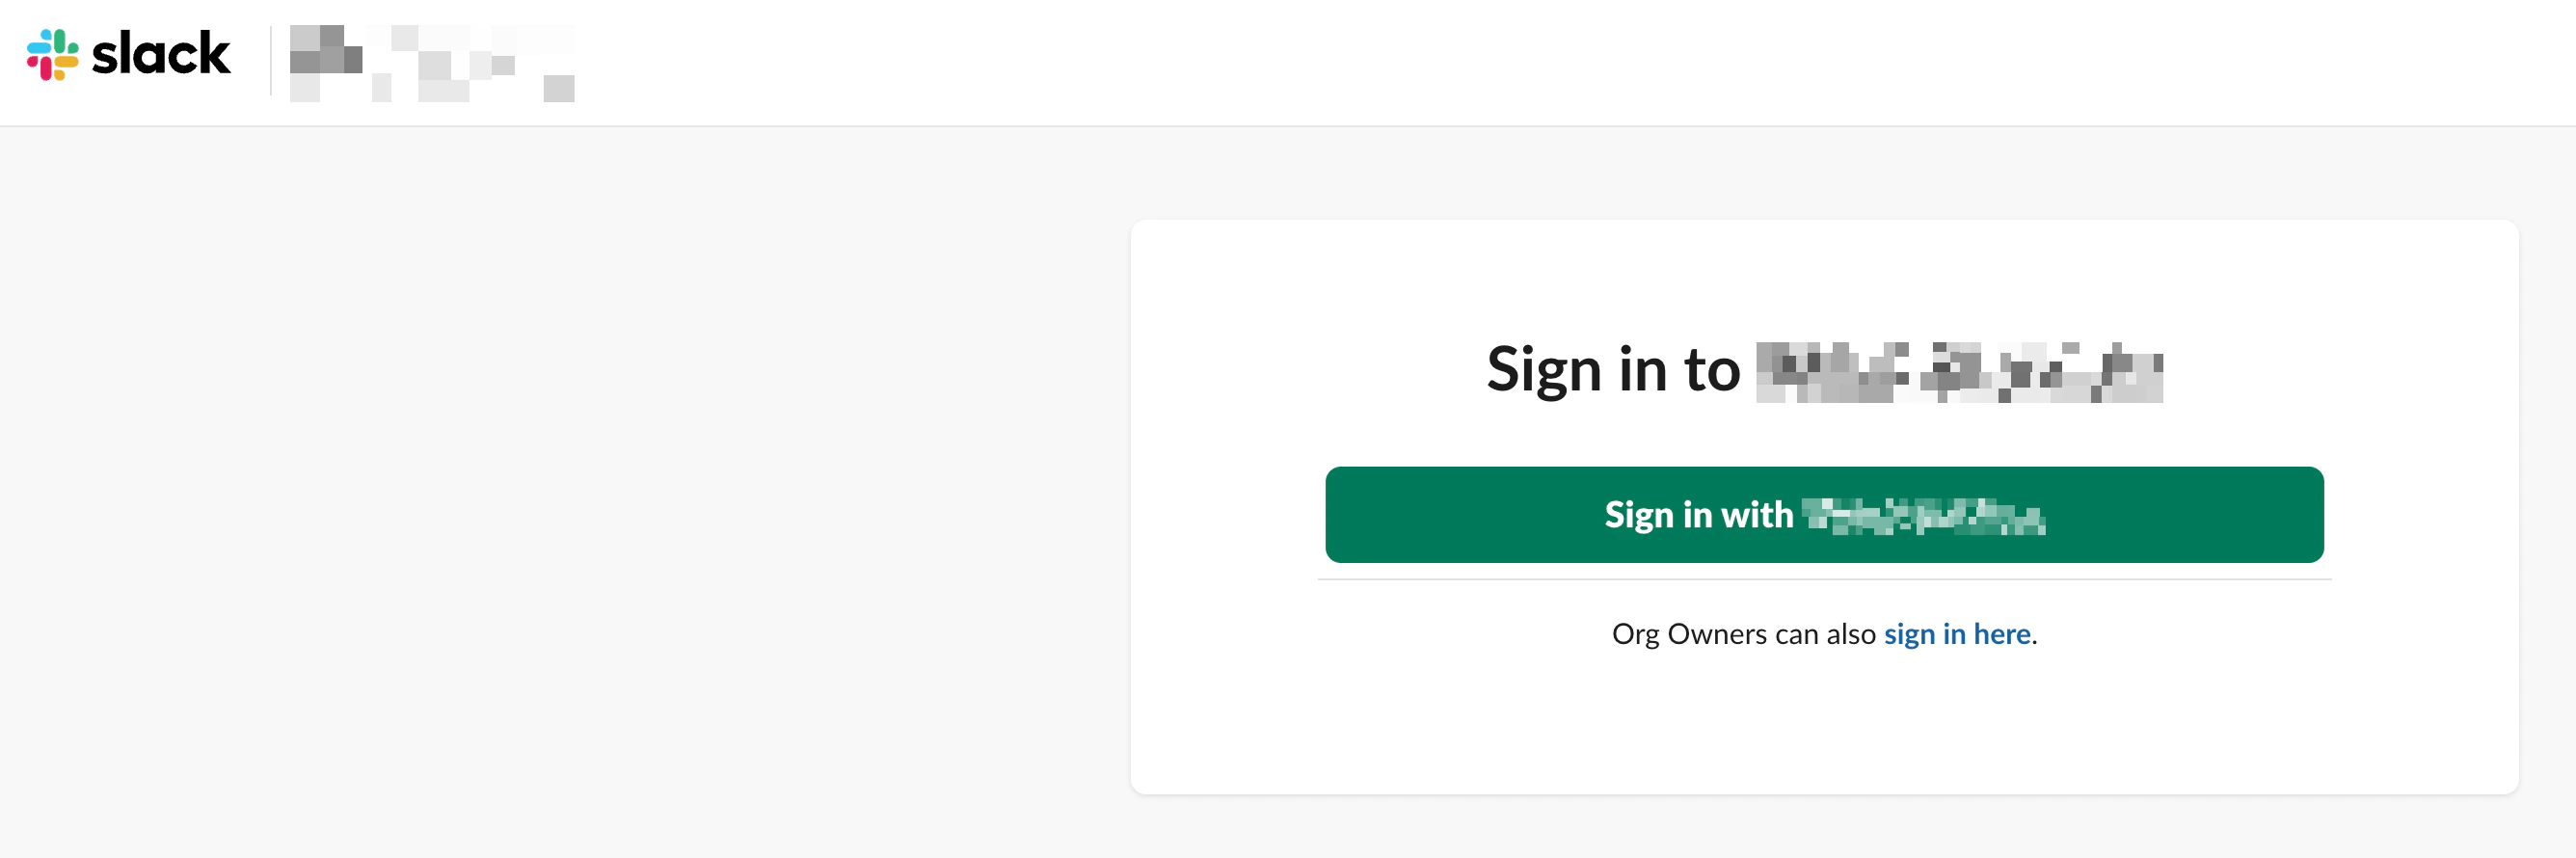
Slack SSO sign-in page
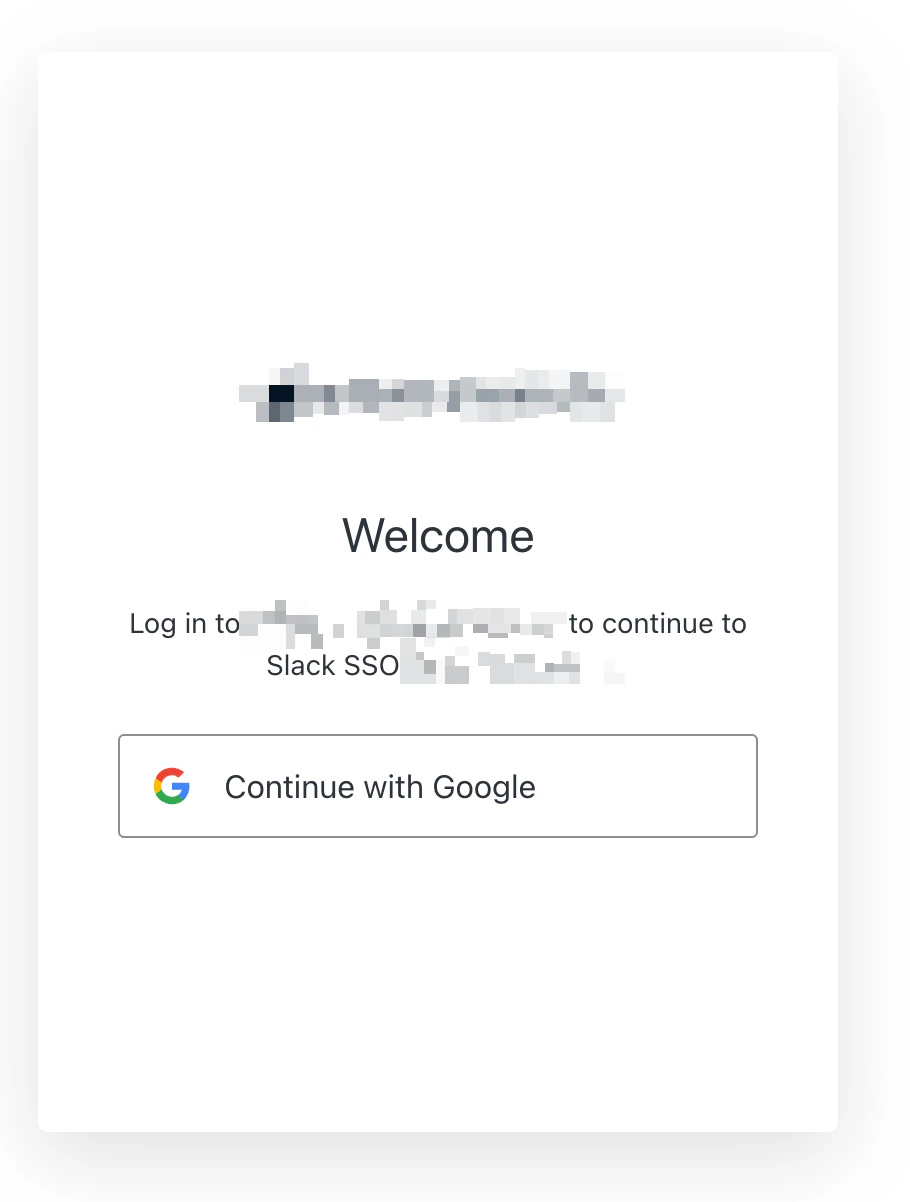
Auth0 login screen with Google sign-in
Sign in as a non-member
Check logs
console.log output in the event details.Error codes
When the action redirects to your login page, theerror query parameter tells the page which message to display.
Troubleshooting
Slack shows a broken error page
Verify the action usesapi.redirect.sendUserTo() and not api.access.deny(). The deny() method sends a failed SAML response that Slack cannot display.
Users are auto-logged in without choosing an account
Run thesso_disabled and upstream_params commands from Force account selection.
Member check returns 401 or 403
Verify theTIGHTKNIT_API_KEY secret is correct. Generate a new key from Studio > Integrations > API Keys if needed.