

Documentation Index
Fetch the complete documentation index at: https://docs.tightknit.ai/llms.txt
Use this file to discover all available pages before exploring further.
The Tightknit Salesforce integration is available as an add-on to the Enterprise plan.
Install the Managed Package
| Property | Value |
|---|---|
| Package | Tightknit Analytics |
| Namespace | tightknit |
| Subscriber Package Version Id | 04tdM000000TminQAC |
| Version | 1.4.0.3 |
| API Version | 65.0 |
| Installation Password | None (no installation key required) |
| Installation URL | Install Link |
- Installation Link
- Salesforce CLI
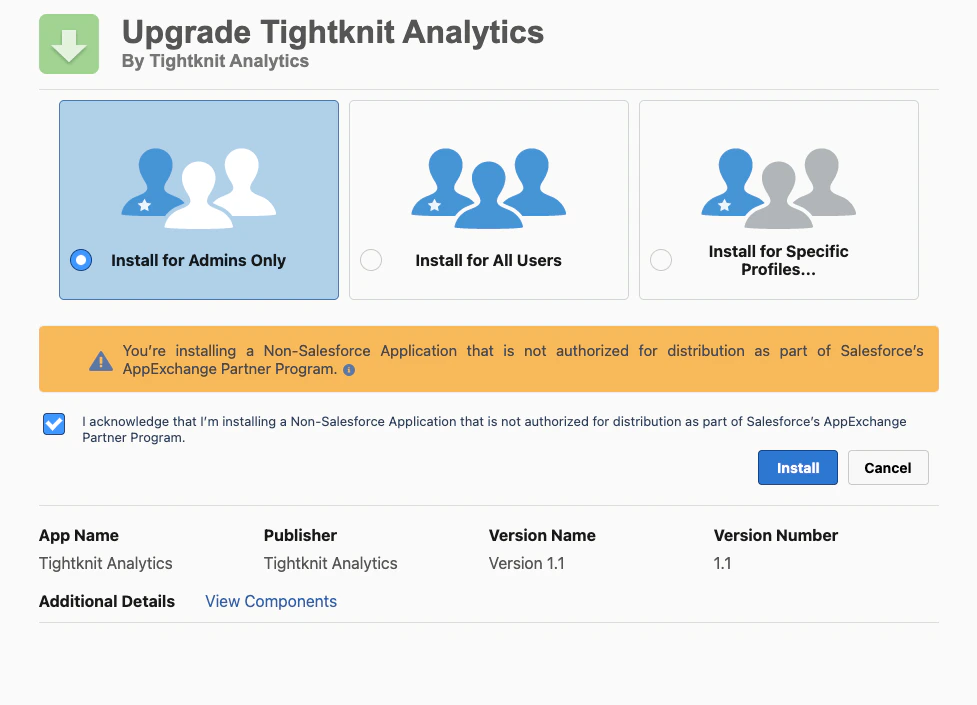
Open the installation link and follow the prompts. We recommend installing the package for Admins only.
Configure the Connection in Salesforce
Assign yourself the Tightknit Admin permission set
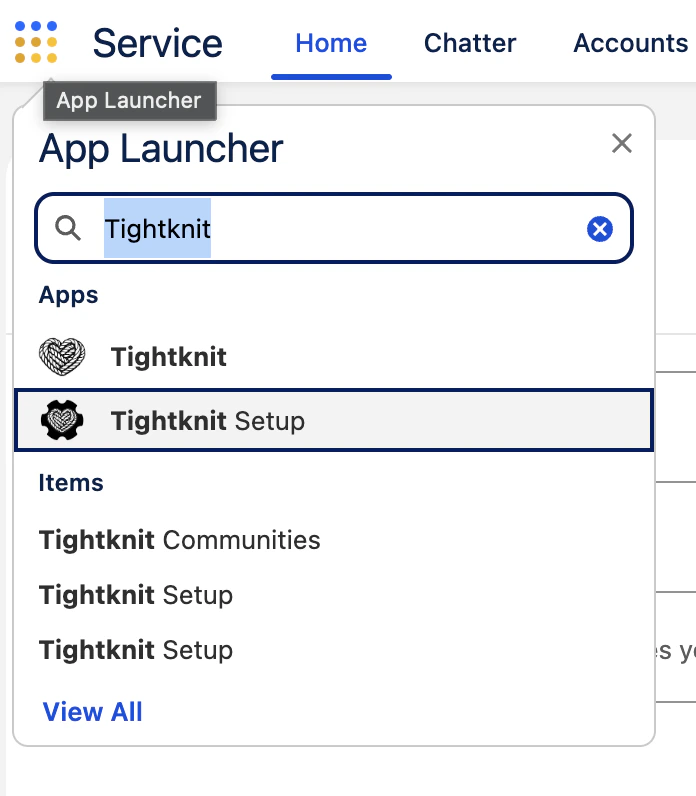
After install, the Tightknit and Tightknit Setup apps aren’t visible in the App Launcher until your user is assigned the Tightknit Admin permission set. Managed packages can only grant Lightning app visibility through permission sets — profile customizations don’t ship in 2GP managed packages, so even system administrators need this assignment.
- In Salesforce, navigate to Setup → Permission Sets.
- Click Tightknit Admin.
- Click Manage Assignments, then Add Assignment.
- Select your user, click Next, then click Assign.
Grant Your IT Admin Access to the Studio
If your Salesforce administrator is not already a Studio user, you need to invite them and assign the Integrations Manager role so they can manage the Salesforce connection.Invite the user
Navigate to Settings > Workspace > Users and invite your IT admin via their email address.
Configure the Connection in Tightknit
Open the Salesforce integration settings
Navigate to Settings > Integrations > Salesforce in the Tightknit Admin Studio.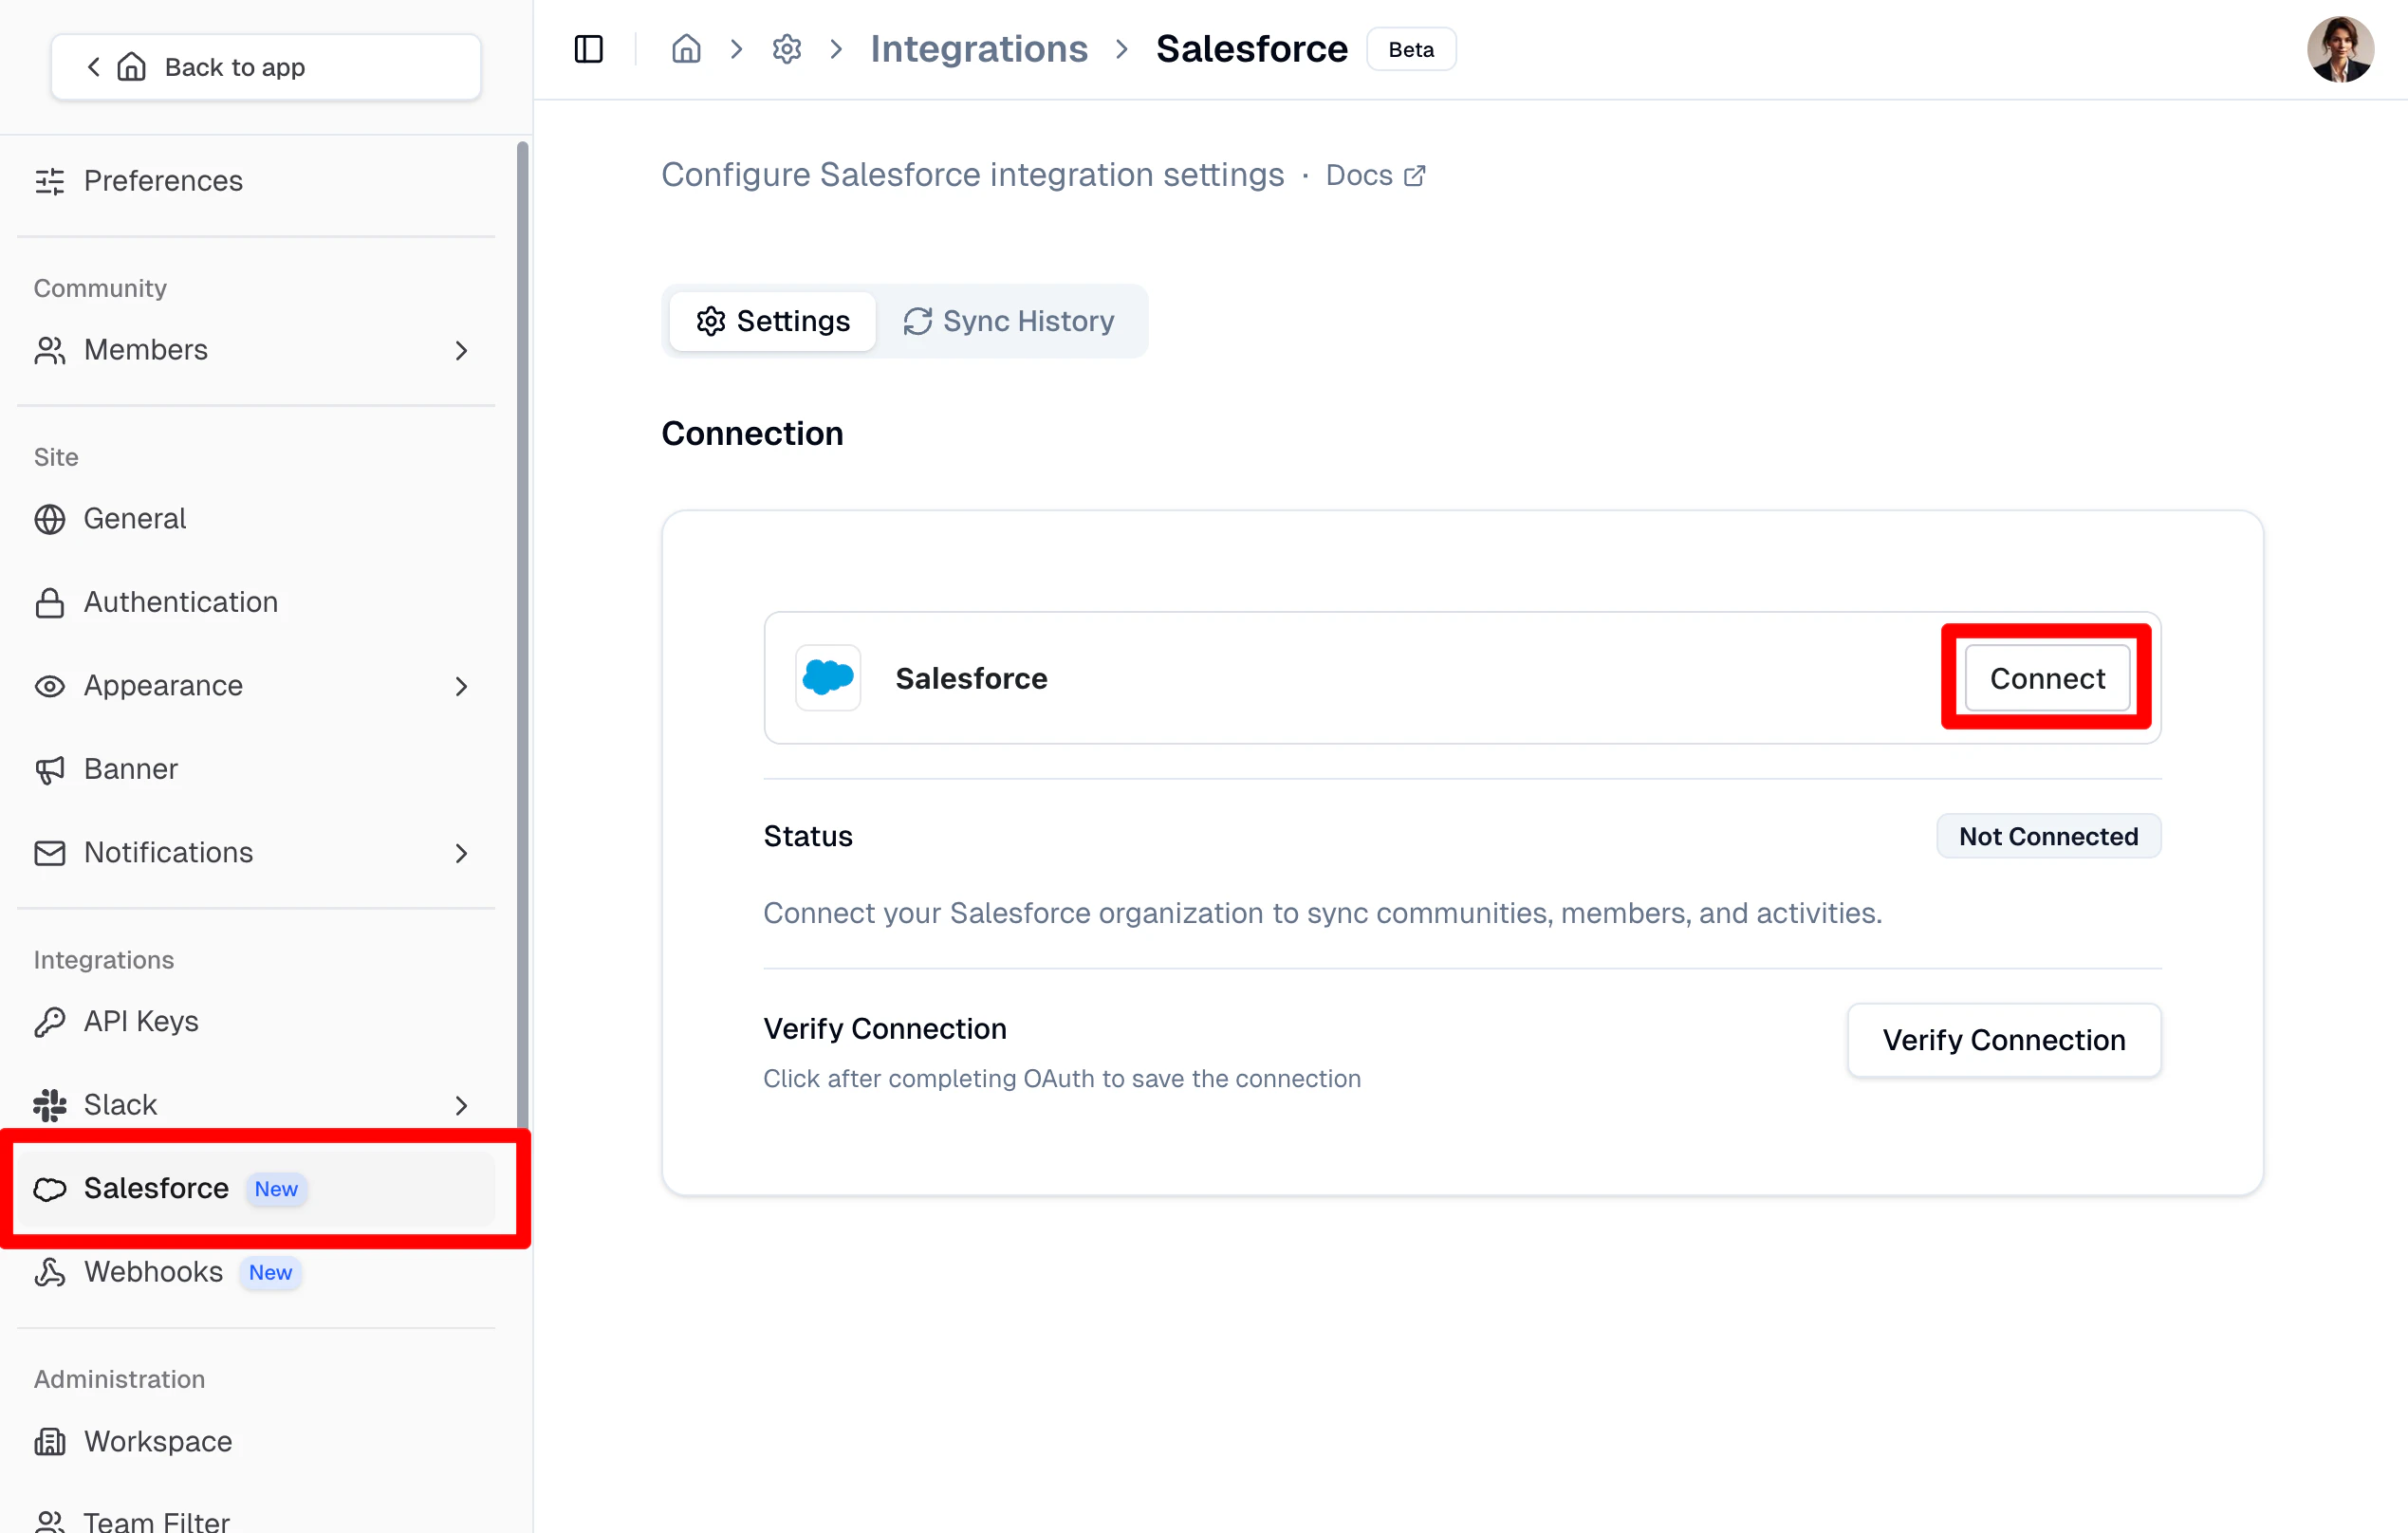
Connect to Salesforce from the Tightknit App
Connect to your Salesforce org
Ensure you are already authenticated (in another tab) as the integration user you set up in the previous section, or be ready to log in as that user. Click Connect to authorize the connection.Verify the managed package
Click the Verify Managed Package button to confirm the package is correctly installed in Salesforce.Configure and Start the Sync
After connecting your Salesforce org, the settings page presents a three-step timeline wizard: Connect, Configure, and Backfill. You can adjust every sync option before starting the sync for the first time.Connect
Complete the Salesforce OAuth connection as described above. Once connected, this step is marked complete and the Configure step becomes active.
Configure sync settings
Set your preferred sync options before starting the sync. Available settings include:
- Create Contacts — create a new Salesforce Contact for any community member that cannot be matched by email.
- Activity Metadata — include additional metadata fields on synced Activity records.
- Matching field — the Contact field used to match community members (default: email).
- Sync interval — how frequently incremental syncs run (for example, every 5 minutes).
Review and start the sync
Click Start Sync to open the review dialog. The dialog displays your chosen configuration and asks you to verify the Managed Package installation. Once verified, confirm to activate the integration and begin the initial backfill in a single step.The backfill imports your existing historical data and may take several minutes depending on the size of your community. Progress is displayed on the page and refreshes automatically.
Disconnect the Salesforce Integration
Disconnecting requires two separate actions in the Studio: one to tear down the integration connection, and one to revoke the underlying Salesforce OAuth account.Disconnect the integration connection
Navigate to Settings > Integrations > Salesforce and scroll to the Connection section. Click the ··· overflow menu to the right of Connection and select Disconnect. This reveals the connection widget below.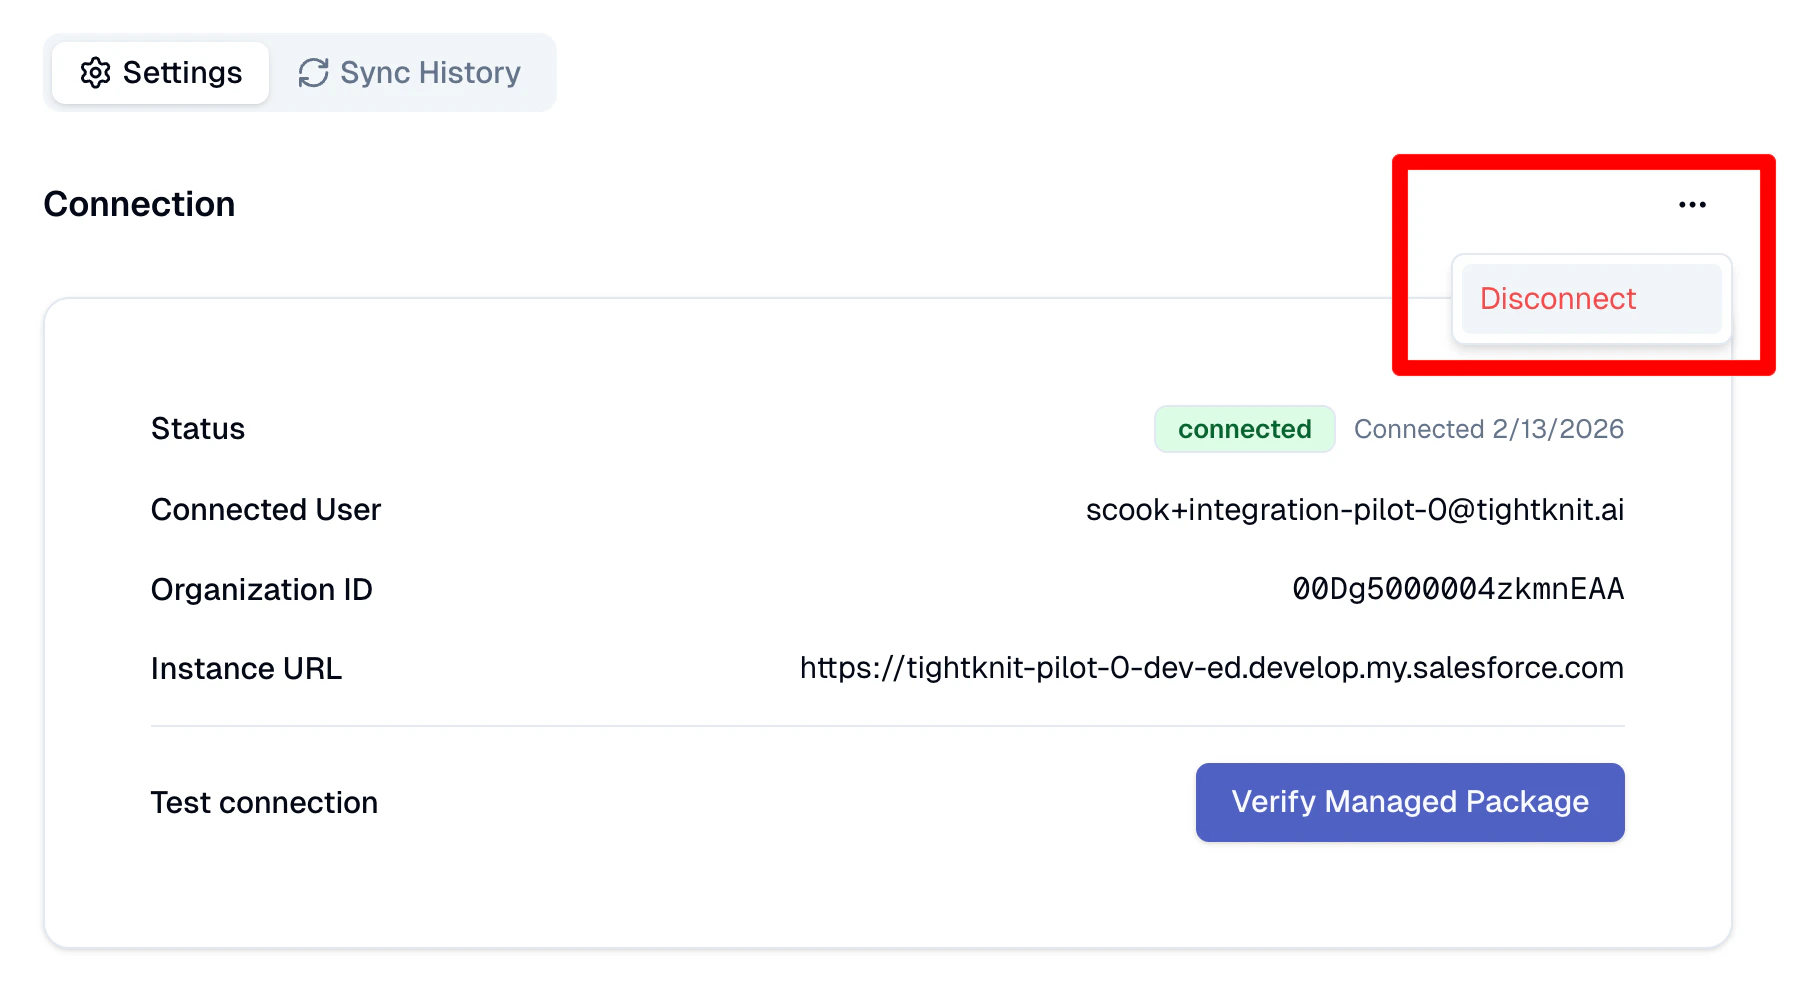
Disconnect the Salesforce account
On the newly revealed connection widget, click the ··· overflow menu next to the connection status and select Disconnect account. This revokes the OAuth authorization to your Salesforce org.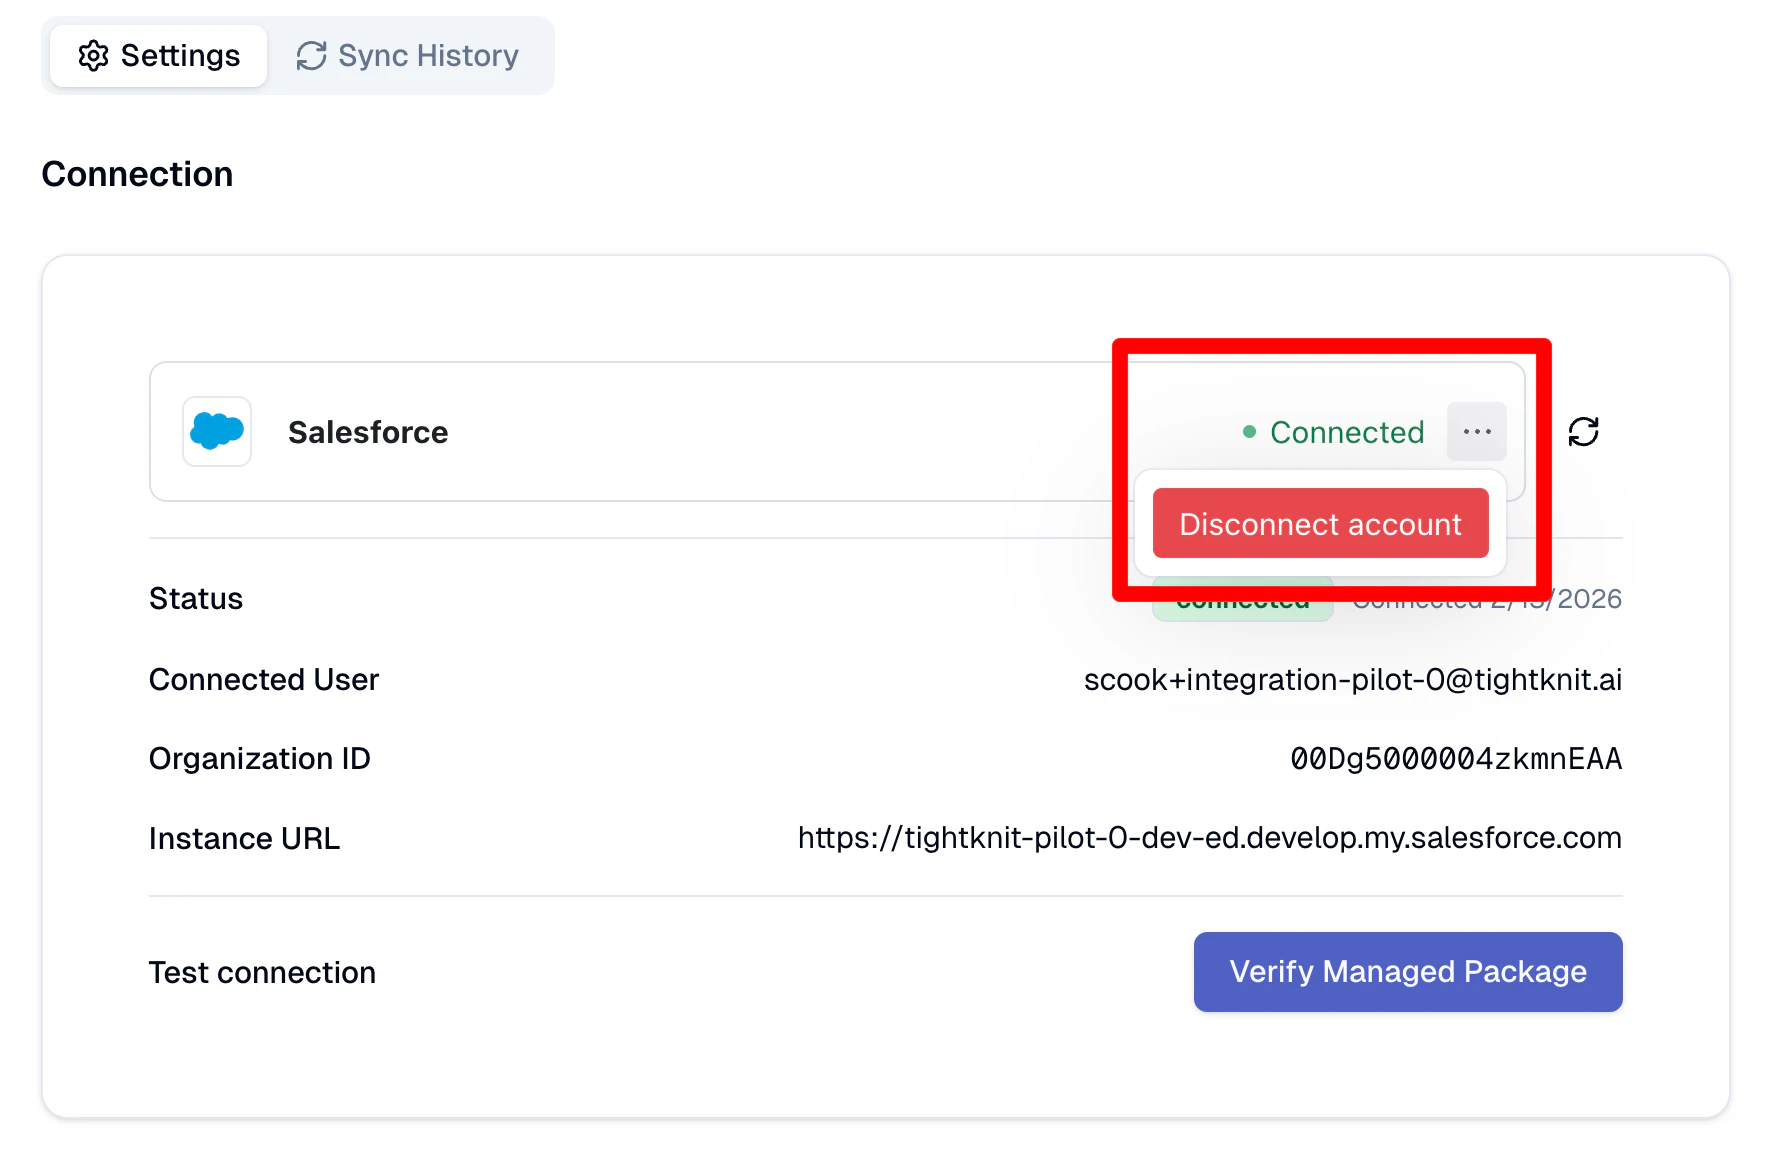
Additional Salesforce Customization
LWC Components
The managed package includes sample page layouts and custom Lightning Web Components that you can add to your Salesforce pages using Lightning App Builder. We recommend exploring the following components:| Component | LWC Name | Target Page | Description |
|---|---|---|---|
| Account Community Activity Summary | tightknitAccountCommunityActivitySummary | Account Record Detail Page | Displays a summary of community activity for contacts associated with an Account. |
| Activity Info | tightknitCommunityActivityInfo | Activity Record Detail Page | Displays detailed information about a single Activity record including related members and community. |
| Community Activity Summary | tightknitCommunityActivitySummary | Community Record Detail Page | Displays a summary of member activity for a single Community. |
| Community Profile | tightknitCommunityProfile | Contact Record Detail Page | Displays Tightknit community profile information based on the contact’s email. |
| Contact Member Activity Log | tightknitContactMemberActivityLog | Contact Record Detail Page | Displays a list of recent Tightknit activities for a Contact or Lead by matching their email to Member records. |
| Member Activity Log | tightknitMemberActivityLog | Member Record Detail Page | Displays a list of recent Tightknit activities for a Member record. |
| View in Tightknit | tightknitViewInStudioButton | Member Record Detail Page, Contact Record Detail Page | Button to open the member’s profile page in the Tightknit Admin Studio. |
Permissions required to view LWC components. Users who view a record page containing a Tightknit LWC must be assigned the Tightknit Admin or Tightknit Integration User permission set. These permission sets grant access to the underlying Apex controllers and to the Community, Member, and Activity custom objects.